

Run and Gun with Hotshoe Flash
/
A Very Good Option for Run and Gun Flash
Hey folks,
I recently answered a series of questions on the KelbyOne CommunityLIVE! broadcast about lighting, specifically regarding flash, strobes and continuous lights.
One of the questions asked was from a seasoned photographer who is very successful in his studio and set up images with flash but said he was challenged with Run and Gun work when he was using flash.
I thought that I would share some tips on what I have found to be successful.
Flash on the Hotshoe Nearly Never Looks Good

The RRS WPF-1 apparently now discontinued. Fortunately there are other options such as from Stroboframe
What I propose in this case is the use of an off camera flash bracket. I’m not talking about some difficult to use or awkward bit of scaffolding, just something to get the flash a bit higher and off centre. Since I have Really Right Stuff L Brackets on all my cameras, I keep their Wedding Pro bracket in my flash bag. It’s a simple way to get the flash off camera, when your shooting situation precludes getting the flash really off camera and into a light shaper. To do this, you are going to need a flash controller and receiver.
Radio Control
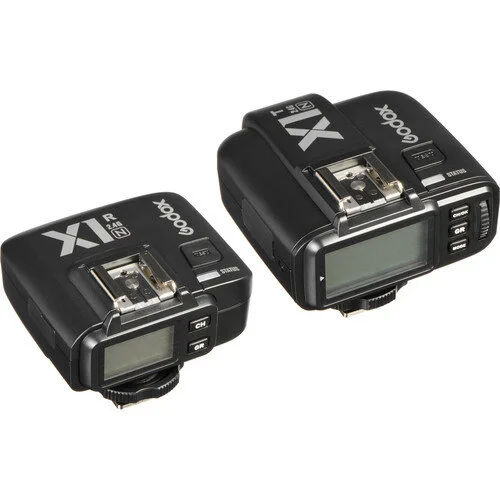
Godox Transmitter and Receiver Kit
The days of having to spend a ton of money to get a TTL flash that works with your camera are over. For the price of a single manufacturer brand flash with a built in radio receiver, you could get three or four Godox TT685 TTL flashes for your camera and an on camera transmitter. There are other brands of course, but I only recommend what I have used myself in a professional situation.
Forget optical triggers. That ship sailed, hit an iceberg and sunk. They are limited in distance, require line of sight and more often than not, just don’t work well. Save several migraines and go radio.
The reason you NEED TTL flashes is that is the language that your radio transmitter uses to speak to your camera and to the remote receivers in the flashes. You leave the camera on TTL flash and control your remote flashes ENTIRELY from the controller. It is really very simple and works consistently if you just follow the directions in the documentation and don’t try to second guess things. RTFM or you will get a CODE 24 error which means the problem is about 24 inches away from the equipment.
Dump the Dome Diffusers
As discussed in other articles, dome diffusers do not soften the light because they have no impact on the surface area of the flash facing your subject. All they do is eat a full stop of power. Leave them at home.
TTL vs Manual
Yes. By that I mean understand the relationship between your subject and the background. If the distance between the subject and the background is small, TTL flash will get you there very quickly and do a stellar job. Simple and fast, no worries. However, if the distance between the subject and the background is large, the TTL flash metering is likely to get fooled and overexpose the subject. One or even two stops is not pretty but is recoverable in digital photography, more than that is a problem.
Remember to always do everything you can to fill the frame. There is only one subject, everything else is collateral.
In this scenario, write, print, draw whatever, the chart buried in your flash manual that shows what aperture to use at full flash duration (often called full power - we won’t go into why this is not an accurate statement) at a given distance and ISO. Set your flash mode to manual at its full power setting. Tape the chart to your flash and set your aperture according to the subject distance without modifying shutter speed or ISO. Pros did this for years before there was such a thing as TTL flash and if you do your job, it works every time. Back in the days of my mental illness when I was a wedding photographer, I used this method multiple times each weekend.
Overpowering The Sun
In the episode we discussed using the Sunny 16 rule as a method to overpower the sun. I’m going to keep it even simpler here. Decouple your ambient light exposure compensation from your TTL flash compensation.
Set your shutter speed to the camera’s flash synchronization speed. If you do not know what it is, read your manual., it’s published right there. Choose an aperture to give you the depth of field that you want and set the lowest ISO that will deliver the underexposed ambient exposure.
Set your camera ambient light exposure compensation to -1. This will cause the camera to tell you what the ambient exposure will be one stop underexposed. If exposure compensation does not work in manual mode on your camera, simply set the camera to the -1 stop meter reading and leave it there.
If you are filling the frame with your subject as you are moving around, set the flash to TTL with flash exposure compensation set to 0. This will give you a properly exposed flash portion over an underexposed ambient component. Works every time, but practice practice before an event shoot. You need to build the neuro muscular pathways so shooting this way becomes automatic.
Do you have an idea for an article, tutorial, video or podcast? Do you have an imaging question unrelated to this article? Send me an email directly at ross@thephotovideoguy.ca or post in the comments. When you email your questions on any imaging topic, I will try to respond within a day.
If you shop with B&H Photo Video, please consider doing so through the link on thephotovideoguy.ca as this helps support my efforts and has no negative impact whatsoever on your shopping experience.
If you find the podcast, videos or articles of value, consider clicking the Donation tab in the sidebar of the website and buy me a coffee. Your donation goes to help me keep things going.
I'm Ross Chevalier, thanks for reading, watching and listening and until next time, peace.


