

Getting Colour "Right"
/
I hear constantly a litany of concerns about getting the colour “right”. What does this actually mean and how do we achieve it, if we really want to?
It’s Actually Quite Simple
Presuming that “correct” colour is something that you actually want, it is achievable in two steps with two pieces of kit, used properly and consistently. More important is whether you actually want it. The first step is important either way, the second step is not relevant if you are not trying for a colour match. Photography is a creative process and you may not always want the “correct” colour because the doing of, will alter your vision. Thus one may choose not to get too hung up the idea of correct. You’re the creative, you decide, and your decision may change from shoot to shoot.
Step One - Calibrating Your Display
I want to be clear right from the beginning. Your display needs calibration and that calibration needs to be performed REGULARLY, certainly no less frequently than monthly. Displays drift, and if your display setting get altered by users or applications (games do this mostly without your input), then recalibration is needed before any editing session. If you don’t really care about editing, stop reading here and go do something else.
Still here? Good. Operating system based calibrations are on their best day depending on your subjective Mark One Mod 0 eyeball, a notoriously inaccurate thing. Thus you may conclude that operating system based calibrations are mostly a waste of time and effort. What you need is a display calibration device and the program that operates it. If you get a good one, it will keep your display colour accurate. If you use one, decide that you don’t “like” the colour, return it because your subjective opinion is overriding actual data and you will not like the results from any decent calibration device and you are happy to live in the realm of subjective.
A good calibrator is a combination of hardware, software and good display placement. Direct light should never fall on your display. Editing should be done in a dim room, otherwise you will crank the brightness on the display up and you will have colours that please on a display and look like dog food when you print. If you never print, you may not care. That’s fine, but no bitching when you do print and everything is too dark.
If calibrating prints manually is not in your wheelhouse, you can save a lot of money on your display calibrator. Here are two that will work consistently and accurately. The first comes from XRite and is called the iDisplay Studio.
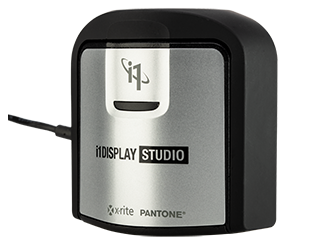
Formerly seen as the ColorMunki lineup, the models have been redesigned and relabeled and do a better job with LED driven LCD panels. MSRP is $169 USD and it will last you a good long time.
The second comes from Datacolor and is called the SpyderX Pro and has an MSRP of $229.99 CAD (check your price where you live).

I have owned and used products from both companies and recommend either very highly. in my opinion, there is no point looking elsewhere.
Note the calibration is about colour and does not correct for a display set too bright, too dark, or with contrast set too high or too low. The software will make recommendations, but won’t cope well with brightness or contrast issues. Assume that out of the box, your display comes from the factory set for really punchy colours, excessive contrast and brightness set too high. Before calibration be sure to set the display profile on the unit itself to as neutral an option as offered. Avoid game, movie, vivid or similar settings. They may work for some things but not for photo or video editing.
The final part of this is to recalibrate at least monthly. Yes I am repeating myself. Borrowing a calibrator is pointless, buy your own.
Step Two - Colour Matching
The general guideline is that if you are not being paid to do a colour match, worry less about this. By paid, I mean in any way because if your results have bad colour, your reputation will suffer even if there is no cheque involved. So if you are doing product or fashion, a colour match is an absolute requirement. Weddings and engagements may suggest a colour match. Real estate photography should consider a colour match and may be part of the agreement that you participate in. If you are doing purely creative work for personal pleasure a colour match is unlikely to be necessary but there is no harm in doing one if you want.
The simplest colour match process is to put a middle grey card in the first shot of a sequence with a given camera, lens and lighting scenario. Then in processing you set your white balance by clicking on the grey card and you will be pretty darn close.
Did you see the part about camera, lens and lighting scenario? Read it again because if any one of those changes, it’s time for another grey card shot. You only need one grey card shot for each sequence and then remove it. Very quick.
However, if you need to actually match colours, you want a tool AND the software to do proper colour matching. Matching is done against a set of known colour patches, typically based on the Pantone system, but there are others.
The “hardware” is a colour check device. These come from pocket sized to very large so choose the size that you will actually use. Buying a big checker is pointless if it stays at home. Any color checker worth having also comes with software to create profiles for that camera, lens and lighting scenario.
I always have my ColorChecker Passport Photo from XRite in my bag or pocket. Mine is an older unit that works a charm but the latest is called the ColorChecker Passport Photo 2 and has improvements over my old one.

It’s a great tool and the software is easy to use and works well with Lightroom and Photoshop.
When I am working in the studio, I use a larger colour checker system from Datacolor. Mine is the SpyderCheckr 48 which I find immensely usable. There is one in the test shots for every camera and or lens that I review
https://www.datacolor.com/photography-design/product-overview/spyder-checkr-family/

Mine is larger than the Passport and can mount to a light stand or tripod in addition to just standing on a table. Again, a nice piece of kit but only useful when you use the included software to create a colour profile.
What Are Colour Profiles
JPEG shooters understand colour profiles very well. They are predefined looks for JPEG processing and have names like vivid, landscape, portrait, standard or neutral. These looks have no relevance to RAW files (thank goodness) and so your RAW files are just the data that the camera recorded. That data however has been influenced by the camera, the lens and the lighting scenario at the time of imaging. Therefore if you want colour matching, you need to be able to create a colour profile to apply to all the images from a shooting sequence, where the sequence is defined by camera, lens and lighting scenario.
Let me give you an example and an experiment to try. Take a can of CocaCola as a prop. Shoot it under a variety of lighting conditions with different lenses and different cameras if available. Even with excellent white balance previews in camera, or the application of a profile in processing (any profile other than completely neutral is going to skew your results). You will end up with a series of images where the red of the can looks different. The differences may appeal but you have a colour inaccuracy problem. If you use a colour check system in your shoots, the prevailing light, camera and lens become non-impactful because the software will do what is need to make the colour accurate on the patch palette and therefore accurate for the rest of the image. Save the colour profile created and apply it to all the images from the sequence. Simple and effective.
Remember, your eye is subjective, and your different displays will vary. Some displays calibrate well, some do not calibrate well at all. Some come locked down to a specific colour space for display which may not align to what you are doing. Trust the software to get the colours “right”. You may determine that you would like to change the images, and that’s cool, unless of course your goal is to deliver colour correct images
Do you have an idea for an article, tutorial, video or podcast? Do you have an imaging question unrelated to this article? Send me an email directly at ross@thephotovideoguy.ca or post in the comments. When you email your questions on any imaging topic, I will try to respond within a day.
If you shop with B&H Photo Video, please consider doing so through the link on thephotovideoguy.ca as this helps support my efforts and has no negative impact whatsoever on your shopping experience.
If you find the podcast, videos or articles of value, consider clicking the Donation tab in the sidebar of the website and buy me a coffee. Your donation goes to help me keep things going.
I'm Ross Chevalier, thanks for reading, watching and listening and until next time, peace.


