

The Photo Video Guy Guide to Exposing to the Right - ETTR
/Exposing to the right is a process to maximize the data that is captured in your images. It is a workflow process best suited to shooting in RAW with the understanding that some post processing will be required. It also gives you more latitude than your default exposure will deliver in most all cases.
To illustrate why we might want to expose to the right, I have two charts prepared. The first shows the number of tones in an 8 bit file split across 8 stops of luminosity from black to white. This approximates a JPEG Fine file. Please note that the real world is a continuous movement from black to white. The squares are used for illustrative purposes to get the point across only.
Please also note that the number of tonal ranges in each square is based solely on sensor architecture and how they work. Sensors do not record data linearly. There is a lot more data on the bright side of the histogram than on the dark side.
Shooting for 8 Bit Files
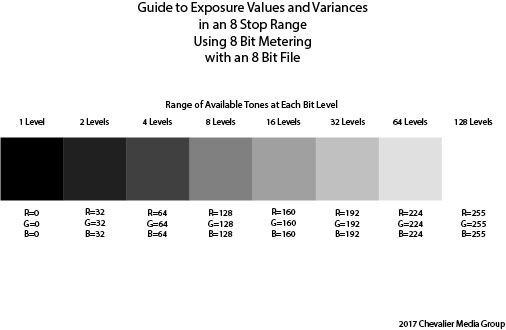
As we see, the number of potential tonal values in a given range, where the RGB value is the centre of the square, doubles with each stop of exposure increase. What this tells us, at a glance, is that there is more opportunity for fine tonal control the farther to the right because there is actually more data in these areas. Thus if we move our exposure one stop to the right, we double the amount of data being recorded.
If we shoot a grey card, and all is done properly, it will fall at about RGB 128. If we over expose it one stop, it moves to about RGB 160. A grey card has only one tone, but now consider an averaged exposure as your meter will produce. Let's say that the majority of the data falls into the RGB 128 area. When you add a stop of exposure, you move it to the RGB 160 area and double the tonal range in the area from 8 levels of variation to 16 levels of variation. That means double the amount of tonal information in that area alone.
That's enormous! It can mean the difference in detail of literally twice as much. It also means that the overall image is overexposed by one stop, and that means that you must do some post processing to make it look right. Most folks who shoot in JPEG are seeking speed and simplicity and would not do this, but you can try it yourself and see the difference. Because more data is being recorded, when you pull the exposure down in post processing, you are ending with more data in the segment than you started with and the processor does not have to fill in blanks, hence you get less digital noise.
This reduces dramatically the risk of noise introduction when you lift the shadows or the blacks on a "properly" exposed image, because you are moving bits to a segment demanding more data, but those bits don't exist because the sensor did not capture them. And thus, we get noise. The greater the lift, the greater the noise.
Shooting in 14 Bit RAW
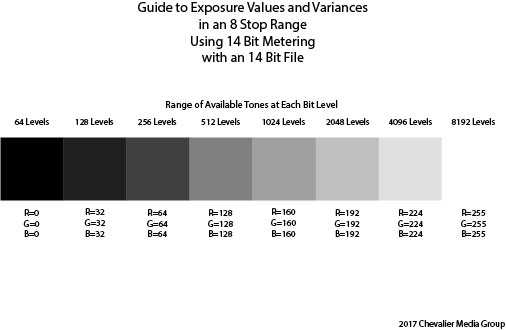
Let's move now to chart two. I have made a change to reflect a modern camera shooting in regular RAW. I counsel against using MRAW or SRAW because they completely defeat the point of shooting in RAW. I say the same thing about using any bit depth less than the maximum your camera can attain. The default for most quality interchangeable lens cameras is 14bit. This is the metering and file structure. It is not indicative of dynamic range.
Immediately on viewing chart two and comparing it to chart one, we see a substantial increase in data points across the board. It really jumps out in the blacks of course moving from one variant in the segment, to 64 variants in the same segment. If you are really serious about your work and will be delivering your work anywhere other than the web, you really need to consider shooting in RAW all the time, even it means having to post process everything. Respectfully, those who will only shoot for the web, aren't going to bother with the ETTR practice anyway.
What we learn from these two charts is that the greater the bit depth that the camera records in, the more data we have to work with, and if we overexpose in camera (within reason and without clipping the whites) we will have more data for every tonal area in which to work.
The ETTR process can work with any metering mode that you like. Spot metering practioners will often include ETTR practices in their exposure calculations to maximum their tonal intent. I cannot emphasize enough that by using ETTR practices, you MUST be prepared to do post processing as the core image will be by definition overexposed.
Where Do I Start?
This is an excellent question. I think back to the days of my favourite film ever, the wonderful and long dead Kodachrome 64. A great many of my peers and I would consider our goals and would very often, underexpose by one third of a stop, setting the meter for 80 ASA (ISO 80) instead of the factory specified 64. We did this, knowing we would be crushing the blacks a little bit but as consequence would pull richer colours out of the film. 1/3 of a stop is very little in today's world, but significant in a film that was not very tolerant of missed exposure.
For your first steps in ETTR, and presuming that you are leveraging one of the automatic or semi-automatic shooting modes, dial in +2/3 EV exposure compensation. This is subtle but gives you a nice push to start with. It's my default for general purpose shooting, but I will go higher when the subject or scene warrants, particularly if I know I am going to have to do some work to lift the shadows. Different cameras handle exposure compensation differently in Manual mode, so since I cannot address all of the options, you will need to see what your particular manual tells you.
Here is an out of camera image made with the ETTR intent. Below it, you will see the RAW histogram for the image. You'll note that the histogram shows an overexposure warning, but no clipping warning. It's not the overexposure we worry about, it's the clipping.
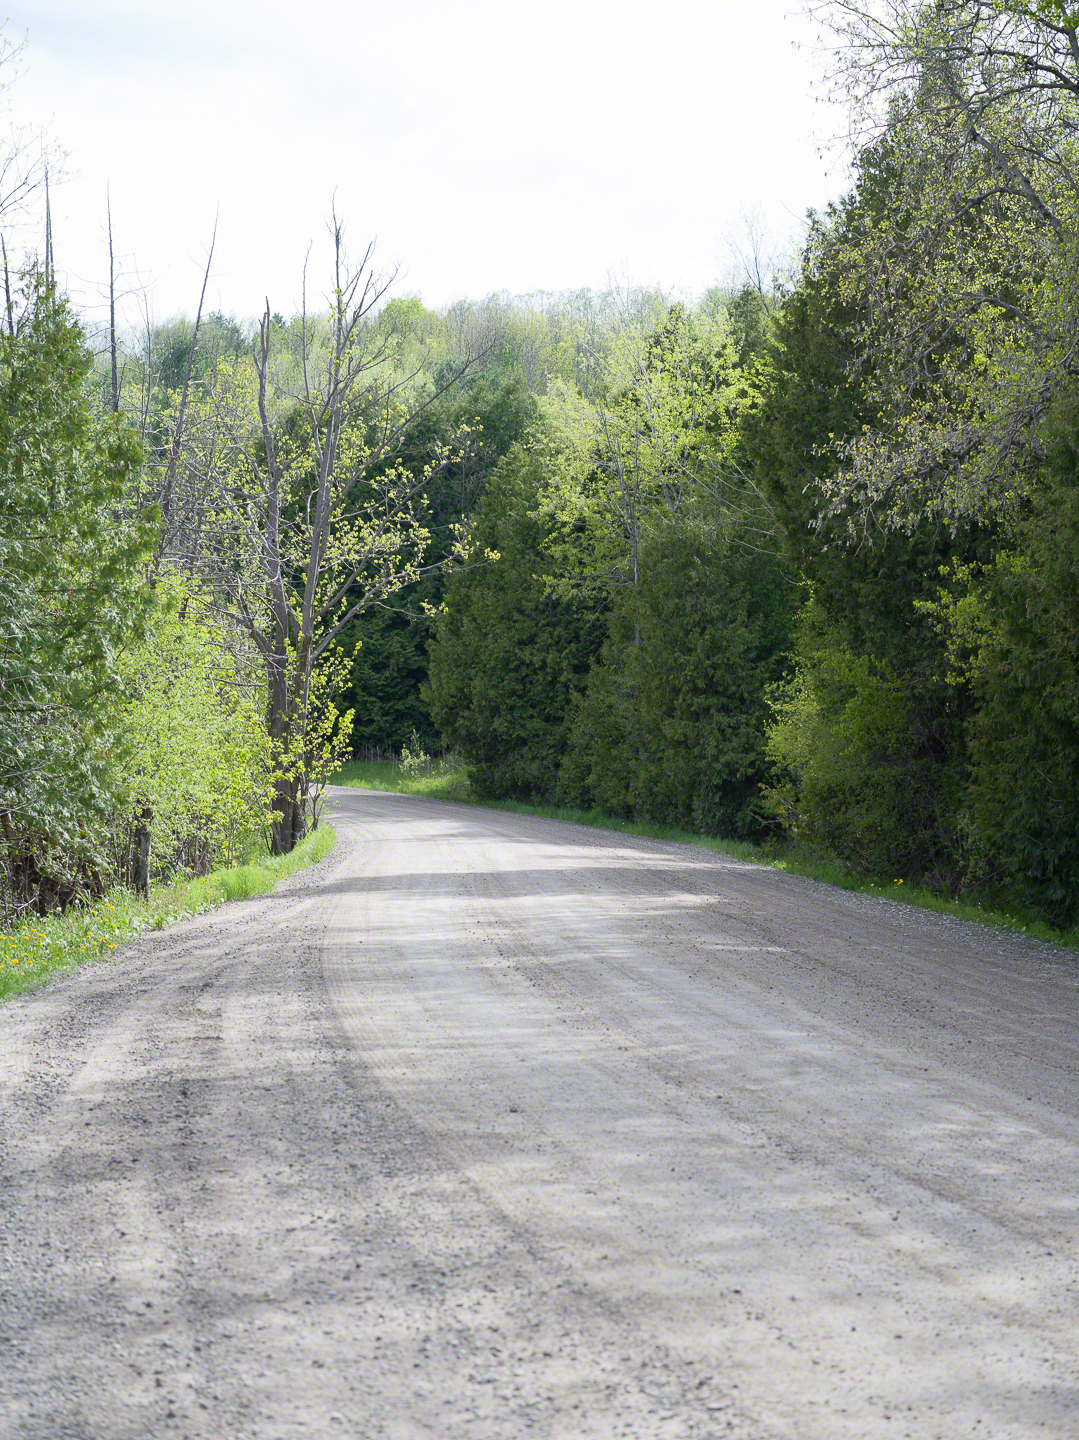
Out of camera image with ETTR intent

ETTR histogram before post processing
The image is flat and uninviting. It looks like the sky is completely blown out and the histogram shows us that the majority of the data, based on the tables above is sitting in the highlights and whites and this is absolutely accurate. The next image shows what is possible when starting with ETTR intent and doing some very basic post processing, literally less than two minutes. I've also included the new RAW Histogram
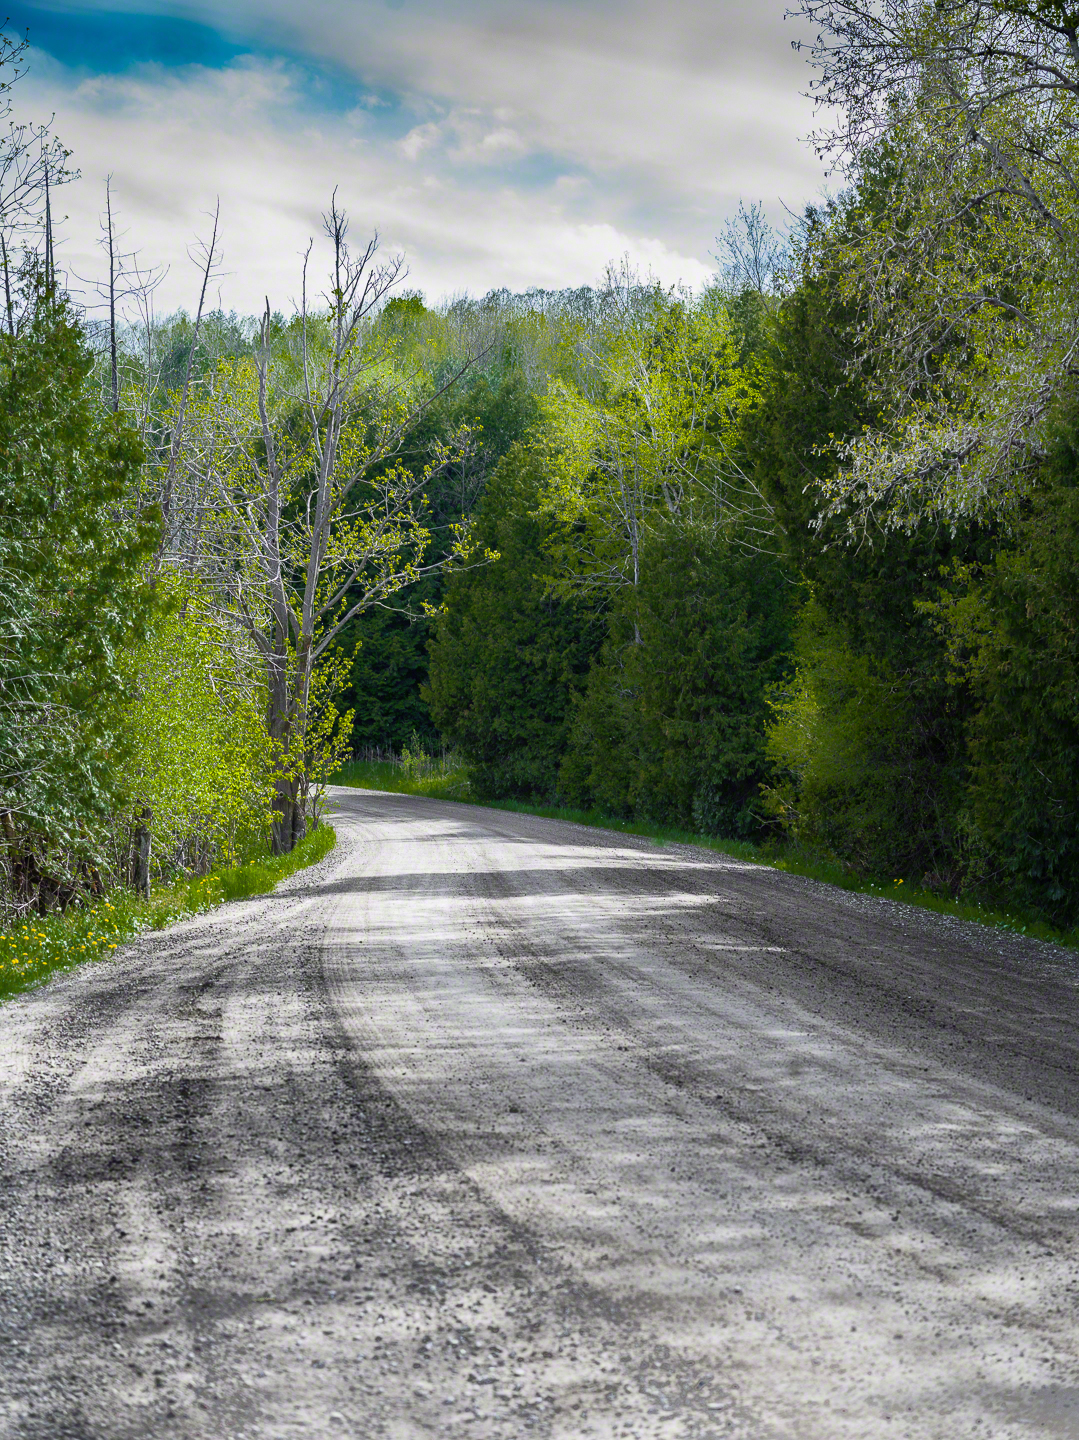
ETTR intent image with minor post processing

ETTR Histogram after post processing
I am in no way suggesting that this image is brilliantly done or is even a good photograph. It does however, deliver on the defined use case of how ETTR can definitely give you a lot more data to work with, without increasing noise.
We see that the mids and shadows have been filled out, and that spike in the whites is gone, while we have also, by pulling bits to the left, dramatically enhanced a sky that out of camera looked completely lost. This very quick post processing work was done ENTIRELY in Lightroom, no adjustment layers in Photoshop or other digital darkroom enhancements other than the Lightroom Basic Panel, Tone Curve and using Dodge and Burn adjustment brushes. Very fast and a significant improvement that pleases me.
Summary
By choosing to give exposing to the right a try, you give yourself more data to work with in the digital darkroom and can do so with a much lower probability of adding a lot of digital noise. This is particularly valuable when the entire scene is a bit on the dark side, because the overexposure gives you more data to the right, that you can simply push left in post and actually get a better result than if you had just shot it as is. ETTR may require a tripod because of slower shutter speeds as you increase the exposure and always requires post processing but can open new doors and opportunities for you as a creative artist.
If you shop with B&H Photo Video, please consider doing so through the link on thephotovideoguy.ca as this helps support my efforts and has no negative impact whatsoever on your shopping experience. If you find the podcast or articles of value, consider clicking the Donation tab in the sidebar of the website and buy me a coffee. Your donation goes to help me keep things going. Email your questions on any photo or video topic and I will try to respond within a day.
I'm Ross Chevalier, thanks for reading, and until next time, peace.


