

Quick Look : Helicon Focus for professional grade focus stacking
/
I've recently done some tutorials on macro photography and a popular sub-topic to this kind of work is the subject of Focus Stacking. Most of the attendees have the Adobe Photographer's Bundle, and so have Photoshop CC which does pretty darn good focus stacking, but some object to subscription software and others wanted something that was perhaps easier to use and that was more focused on stacking, as it were.
And therein lies Helicon Focus from the nice folks at HeliconSoft. This is a product dedicated and designed to do one thing, extraordinarily well, and that one thing is the production of a final image from a series of focus stacked images.
Helicon Focus can work with TIFF or JPEG files, similar to what we would find in other tools such as ZereneStacker, but can also handle your native RAW files, because it calls the Adobe DNG Converter to do the conversion from proprietary RAW formats to the DNG format. What this means is that if Lightroom or Adobe Camera RAW can open your RAW files, so can Helicon Focus.
Converting to TIFF isn't that hard, but it takes time and space. Helicon Focus automates the whole darn process. You point it at the folder or directory where your originals are and open them. Once open, you select the RENDER option, which will build you a TIFF file that combines all the images.
There are three methods for rendering. I copied the information directly from the web documentation to avoid screwing up any definitions.
You can choose between three algorithms of focus stacking: methods A, B, and C.
Here's a brief explanation of each method and its most typical applications:
- Method A computes the weight for each pixel based on its contrast and then forms the weighted average of all pixels from all source images. This method works better for short stacks and preserves contrast and color.
- Method B selects the source image containing the sharpest pixel and uses this information to form the "depth map". This method imposes strict requirements on the order of images - it should always be consecutive. Perfectly renders textures on smooth surfaces.
- Method C uses pyramid approach to image processing dividing image signals into high and low frequencies. Gives good results in complex cases (intersecting objects, deep stacks), though increases contrast and glare.
By bringing more choices to the table, Helicon Focus helps you best deal with specific shooting or file order scenarios. I always recommend shooting your stack in a consistent sequence, but if you have not, or have been doing the "bobbing" method of shooting, you still have Method A available.
I tested Helicon Focus with the same set of model car images that I used for my tutorials, and in my opinion, the final result from Helicon Focus is better than what I got out of the latest version of Photoshop CC. Please understand that the Photoshop CC version was not bad in any way, it's just that the Helicon Focus version is better, with greater sharpness, fewer vague areas, and better contrast.
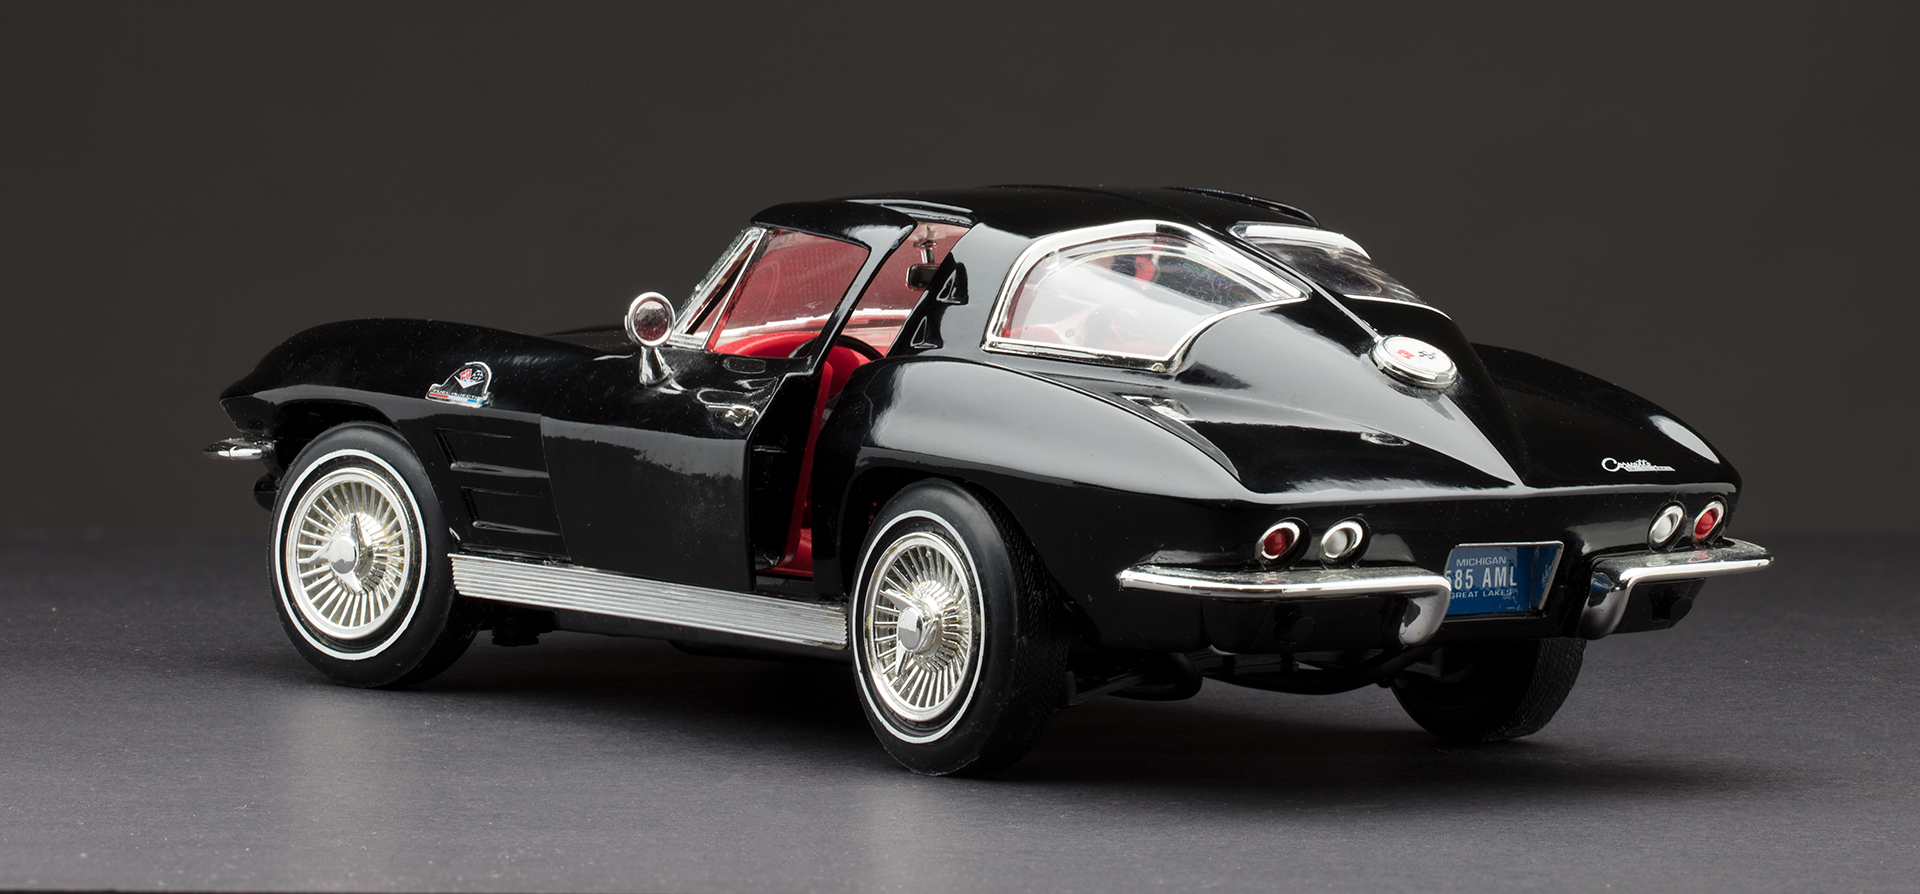
Final JPEG exported from Photoshop after cleaning up dust spots and cropping for style
Once rendered, you can retouch your image, but be aware that the retouching is for the stack itself, basically allowing you to select areas of a source and paste them into the final on a manual basis. I confess, that I did not try this, but I see it as similar to painting on a Photoshop layer mask. Most important, is that I had no need to do so.
The Text/Scale module is not something that I would have thought of using but it is really quite neat. It allows you to add a size scale and some text to your image, very handy if using a stacked image in a report or analysis.
Finally, you can Save your image out for use in other tools. There are plenty of other functions in the Save area, including building depth maps and 3D projections, but my use case was for macro photography and as I didn't have a particular reason to try them all out, I did not. The options are compressed TIFF, TIFF, JPEG and DNG. I also like that you can save a depth map of your stack. It's nothing spectacular in my example but does give you a good sense of what was taken from where in your stack of images.

JPEG of the depth map from my Helicon Focus stack
The benefits of Helicon Focus are very tangible, but for the casual user, it could be a lot like bringing a pulsed fusion cannon to a playground stick fight. It could be massive overkill. Fortunately, you can try the software out for 31 days at no cost at all to see if it fits your use cases. There are three versions available, Lite, Pro and Premium. For my uses, all I would need is Lite, Pro adds the functionality of Helicon Remote, a solution to automatically shoot a focus stack with Nikon or Canon cameras, exporting of 3D models, 2D micropanoramas for photomicrography and other powerful but somewhat esoteric functions. Premium adds Helicon Remote support for Android.
You can purchase Helicon Focus in two ways. There is an annual subscription model, or a onetime lifetime fee, which is just under four years of subscription fees, and gets you unlimited upgrades. The license allows installation on up to four computers, super handy if you work with a laptop in the field but a larger desktop at home or in the studio. http://www.heliconsoft.com/software-downloads/
My take is that if you are a macro photographer, or a landscape photographer who uses the power of focus stacking to create work, particularly work that you will generate revenue from, then Helicon Focus is a good investment. My choice is the one time purchase with perpetual use and upgrades, but your use cases should determine your approach.
Have an idea for an article or tutorial? Do you have a question photo or video unrelated to this article? Send me an email directly at ross@thephotovideoguy.caor post in the comments.
If you're in Canada, please consider shopping with Henry's in your local store or at www.henrys.com If you're in the United States and shop with B&H Photo Video, please consider doing so through the link on thephotovideoguy.ca as this helps support my efforts and has no negative impact whatsoever on your shopping experience. If you find the podcast or articles of value, consider clicking the Donation tab in the sidebar of the website and buy me a coffee. Your donation goes to help me keep things going. Email your questions on any photo or video topic and I will try to respond within a day.
I'm Ross Chevalier, thanks for reading, watching and listening and until next time, peace.


