

Quick Look : Aurora HDR 2019
/
Hey folks. For most of us, the bad old days of overcooked, nuclear waste looking HDRs are over. Some people have even taken to doing their HDRs in camera. Still cannot figure that one out, but hey, to each his or her own.
To this end, the use of HDR as a creative process has fallen off a bit in the last couple of years, and with the availability of good HDR tools, it may be a good time to rethink this. HDR or High Dynamic Range is a technique that melds multiple images together to pull more detail out of the shadows and highlights by pulling data from over and underexposed images and binding them together in one.
One of the reasons that HDR fell out of favour is that in the early days, you really did need 5 or more images to get enough data for the software to work well. As sensor dynamic range has improved, newer sensors produce images with higher dynamic range and we need fewer images to achieve our goals. While some products claim to do HDR from a single image (it’s really just pulling highlights and pushing shadows and playing with contrast) some, like Lightroom’s built in HDR can do the job with as little as two images, one underexposed and one overexposed. The general consensus with dedicated HDR software is that three images tend to be optimal with modern cameras. If your camera is older, go for more images.
The best practice is not to just blaze away with auto bracketing turned on. You still want to get your most important part of your scene exposed slightly above middle grey in your primary or starter shot. Then you want a shot that is overexposed enough to place your shadows clearly in the midtones, and an underexposed shot to place your highlights in the midtones. In many, but certainly not all cases, a bracket of 0, -2 and +2 is a good range. You still have to judge your exposure properly to place what you want where you want it in each shot, so while auto-bracketing works a charm a lot of the time, in very high dynamic range situations like harsh sun, you are better off making your own decisions per image.
Aurora HDR 2019 can work as a standalone tool or as a plugin to Photoshop or Lightroom. My use cases involve using Lightroom as my digital asset manager so I typically call Aurora from Lightroom rather than launching it directly. I tend to select the images in Lightroom with the only Lightroom processing done is lens correction. I only shoot in RAW so I manually remove the auto-sharpening that Lightroom does. I find that I get less crunchy HDRs when I do this. Personal choice.
Aurora accepts the images and asks if I need auto alignment. Since most of my HDR images are shot handheld, I turn this on. Whatever extra time it takes has never hurt me. Unless my subjects are so solid that they have no movement, I choose the ghosting correction and unless there is a good reason to do otherwise, will use the middle image as my reference.
Aurora then blends the images together using its default process. This process involves a lot of filters and you can adjust them all after the fact. They are all neutralized on start, so you do not know before you start your work what adjustments Aurora has already made. For those who want to work fast, or want the same look to all their HDRs, there are myriad presets in multiple categories provided for you directly by the software. I am no fan of presets, and rarely use any of them other than the default as a starting point. I realize that I am an exception to the rule, and this is why so many presets are provided. I find most presets to be overdone, and choose not to use them. This does not mean that a preset or collection of them may not be perfect for you.
The filters are laid out very much the same way as the panels in Lightroom. Starting with basic adjustments at the top and moving down through more specific tools is a nice way to go. Unlike Lightroom, the great strength that differentiates the HDR processing in Aurora from Lightroom native is the ability to work in Layers, using different settings on different layers, controlling the opacity of the layers and the ability to use masks to control precisely where filters are applied. This is, to me, the most important value proposition of Aurora. While I could care less about presets, having layers and masks is enormously valuable to me.
With Aurora 2019, Skylum has brought new tools to bear as well as improvements to some existing tools. The big deal is their new Quantum HDR Engine. In the simplest terms, I find the engine both quicker and more subtle. The results feel less to me like a fifty pound maul, than a more subtle application. This is enough to warrant the upgrade in my opinion. For me, the enhancement delivered to the bracketed images is where it counts, but the engine also works with single images as well, but you had better start with pretty amazing dynamic range for this to work very well.
One of the biggest issues for my use in the past was the visible evidence of artefacting coming from the HDR process. A change to the structure algorithms results in images with less chunkiness or harsh contrasty edges. Skylum has also added more HDR looks for more choice. Having been a video editor for years, I am less excited by the buzzword du jour of LUT support, but I know that for a large part of the market, LUTs (which are really just another kind of preset) are very exciting. I’m already over Hollywood’s orange and teal fave but other folks will likely love the LUT capability as well as the included LUTs. Since I will on a project basis create my own 3D LUTs in other products, I like the ability to import my own LUTs if needed.
Skylum has improved their details boost filter so you get more resolution without the look of overcooked clarity. They have also improved the adjustable gradient filter so the transitions are, in my opinion, smoother.
Aurora 2019 also has significantly enhanced plugins support including the ability to use Photoshop plugins directly as well as to use Skylum’s AI based image adjustment application Photolemur as a plugin. The new plugins menu option, available on both the Mac and PC versions, (I’m on a Mac) needed no configuration at all, it found all my plugins automatically and populated the list. The only enhancement I would request was an obvious way to group and sort plugins for folks like me who have a lot of them.
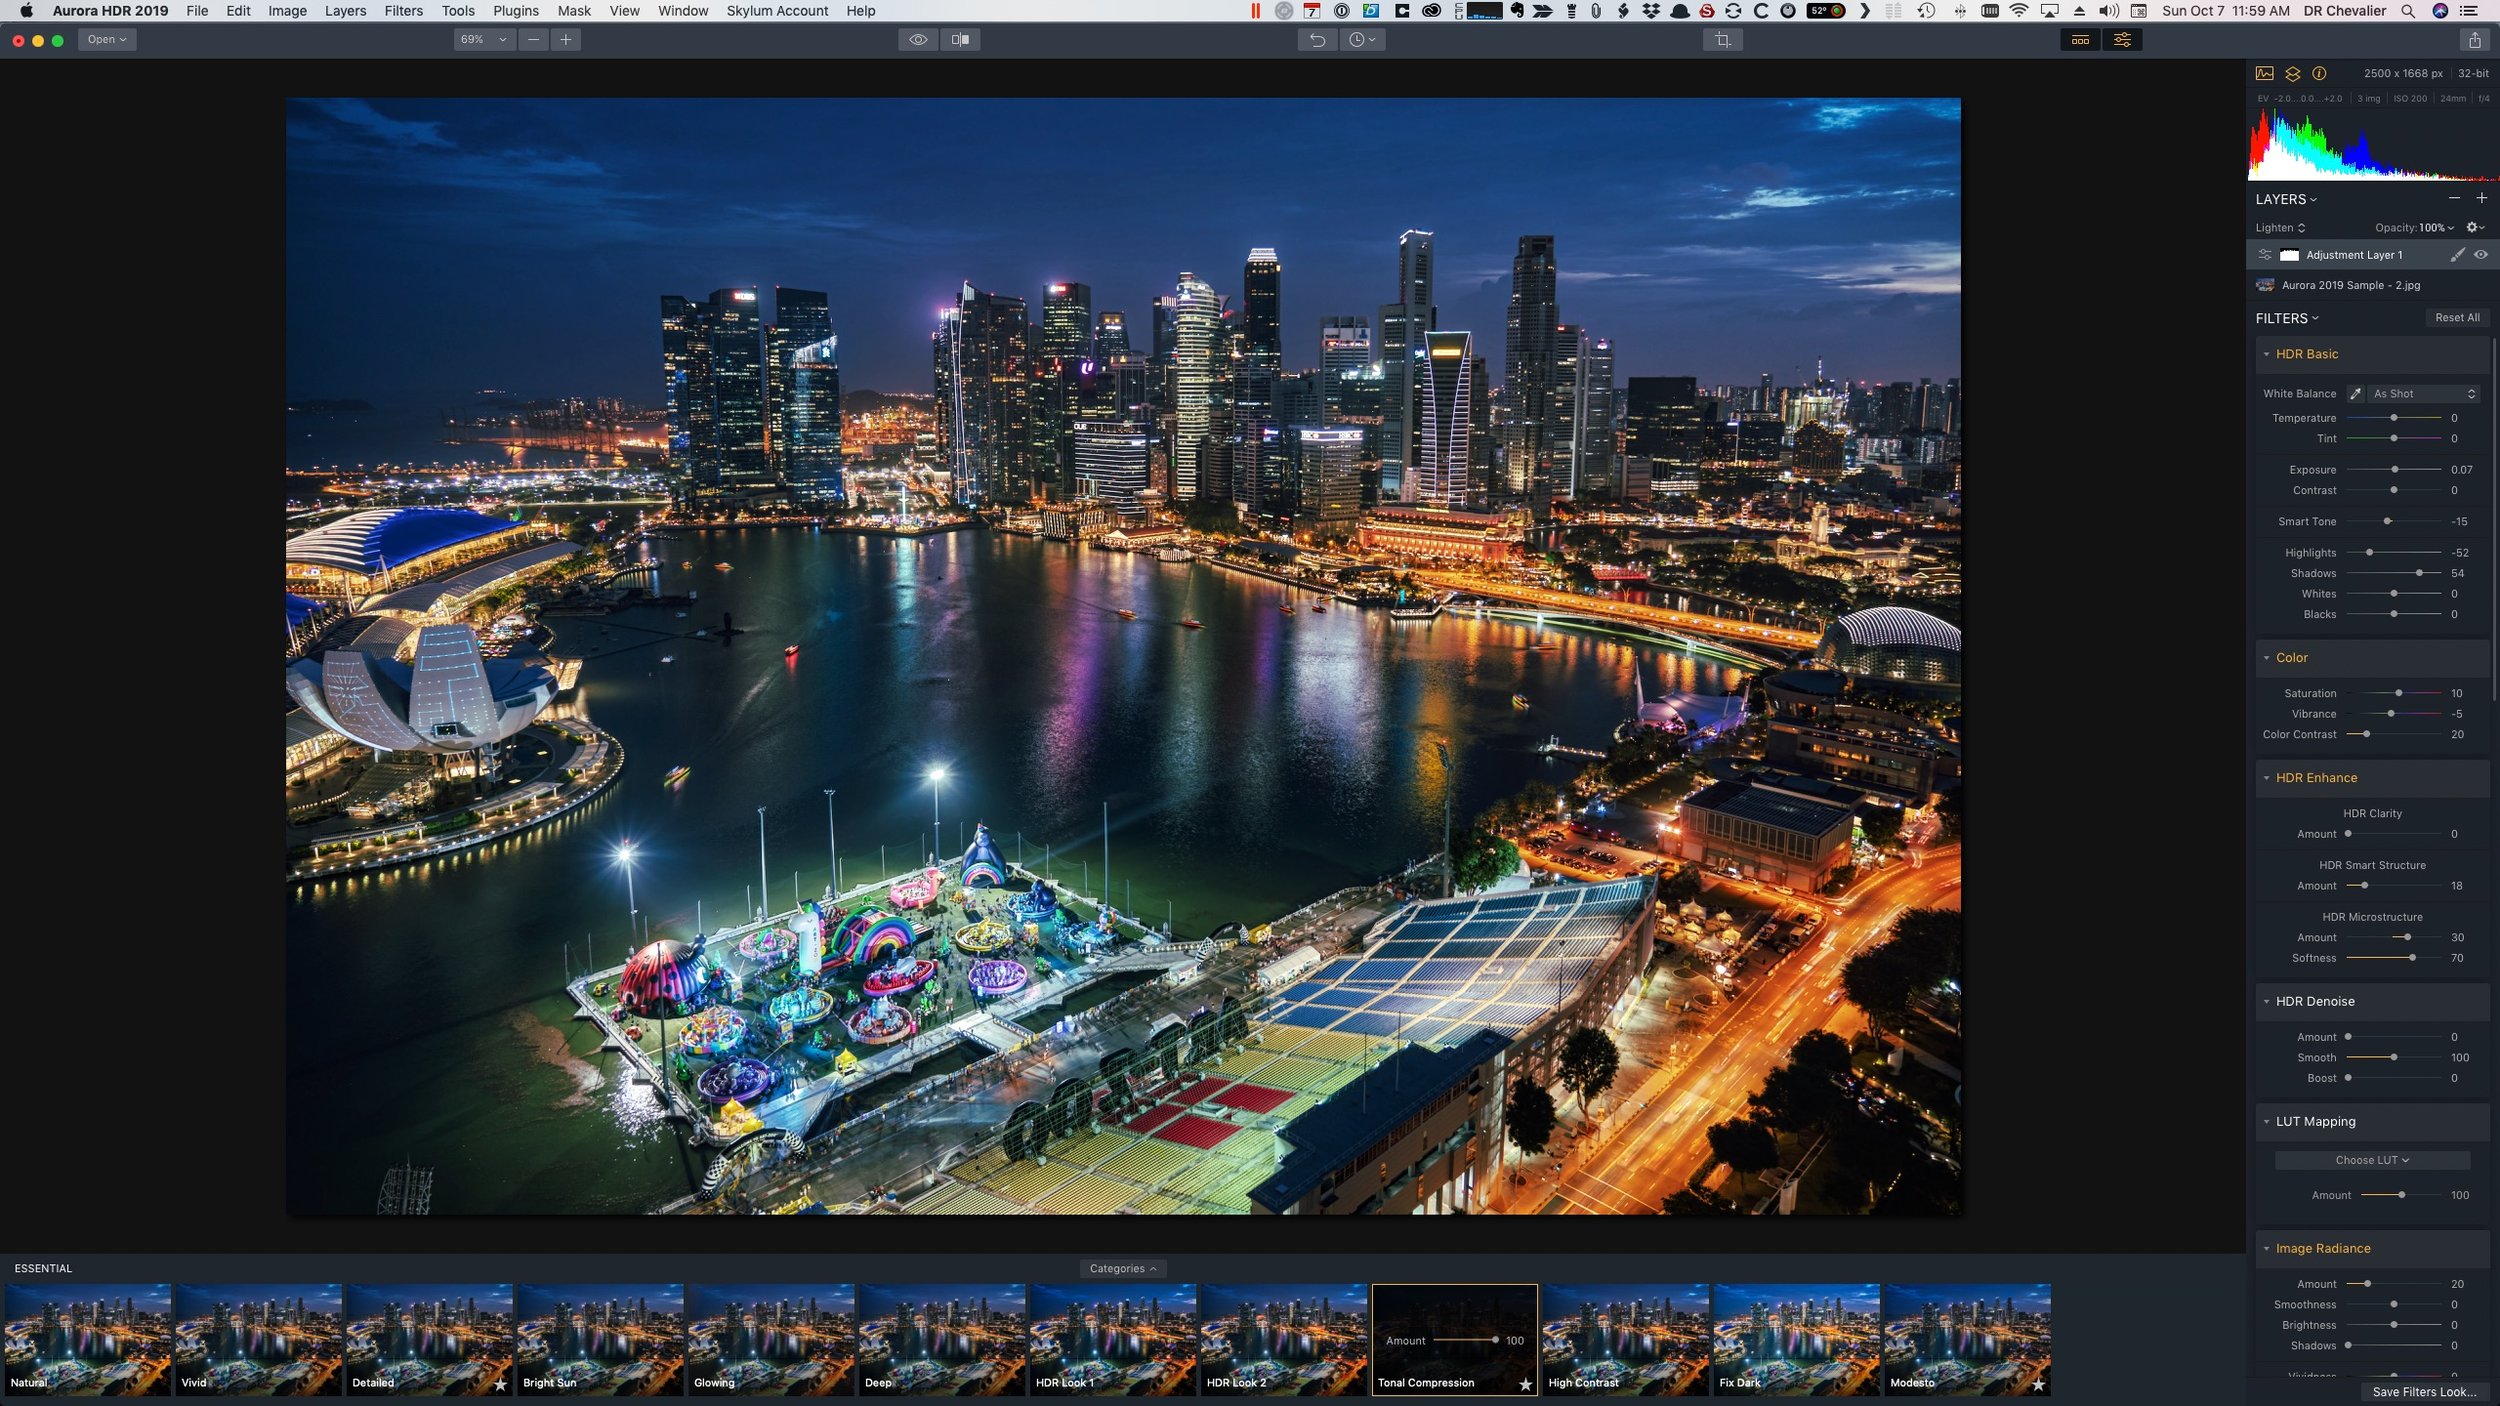
User interface is easy to learn. Layers upper right, makes Aurora 2019 very powerful
I keep coming back to the Layers capability, the ability to leverage blend modes. Masking is not nearly as precise from a selection perspective as one might find in Photoshop, but it probably does not have to be. I do like that when you are working on a layer, the preset that was used as your starting point is highlighted.
I think that Aurora 2019 is a very credible and worthwhile upgrade from prior versions and if you are not using HDR software at this time and want something that is easy to use and reasonably fast to develop competence with that this is an excellent choice
Do you have an idea for an article, tutorial, video or podcast? Do you have an imaging question unrelated to this article? Send me an email directly at ross@thephotovideoguy.caor post in the comments. When you email your questions on any imaging topic, I will try to respond within a day.

If you're in Canada, please consider shopping with Henry's in your local store or at www.henrys.com If you're in the United States and shop with B&H Photo Video, please consider doing so through the link on thephotovideoguy.caas this helps support my efforts and has no negative impact whatsoever on your shopping experience.
If you find the podcast, videos or articles of value, consider clicking the Donation tab in the sidebar of the website and buy me a coffee. Your donation goes to help me keep things going.
I'm Ross Chevalier, thanks for reading, watching and listening and until next time, peace.


