

Going Pro with the Olympus OM-D E-M1 Mark II
/
Can you shoot professionally with a micro four thirds camera? Read on to find out.
While it may not be the biggest question when things come to mirrorless, whether mirrorless is ready for professionals is an increasingly relevant question.
I've recently had a number of friends and clients switch from full frame DSLRs to Olympus mirrorless cameras. I was impressed by the thought processes that these folks went through to make the decision and how they went about choosing the cameras that they selected. This led me to believe it was time to reconsider if demanding pros are in good stead should they choose to move to mirrorless now.
The challenges of an insufficient lens choices are well gone, and for most applications the image quality from the wide range of mirrorless cameras is at least as good as what we see from traditional DSLRs.
I've shot with professional grade DSLRs for a very long time, a transition from pro bodies for film. So I contacted the good people at Olympus to see if they would loan me their E-M1 Mark II and what are often called the triumvirate of lenses to see how they fit. Regular readers know that I've been impressed with solutions from Fujifilm and Sony for different use cases.
The gear that Olympus has provided me includes the camera body, battery, charger and three of their Pro series lenses. I have the 7-14/2.8, the 12-40/2.8 and the 40-150/2.8. For this initial foray into the Pro space with Olympus, I decided to go with zooms, for the simple reason that many of my peers use similar ranges for their Pro DSLR bodies.
The Olympus micro four thirds sensor is a proven entity, and when comparing a lens designed for micro four thirds, you multiply the m43 focal length by two to find the full frame equivalents with the same angle of view. Thus you see that the three lenses equate to 14-28, 24-80 and 80-300 from a full frame perspective. All have a maximum aperture of f/2.8 which is consistent across the zoom range. We also understand that depth of field at a selected f stop is also impacted by the crop factor. So while the lens maximum f/stop is truly f/2.8, the depth of field at any focal length will be the same as f/5.6 on a full frame lens at an equivalent angle of view.
While not covered in this test, there are primes that provide excellent shallow depth of field options that we will look at in a future review,
When my Olympus contact handed me a camera bag with the gear, two things leapt to mind. My first mental question was "where's the rest of it" and then she said that everything was in the small bag, and then I put it on my shoulder and started wondering where the weight was. While my loaner kit does not include the battery grip, I have to say that the whole thing, including the charger weighs less than my 11-24 and 70-200 together. As I do not get younger, I found the tug on my shoulder to be almost unnoticeable and saw an immediate benefit.
Professional bird photographer Scott Bourne has told a similar story about his own case, where his physicians warned him about permanent shoulder and leg damage if he did not make a change. Mr. Bourne now shoots with the E-M1 Mark II and the Olympus 300/4 which delivers the same angle of view as the massive (and wonderful) Canon 600/4 that Mr. Bourne retired.
As I began reading the electronic manual and working my way through the comprehensive and reasonably easy to follow menus, I noted that unlike some other approaches, Olympus has not tried to overload the pixel density on their sensor. Professionals need to work in crap light more commonly than to make massive resolution images. We should all know by now that the larger the individual photo site, the better the noise control when the ISO starts to climb. Since the majority of images made today are displayed on the web, any resolution over eight megapixels is a bonus. I print regularly, so my testing was not about how the final images appear on the web, but how they look on fine art paper out of my Epson 4900 Stylus Pro printer.
I feel lost without a battery grip most of the time. I need one for the level of grip that I want, and no matter the battery efficiency of any system, in my world more power on tap is always better. I was very surprised how well the E-M1 Mark II fits my larger than average hands, and how easy it is to handhold even without a grip. I do know that should I buy the camera, a battery grip will be bought with the body, and that's my choice, not a necessity.
Camera manuals and menus get a bad rap. Often they deserve it. The manual is reasonably constructed, but is written for an amateur not a professional and too much space is spent on connecting to smartphones and not enough on the really high end functions of the camera. The index is ok but not great. I downloaded the PDF version of the manual to make searching for topics easier. I cannot say that has made much of a difference.
Olympus menus are generally good. Each selection is a single page long, which is easier to follow, but this makes for lots of sections and things are not where you might expect them to be coming from a professional Canon or Nikon. They aren't Sony level annoying, but some work on the menus in the context of a pro user would help. Also the menu listing type is too small. It's not realistic to have someone who can shoot without eye correction need to go to magnifying glasses for every menu option change. Setting the LCD to what the manual calls the Super Control Center is a good idea. The only oddity is that the icon on the button for this looks like the EVF/LCD selector icon on most other mirrorless cameras, so if you have used Sony or Fujifilm, you may have a different impression of what the button does.
Overview
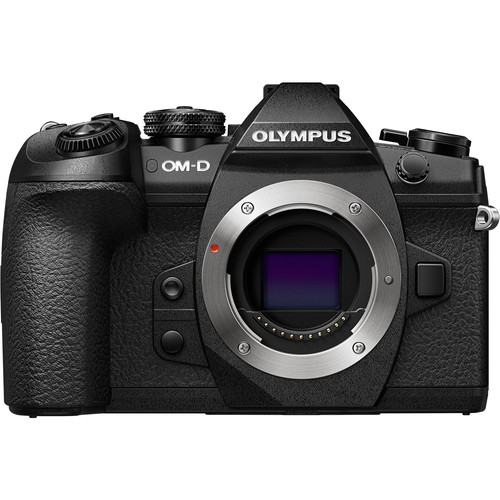
The OM-D E-M1 Mark II is a 20.4 megapixel mirrorless camera that looks and feels DSLR like. This means that stuff is where you expect it to be. The front face is nice and neat, and not cluttered with a slew of micro buttons. Buttons are easy to find and construction feels really solid

Flipping the camera around, we see the back and it is also neat and tidy. the viewfinder is nice and large and you can program the AE-L AF-L button to be rear button focus as things should be, at least in my world. The navigation pad is easy enough to use. The big missing for me is a direct ISO button, although by flipping the lever around the AEL/AFL to position 2 you get to ISO and WB quite quickly. The rear LCD is of the tilt swivel type and is bright and mostly easy to read and can be enabled for touchscreen use. I would prefer larger fonts as the type is very small to my eyes, and touchscreens and I simply do not get along. I had to turn it off as my nose kept changing things. If the viewfinder protruded further backward, that would not be a problem, but it does not, so the touchscreen is a no-go for me.

The dual SD card slots are on the right side under a rearward sliding door. Thank you Olympus for not putting the slots on the bottom of the camera. Slot 1 is UHS-II compatible while Slot 2 is only UHS-I compatible. Arrgghh. When will makers stop with this idiocy of different slot types? Makes me all stabby. You will also find the port for the remote release. Olympus has their own of course, but a quick look indicates a generic 2.5mm jack. Yea! Thank you for not being proprietary as it means that remotes that I already own work with the E-M1.

The left side has a couple of weather sealed panels. Actually all the panels are weather sealed, this is a pro level camera after all. Here you will find a microphone input, a headphone output, USB-C port and Type D Micro HDMi port. The LCD must be flush against the back to get the panels open, and if you have the screen flipped out in selfie/vlogging mode, any cables connected will obscure your view. As my eyesight is not what it once was, I used the HDMI out to run the video signal to an external Atomos Shogun display/recorder, so obscuring of the flip screen did not matter to me.
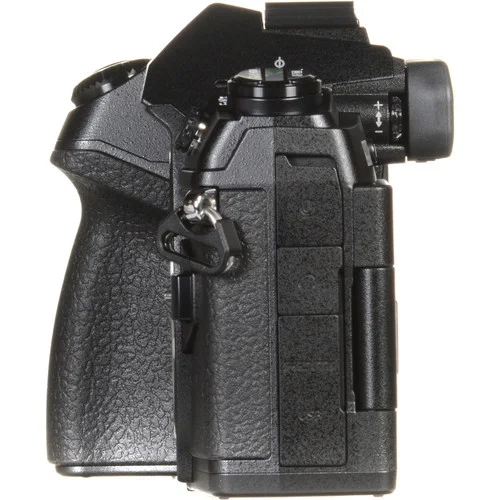
The top deck of the camera is very nicely laid out. There is large, locking mode dial. Hurray! I hate having to push buttons and turn wheels just to flip modes. Three user specific modes are directly on the wheel and as a pro camera should be, there are no dork stick scene modes, although there is an ART mode for those who would actually do processing in camera. Why?
The on/off lever is positive and the two control wheels have quite positive click points. They take on different functions depending on switch settings or selector positions. The buttons on top of where the rewind crank would have been forty years ago by default control drive mode / HDR options, and Autofocus modes and metering modes. There is a PC sync port on the beveled front for old style flash connectivity. The hot shoe is a multipin design that works with any Olympus or Lumix compatible flash unit for TTL and manual control. I had hoped to get a Profoto Air-TTL remote to use with the camera, but one was not available. I used the regular manual Air Remote extensively with no issues.

The bottom plate layout is pretty simple. There is a battery door to access the battery that remains usable if you have a tripod plate mounted. There is a sealing cover over the connector for the battery grip. You will note that the tripod socket is well forward on the body. Attaching an Arca Swiss plate to this made for an uncomfortable projection forward of the body. If it were mine and I did not have a battery grip (like that would ever happen) I would definitely get a properly laid out L bracket for the camera such as the one from Really Right Stuff.

I was very pleased with the three Pro lenses that Olympus graciously loaned me. The 12-40 is angle of view equivalent to a 24-80 with a continuous f/2.8 maximum aperture. It's a great core lens for most, although I ended up using it the least. Sharpness and accuracy are excellent. The focus ring is a push pull design to easily flip from automatic to manual focus. I never actually needed manual focus but it is nice to see an actual focus scale on a modern lens. The lens normally comes equipped with a petal type bayonet lens hood. My loaner did not have the hood and I missed it.

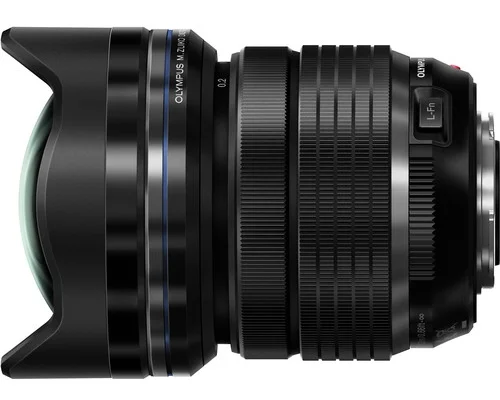
The ultra wide 7-14 f/2.8 is gorgeous. It provides the same angle of view as a full frame 14-28 with the maximum aperture of f/2.8 available through the zoom range. It has a moderately bulbous front element and includes a petal style hood to protect it. There is no front filter mount, but you can get mounts from Lee and others to allow the use of filters with this lens. For landscapes it is absolutely killer and is on my must have with the camera list. It is absolutely fantastic!
Unsurprisingly for me, the 40-150 f/2.8 was the lens that I used the most. I mean think about a lens that delivers the angle of view of an 80mm - 300mm in a lightweight package with a constant maximum aperture of f/2.8 through the zoom range. It's just brilliant. Tack sharp, very fast to focus, a superb zoom range, it's just wonderful. The hood design is tremendous, and although I worked without the foot mounted most of the time, it is handy. It would be much handier however if it came with an Arca Swiss dovetail milled into it so I would not need to add a lens plate. It's the little things people...And if you will do that, consider milling a dovetail into the body base plate and the base plate on the vertical battery grip. I know, small gripes...

Could I as a working photographer get by with this triumvirate? Of course. Would I want to? Hells no! I would want more reach for wildlife and birds, perhaps the Pro series 300mm f/4 or even the Lumix 100mm-400mm although given what I have learned about depth of field delivery, I would prefer the faster lens. I would definitely add Olympus' excellent teleconverter. My friend Gordon has one, and it's really very good indeed. Of course for the studio work, I would want some really fast primes and i hope to revisit this topic in a studio specific review of the professional applicability of the system.
5 Axis Image Stabilization
The E-M1 has in body 5 axis image stabilization. In my testing it's great, although I never got the promised 5 stops myself. I don't blame Olympus, those promises require ideal conditions, situations that I have never met yet. The graphic below shows the five axes better than I could verbalize things. If you use a lens with stabilization built in, the effect is additive. The only time that in body stabilization has been shown not to surpass in lens stabilization is in the realm of super telephoto lenses. Not a problem that I encountered.

Impressions on the First Shooting Day
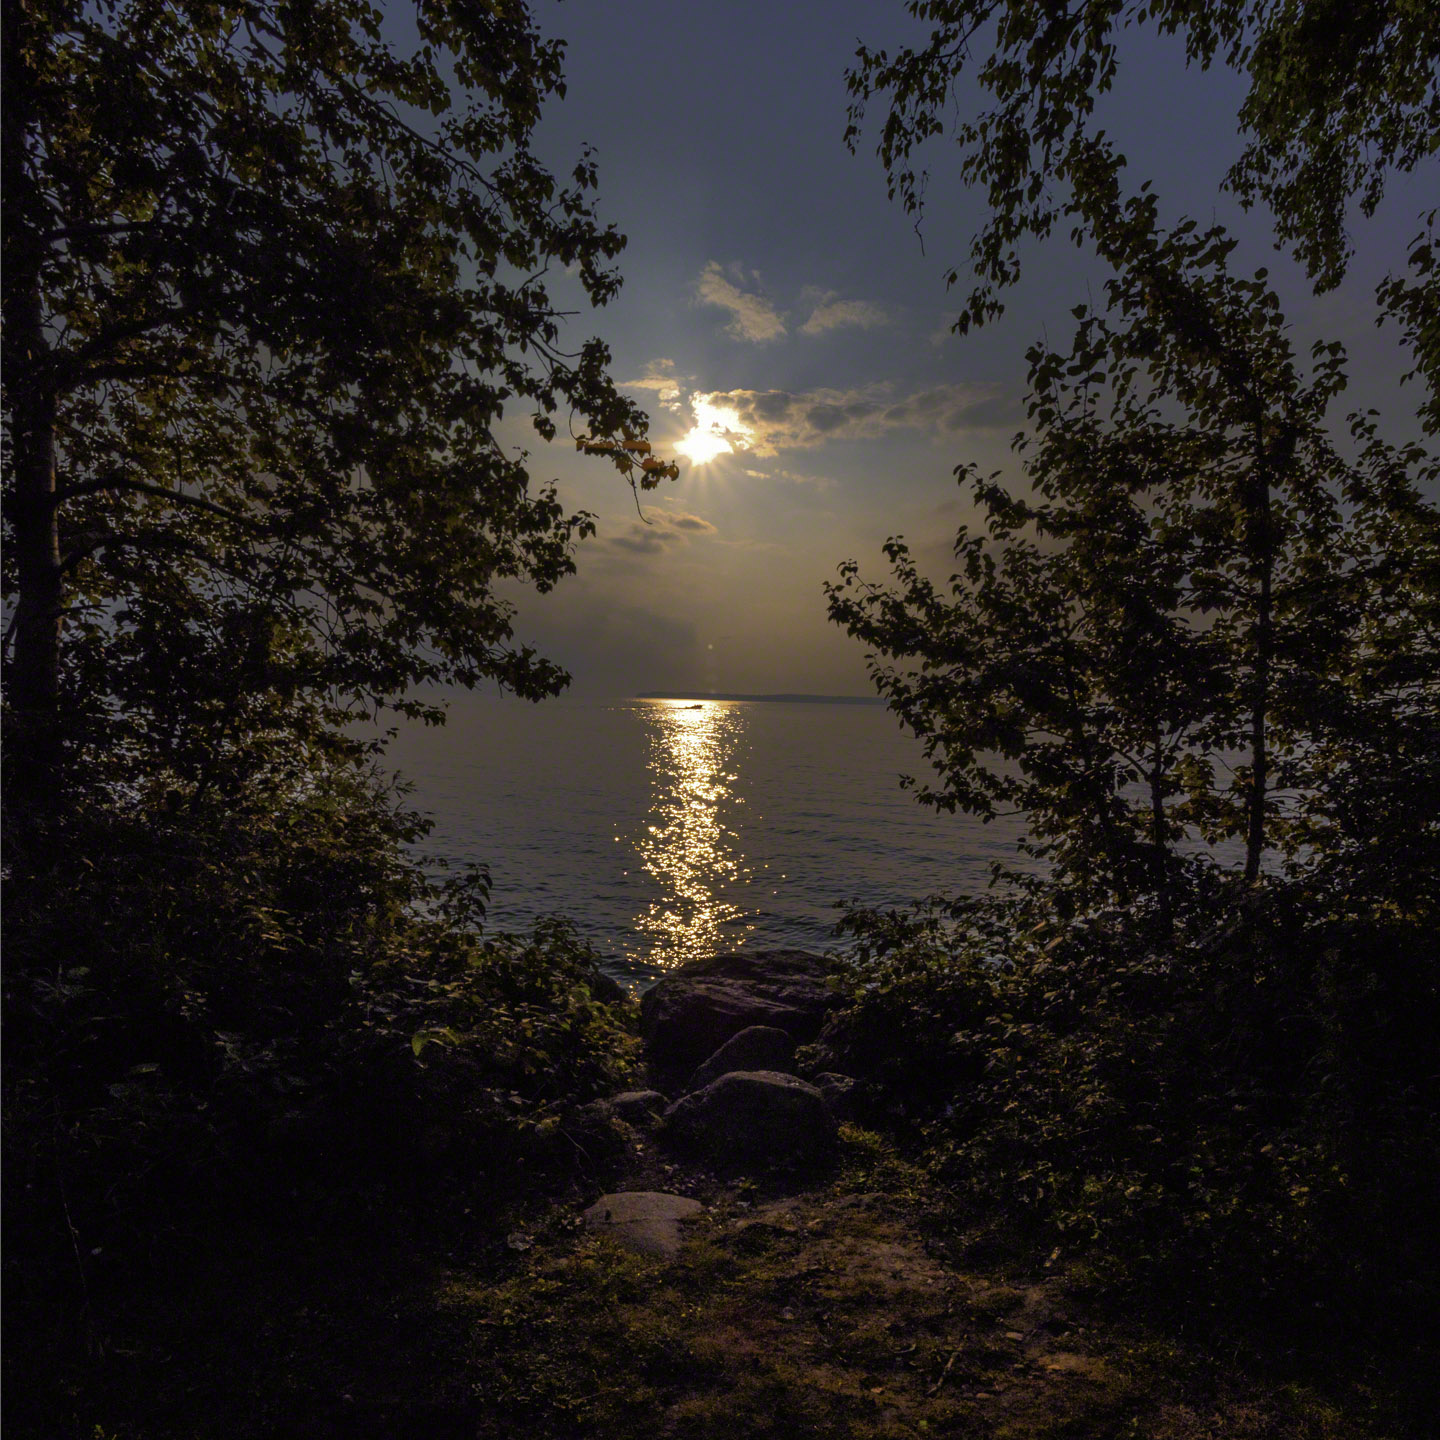
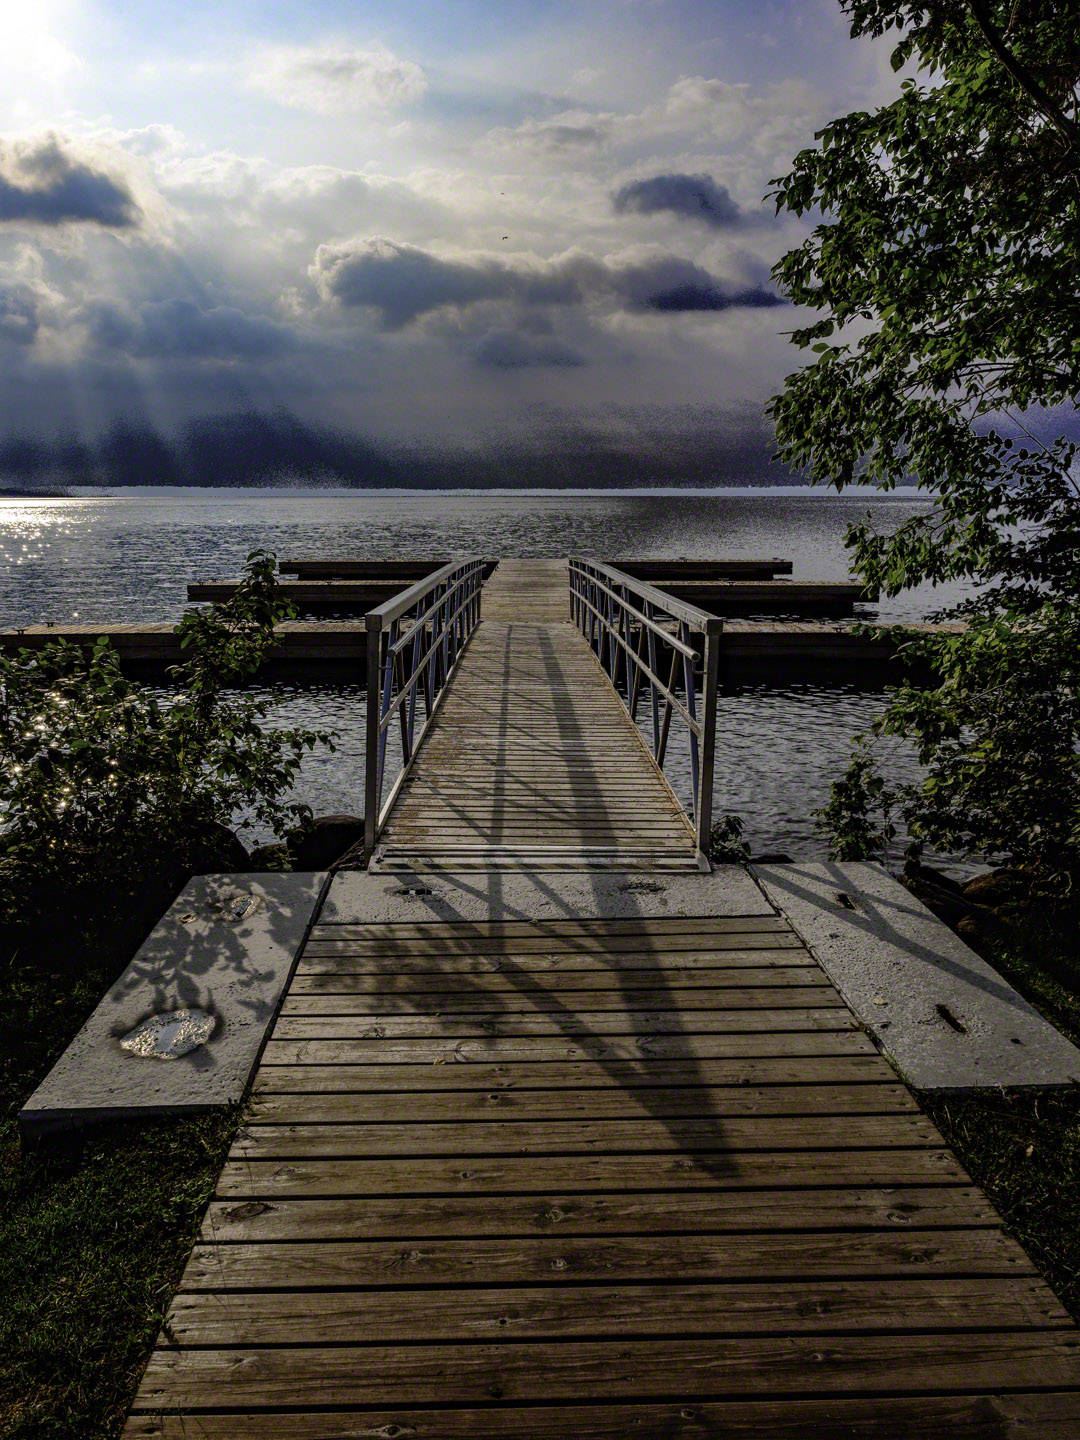
I asked my friend Gordon, who recently switched to this camera from a full frame Nikon DSLR that he liked very much, to join me for a morning of shooting using the time tested "go thattaway and see what you find" method. Carrying the body and the three lenses was a very different feeling for me. The bag was small and so lightweight. I found that I used the 40-150 most and then the 7-14 and really had to force myself to use the 12-40. Let me be clear that there is nothing wrong with the lens at all, it's just not the first focal length range that delivers on how I see things.
I'm honestly still learning all the ins and outs of this camera. i tend to shoot in aperture priority and use exposure compensation a lot because I want to get things right in camera and not have to do a lot of fixing in post. The day was a holiday Monday in August, so very harsh sun, with lots of haze and humidity to go with the heat. The default positioning of the aperture control dial and the exposure compensation worked for me from the word go. Very intuitive. Having to toggle the rocker switch to quickly alter ISO was less intuitive, and lack of experience meant I was changing white balance when I meant to alter ISO. Since I only shoot RAW, the white balance setting on the camera means nothing at all to me, so I need to figure out if I can set a function more useful in this switch position. (EDIT No I cannot) The camera is so programmable, that I may be able to add a function button to toggle the exposure compensation wheel to be ISO which for me would be ideal. (EDIT, Nope couldn't figure that out either)
I quickly caught myself shooting at shutter speeds that ostensibly are far too slow for my ability to handhold. I love that the 40-150 at full zoom gives me the same angle of view and lens speed as my long in service Canon 300mm f/2.8 The fact that the Olympus lens is so light, encouraged some dumb mistakes on my part. Up to five stop stabilization claims not withstanding, I cannot handhold that lens at 150mm at 1/30 without micro shake. Others may have different experiences. I was pleased to see that I was regularly getting over two stops of shutter speed with the stabilization and when I was braced got just over three stops. Five stops eluded me all day.
The lens mount is quick and because everything was so lightweight, I was switching lenses a lot more than I would do on my regular body. Smaller and lighter does encourage this. The rear LCD is quite nice, but as on my pro Canon bodies, the brightness of the sun makes it hard to see sometimes and I really don't use it to judge the final keeper state of images. The EVF is superb and I noticed that what I saw before pressing the shutter is what showed up in playback after the shot very consistently. This has been a frustration for me on some mirrorless cameras, where the EVF shot composition doesn't match the JPEG embedded in the RAW that gets shown in playback mode. I dutifully set the picture style to as neutral as I could find for shooting, but there is definitely still some rather aggressive internal JPEG processing happening as was apparent when I got things into Lightroom. More on that later.
The one downside of the light weight is that it encouraged some sloppy holds and I blew shots that I would not have messed up on the heavier pro bodies that I shoot most every day. I don't think that this is a camera issue, but a learning experience for folks moving from heavy to light in general. I know that I can with practice get past this.
In the field, the menus are usable, but some of the naming could use a bit of work, and what should have been simple for me, the changing of the rear AEL/AFL to AFL only is a couple of different menu settings that you use together, and I think that the help screens such as they are, would benefit from richer explanations during a transition period from a different pro body. They are not bad, but they are different from Canon and Nikon and while comprehensive take some work.
I shot in both S-AF and C-AF. My usual modality is to use a single centre focus point. I became very frustrated at what I felt was the camera choosing focus points on its own. I clued in that the issue was that the touch screen AF pad was active and I was moving focus points with my nose. Once I turned this off, that problem went away. I also tried a couple of the focus zone options, the five dot and the nine dot. The nine dot worked ok on moving horses, the five dot did not deliver the success I hoped, favouring the brightest or most contrasty of the points, not necessarily where I wanted things to go. On this shoot, there were no sports or stuff moving of note, so a deep test of C-AF and its ability to track will have to come on another day.
The 7-14 is a beautiful lens, equivalent to a 14-28 on a full frame sensor. You do have to watch your scene parallelism because it's very easy to make stuff start to fall over. It has great contrast, but be aware that it can be very susceptible to lens flare, even with the built in hood, given that fishbowl front end. It also focuses very close, which makes it very handy in different shooting situations.
The 40-150 is equivalent to an 80-300 on a full frame sensor, and like the other two lenses is f/2.8 through the range. I have shot the non-Pro lenses on other Olympus bodies, and let me just say that the Pro lenses deliver. They are all excellent, and as noted, this would likely be the lens that I would buy first. I would still want something longer for birds and wildlife, either the Olympus 300/4 prime or perhaps the Panasonic Lumix 100-400 that Gordon selected. Just the thought of that kind of reach in a lens that goes in a pocket is very exciting.
I want to talk about sensors for a minute. Micro four thirds sometimes gets bashed because it is small, about one quarter the size of the full frame. This means that if we compare the E-M Mark II to a Nikon D5 which is similar in terms of pixel count, the surface area of the individual pixels is about four times larger than the photo sites on the Olympus sensor. Consequently the Nikon should perform better at higher ISOs and it does. The Olympus is rated to 25600 native ISO, and as expected, I find that ISO 6400 on the Olympus looks a lot like ISO 25600 on a Canon 1Dx Mark II.
Based on the first "roll" I find no reasons to believe that 40"x30" prints would be beyond the capability of this sensor. It is rated to 12.8 stops of dynamic range and I would say that this is pretty accurate. Note though that the pixel depth of the RAW files is only 12 bit as opposed to 14 bit on a full frame Canon or Nikon, and this means that you will not get the same range of fine colour gradations. This is not fatal in any way, and so far superior to 8 bit as to be not worth discussing. Would I prefer 14 bit? Yes I would, the lenses are capable of delivering the information to support this. For a Pro moving to the E-M1 Mark II, the high ISO performance, which is directly related to the photo site size is something for consideration.
Also be aware that if you come from the 3:2 full sensor aspect ratio of a full frame Pro camera, you will have to get your head around that the default aspect ratio of the Olympus Micro 4/3 sensor is 4:3. When it comes to standard frame sizes, the frame companies are out to lunch here as well since they live in a 5:4 world for no good reason. I mean seriously, 5:4 has not been a standard aspect ratio in over 50 years, try and keep up frame people.
If you follow the Rick Sammon guideline that "the name of the game is to fill the frame". you will be very pleased with the Olympus sensor. However if your normal practice is to shoot very loose and crop significantly in post processing, you are going to be less happy than with a full frame sensor. To each his or her own, but I confess not understanding why someone would spend all that money on a great sensor and then throw away so many pixels of data in post processing when getting it right in camera is not exactly rocket science.
As I mentioned, I had some complete failures on my first roll, although none of them were the camera's fault. I am very accustomed to the release on Canons, Nikons and Hasselblads which while soft, is more glass break than the OM-D. I fired more frames while just composing or getting focus locked than I would like. Not so many as I did on the Fujifilm X-H1 which for me fired if I looked at it funny, but I will need to practice more.
The images were downloaded from the card using Photo Mechanic, and then after a first cull, imported into Lightroom Classic with Smart Previews on, and using only the Embedded JPEG for regular previews. Olympus' embedded JPEGs are good for preview work and except for sharpening and contrast are reasonable approximations of the RAW file. I get no value from Lightroom's slow proprietary previews so do not use them at all.
Olympus embeds lens correction information in the camera, so Lightroom's lens correction module has nothing to do other than eat what is fed. Vignetting and distortions were not visible with any of the lenses. Dynamic range is quite good as noted, but proper workflow can still bring more out of the RAW files as one should be able to do. I tried a couple of HDRs in Photomatix Pro and it did a good job leveraging the data in the RAWs. I had set the E-M1 Mark II to 3 shots at 2.0 EV intervals and they came out looking nice. To be fair, I like natural looking HDRs, and dislike the nuclear meltdown overcooked look completely, so I could probably get the same result with a properly exposed single frame processed properly.
Lightroom's sliders all performed as expected on the Adobe conversion of the Olympus RAW file format. No glitches or weirdness were evident, but I did find that the 12 bit colour depth was naturally more poppy and contrasty than a 14 bit deep file, and so I had to modify some of my baseline starting points when working with the Olympus files, specifically when it came to saturation, sharpening and the tone curve. I never use the Contrast single slider, as it acts like a twenty pound sledge hammer in my opinion and was too heavy on the Olympus files when I tried it. I was however pleasantly surprised to discover that Dehaze was useful beyond about 7 points where it usually turns things into mud. I went back to other files from other cameras, and can confirm that this is unique to the Olympus files in this test.
I did not use any plugins, nor did I try any other post processing software. I own them all, but only go elsewhere if Lightroom does not work, with the exception of doing side by side work in Capture One.
The Second Shooting Day
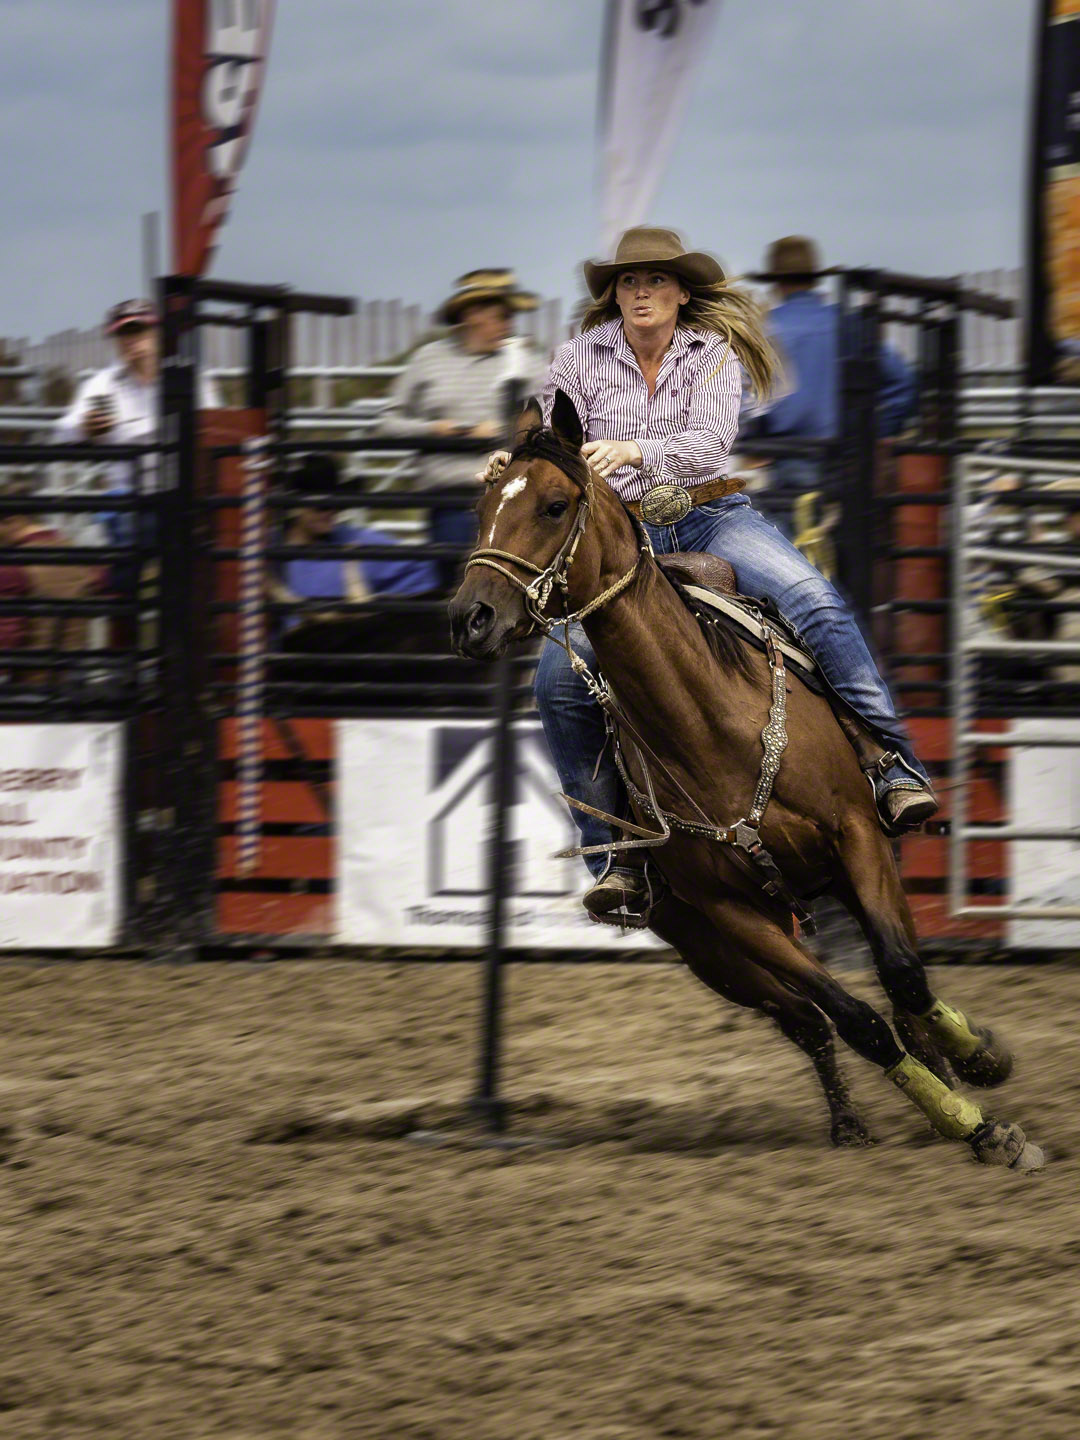
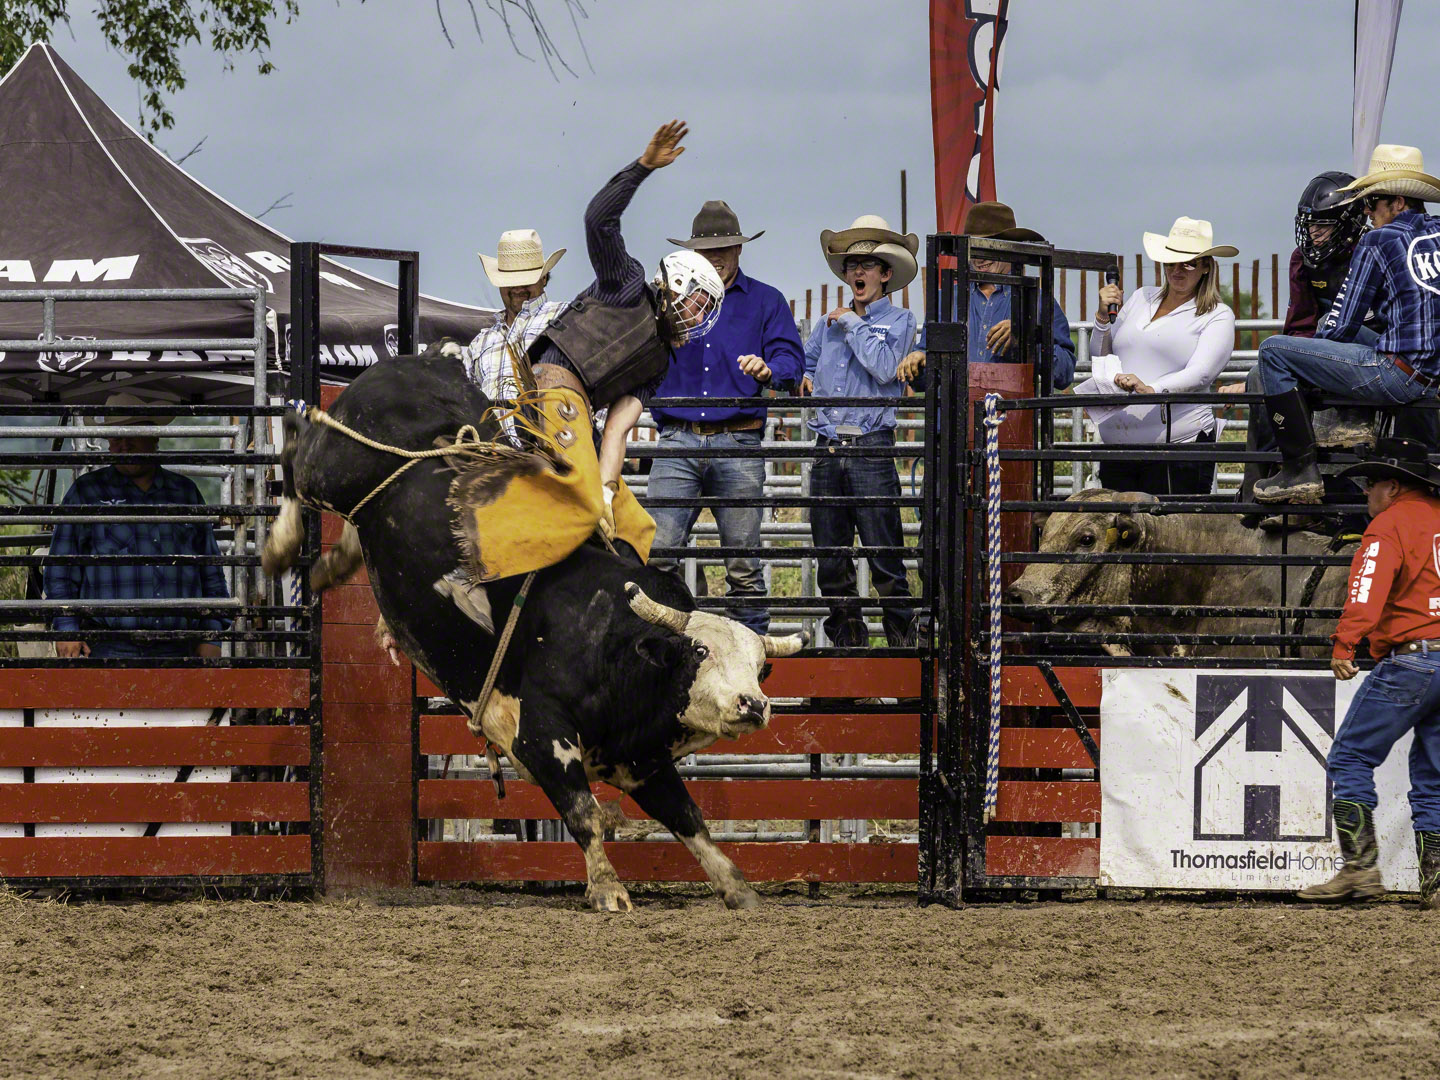
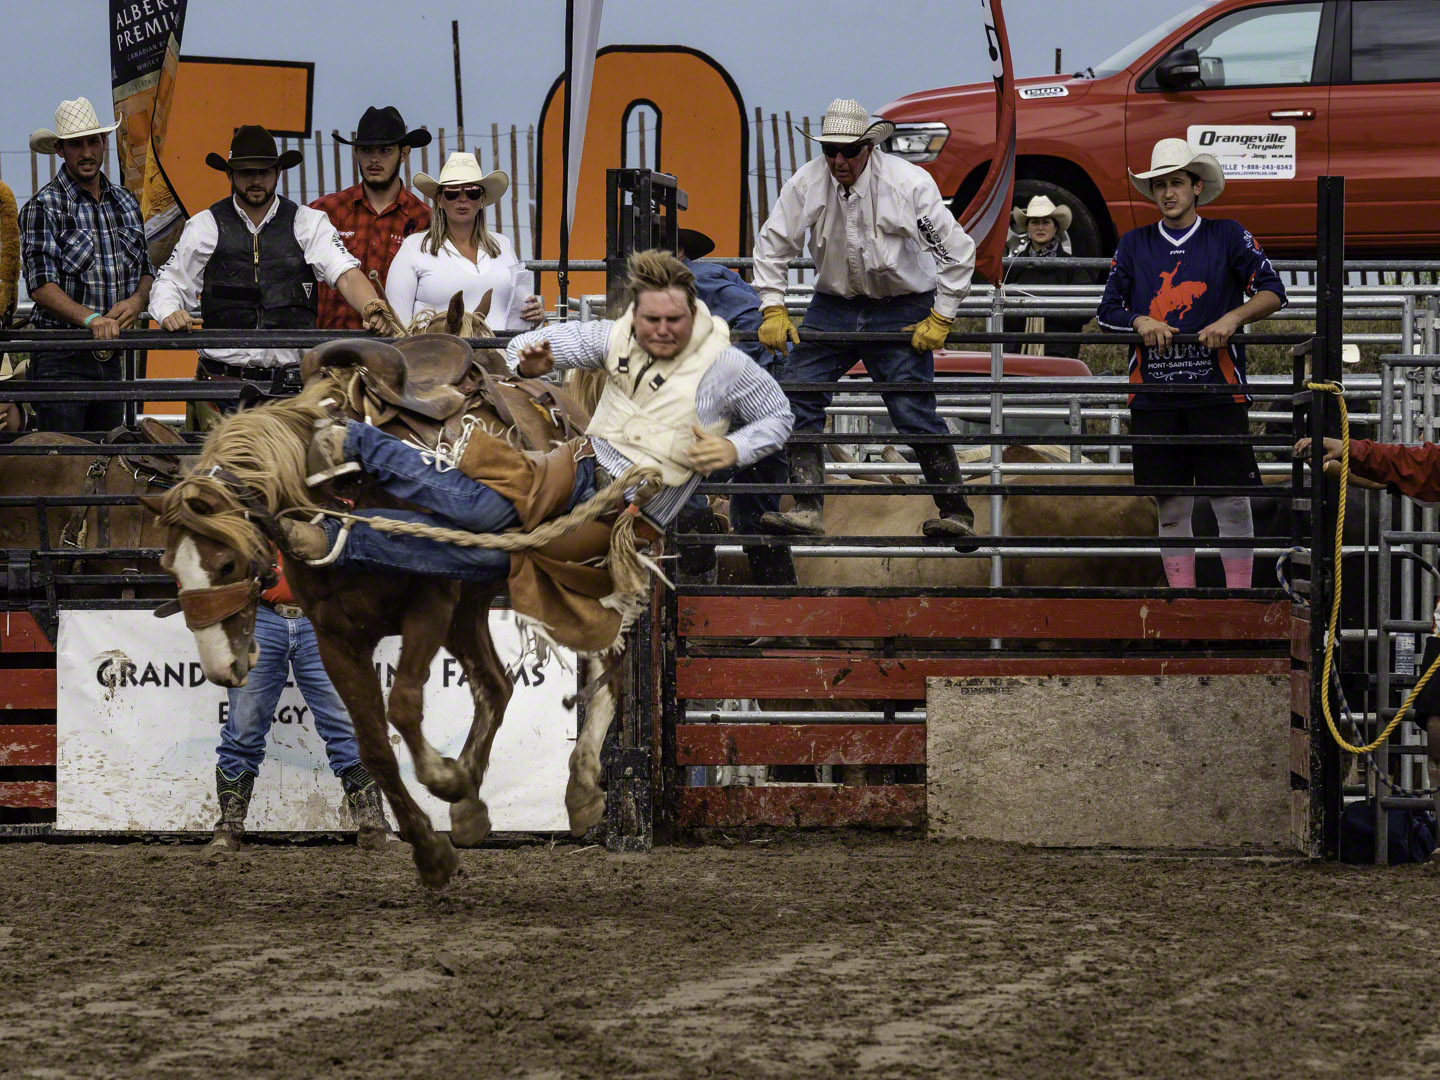
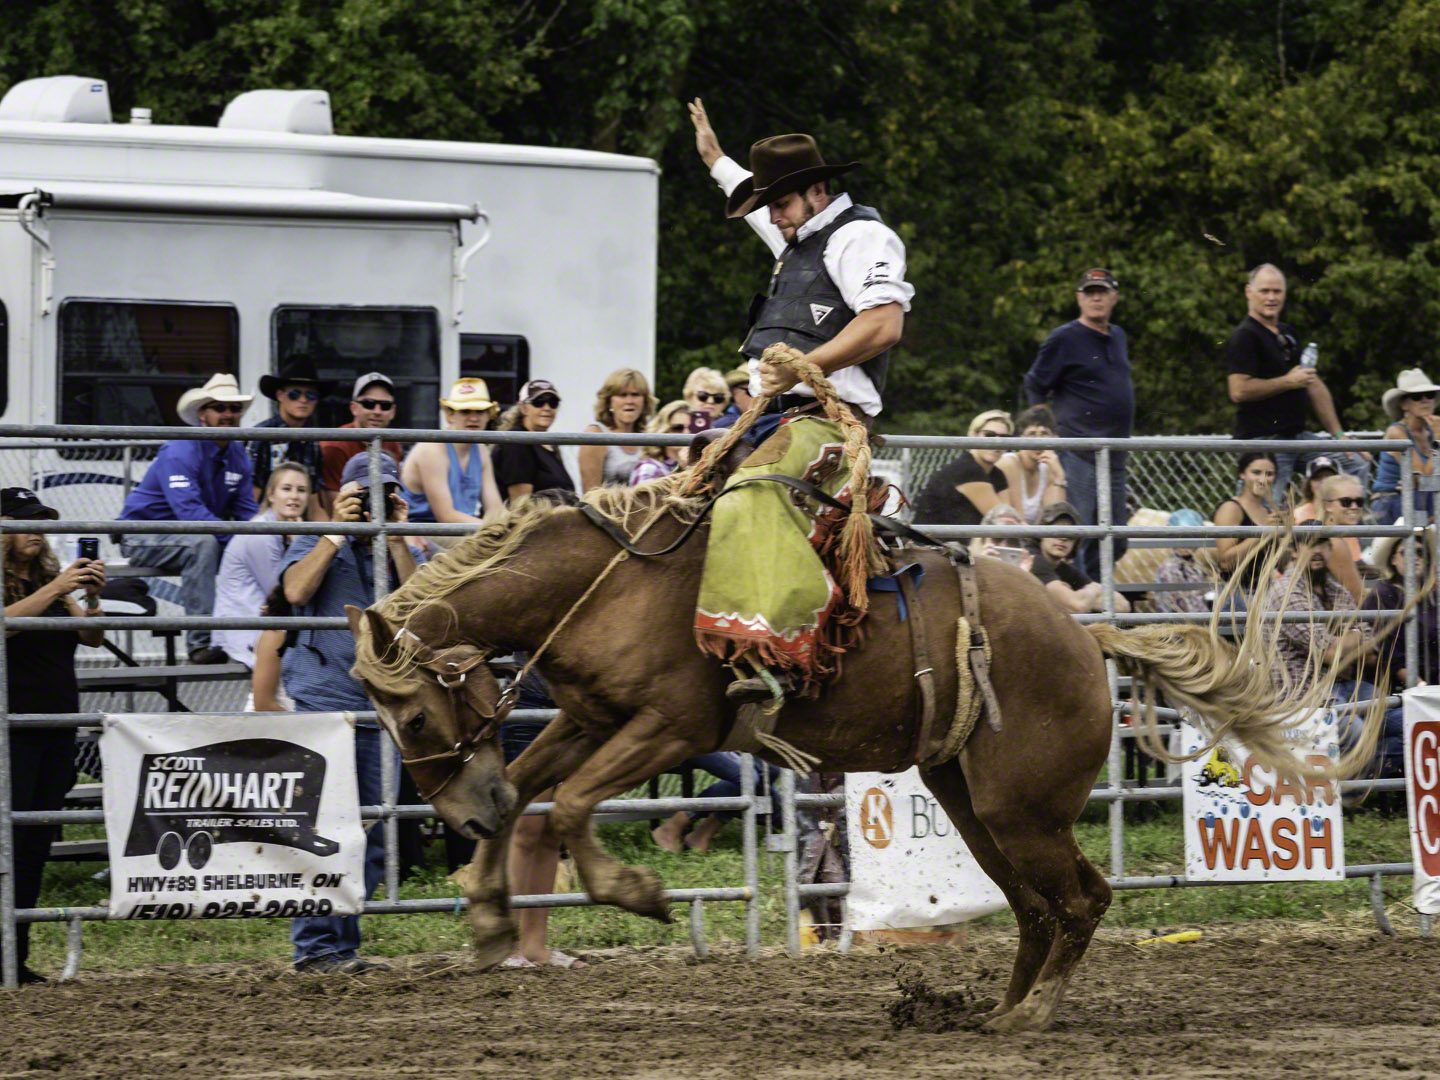
For my next full day of shooting, I took the camera and lenses to the Grand Valley Rodeo. This is part of the Dodge RAM rodeo series but it's a much homier and easygoing event compared to some of the larger ones. Organizer Ron Wilson and his team do a great job.
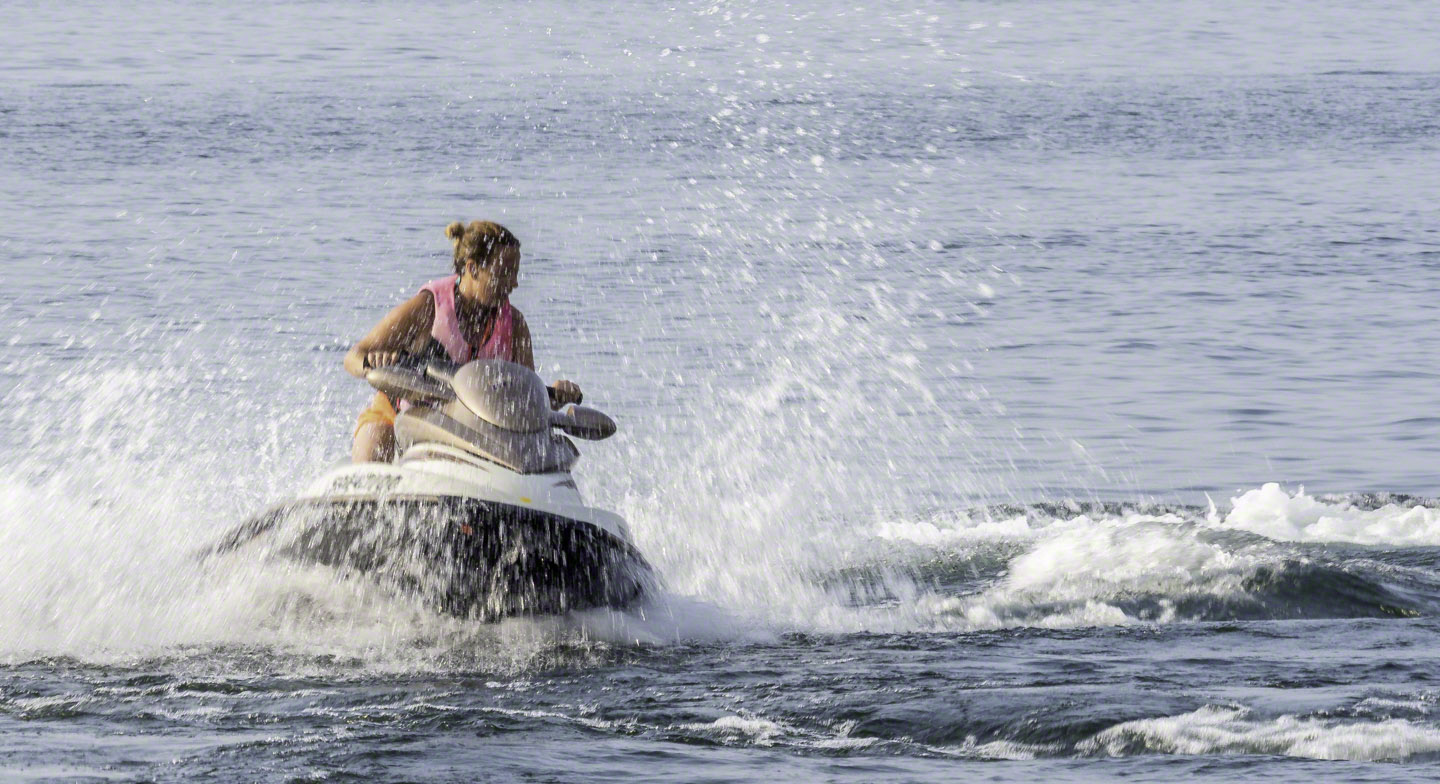
While I carried everything that Olympus loaned me, I only used the camera and 40-150 for the shooting day. If full frame cameras had an 80-300 f/2.8 that weighed as little as the 40-150 it would be the killer lens. I usually shoot rodeo with my 70-200/2.8L II Canon and the much smaller and much lighter Olympus lens fit the niche very nicely and afforded me that much more reach as well.
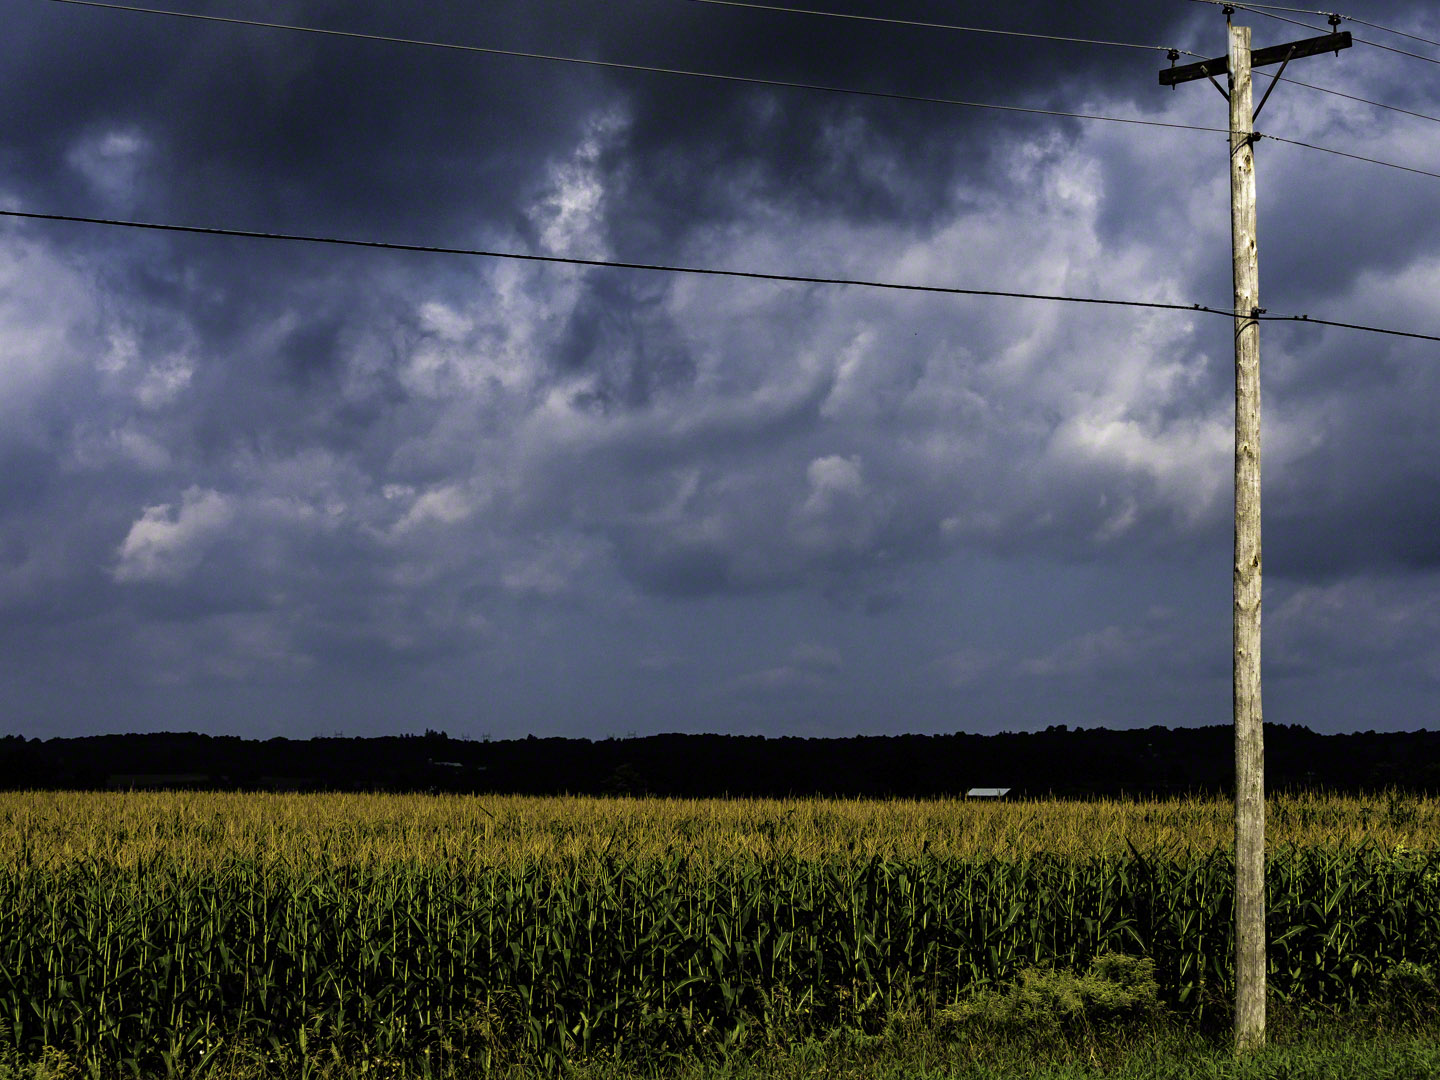
Let's dispense with the nonsense about noise right away. Shooting at ISO 200 most of the day, only going to 400 when the storm clouds came over, the images are both sharp and for all normal viewing, noise free. Only a photographer, using a giant screen, zoomed into 3x life size while checking the image from under a foot away would complain about noise, and those folks are crazy anyway. If you have been saying noise is going to be a problem with micro four thirds, I would say that in most conditions, you'd be wrong. Note the adjective most, which I will come back to in the ISO test section.
The Continuous autofocus is really accurate and the out of focus images were all my fault. I was shooting in single point as I normally do. The only thing that threw me off is that on every click of the shutter I would see a quick rendering of the image captured in the EVF. I needed to figure out how to turn that off. I have since set the REC Preview to off, which mostly addressed the issue and turned S-OVF on which fixed it completely. It's not really a complete fix, because you can no longer see adjustments in the EVF which is a tangible benefit of using an EVF in the first place. Maybe this could be addressed in a firmware update?
I also tried the tracking Continuous AF. I am accustomed to this with Canon's 1Dx Mark II and Nikon's D5. It works quite well but gets distracted easily if something enters the frame. Olympus could consider adding something like Canon's Case System to make this more usable. It got distracted enough that I stopped using it.
I was shooting in high continuous drive for the entire session except when I switched to shoot video. In the course of just over two hours of being on it all the time, I shot 1184 images, of which a dozen were 4K 30fps video clips with duration running from 30s to 2m. At the end of the day, I was at 35% battery remaining having started with a full charge. I only had the one battery, and I am very pleased with the Olympus performance. I have never gotten anywhere near this kind of image count out of any other mirrorless camera that I have tried. Please note that this is WAY beyond the published CIPA ratings for the camera so I sent a note out to my technical contact at Olympus. I have not heard back at the time of publishing. I would not coach anyone to plan on 1,000 shots on a single battery.
[EDIT - I have since spoken with a senior technical representative at Olympus. He has validated my battery experience saying that the CIPA ratings are very conservative. He indicates that the less you use the LCD, the longer your battery life will be on a charge. I don't chimp very much, mostly when i'm trying something creative or experimenting with exposure compensation, and this will contribute to the battery life that I saw.]
I will say that I need a battery grip. I like the low weight of the camera and lens, but I started to get some left hand pain from having to change my grip to accommodate the camera and lens on a stable cradle grip. This is not the camera's fault, more a result of pinched nerves in the wrist from an old accident. I also found that I was off camber a lot, something that I have noticed with other smaller bodies without a grip. Fixable through practice for certain, but that grip would make a difference for me.
I like that the lens does not get longer or shorter during zooming or focusing. The lens is not parfocal, but I don't expect it to be. A side note is that the lens hood design and mount is the best that I have ever found, it's just brilliant. Other makers should be looking to figure out how to do this for their own lenses.
This was the first time that I shot sports with the camera and in an ideal scenario, I would like a do-over please. I used settings that had worked at past rodeos with my Canon 1Dx Mark II and 70-200/2.8L. While I knew in my mind that due to the smaller sensor, depth of field at any given aperture would be greater than on the full frame sensor, that knowledge remained in its notch in my brain attic and while the images worked out pretty well, they all had way more depth of field than they needed and some were unsuccessful because the background was too sharp and therefore cluttered. For a pro switching to micro four thirds, this is a critical piece of learning.
The 15fps sequential high continuous shooting is nice. What's less nice is that it locks white balance, exposure and FOCUS on the first frame. So if your subject is racing towards you, you're going to get lots of shots but not necessarily in focus. If you want the camera to be checking focus, you should be selecting Sequential Low and performing menu settings in advance. This is different from most DSLRs and can trap the new shooter. It trapped me. This means that if you want focus checking on each frame, your maximum burst rate is 10fps. Nothing awful there, but not what you may have expected reading a brochure or hearing from a salesperson who does not know better.
On this day, I also shot a fair bit of 4K video, all of it handheld. I did not bring a rig, or an external microphone, and I used only the EVF for composition. The camera's very light weight made holding long clips very easy, although I admit my horizons were sometimes off as with the stills by my grip. Looking at the clips on the LCD revealed surprisingly good video and given the loud environment of the rodeo, the audio was not completely horrible either.
Importing the video clips into DaVinci Resolve 15 showed very nice looking video in the media bins and playback was very smooth without any jerkiness. All screwups were mine. A link to a compilation video is found at the end of the article.
The Third Shooting Day
It's starting to sound like I only used the camera a few times. Not so, but I did choose specific options to shoot with intent as part of the review, almost like they were assignments. There was other shooting but as it was not pseudo assignment driven, i did not include it as part of the question on whether you could do pro work with the E-M1 Mark II.
I tried shooting in the S-OVF mode for a bit which simulates an optical viewfinder. My personal preference is a viewfinder that is uncluttered and I thought that this might be a good option. It is an excellent option in a dark studio where the exposure simulation shows it being pretty darn dark until the flash goes pop. I did not encounter the focusing challenges that I found with the Sony a7R II not being able to find focus in a dark studio when set for a small aperture. Sony has since addressed this with firmware updates, but it made me nuts at first. Using this mode also addressed the being able to see my subject issue that I had with the Fujifilm X-Pro 2 in EVF mode, that was resolved by switching to the hybrid option.
Working outdoors in S-OVF worked, but I felt like I had lost something significant. In S-OVF, you lose the exposure simulation value proposition that allows seeing what exposure compensation is going to do before squeezing the shutter and whatever I was gaining in S-OVF was not worth what I was losing in achieving my "assignment". The self assignment was about seeing what was not obviously in front of me, and required me trying to influence the image captures with intent to push and pull exposure with post processing as part of the final deliverable. I wanted to apply some affirmations from a presentation by landscape photographer Robert Rodriquez as well as some Photoshop tips from a course by Unmesh Dinda. Back to the clean EVF view.
Pushing and pulling exposures gives you a very good sense of what the camera can handle. I was consistently working more than three stops away from the meter reading. Trying to shoot near wide open for shallower depth of field is also a different approach from what I am most used to. Because the crop factor of the micro four thirds sensor is 2x, when coming from full frame, you need to think about that in terms of aperture selection for depth of field.
For example, if I shoot the Canon 1Dx Mark II with a Canon 300mm lens set to f/5.6 with a subject distance of 10m, I will get a depth of field of 0.37 meters. If I want the same depth of field with the E-M1 Mark II, I need to use a focal length of 150mm (because 2x 150 is 300) and an aperture of f/2.8. See the factor of 2 here? In this scenario the crop factor is the number of stops I have to open to get the same depth of field. This made sense in my head so I ran a number of scenarios through Photo Pills and it was consistent. Thus if you are seeking very shallow depth of field with the micro four thirds sensor, you are going to need very fast glass.
Image Samples


Video Sample
I thought it would be fun to shoot some ad-hoc video with the camera. I did not have a rig, an external microphone or audio recorder. I had no tripod or monopod and other than choosing to capture in 4K UHD, I made no settings specific to video. In fact all that I did was turn the mode dial to the icon with old style cinema camera, and press the red start/stop button that is beside the shutter release. That's it. Even the microphones were on automatic levels. While this is hardly how I would normally shoot professional video, I wanted to see what the person new to video would get with only the most basic choices made. In my opinion, it's pretty darn awesome. Editing was done for time and content in DaVinci Resolve Studio 15. All I did was assemble the clips, trim them for length and put a 7 frame cross-dissolve between the clips. I did level the horizon in a couple of places for appearance sake and lower the volume of the audio because I saw it was clipping a bit given the significant volume changes in the scenes. No colour correction was done at all. I put in a title section and a scrolling section at the end and then ran it through the delivery engine for Vimeo. Vimeo's initial guidance was to increase the bandwidth used in the export tool for better quality 4K so I did that and re-uploaded the final video.
The Digital Noise Exercise
Every time I review a camera, I go into the studio with Sondra, my now famous mannequin head and shoot the range of ISOs that the camera natively supports. Extended ISOs are computational and processed entities, so for my purposes, I discount them in this area.
I shot the camera in the studio using a single Profoto D1 strobe in manual mode. The D1 was firing into a Deep Octa. Camera white balance was set to flash, which made the rear LCD JPEG look ok, although the images were captured only in RAW and thus had no predefined white balance. I used the 40mm - 150mm f/2.8 pro zoom at a native focal length of 57mm. Exposures were made at 1/200 of a second and f/18. I started with the base ISO of 200 and worked up in one stop increments to 25600. The Profoto strobe allows for very precise single stop increments of output, so I turned it down one full stop for each change in ISO. I could not turn it down enough for the ISO 25600 shot, and my Sekonic flash meter told me that I was over ⅓ of a stop on that shot, so I dropped the exposure on that image ⅓ of a stop in Lightroom. For those that are interested, the process version used is Lightroom Process Version 4.
All the images were imported to Lightroom where they were renamed to reflect their ISO setting. As I had a Color Checker in the frame, I used the white balance eyedropper in Lightroom to set a custom white balance on the first image and then synced it to all the other images. I did this rather than individually set the white balances for each ISO to see if there was any colour drift as the ISO went up. As you will see, there is.


Based on these results, in my opinion, the E-M1 Mark II is perfectly workable up to ISO 6400 and with some additional noise management, you could even manage shots at ISO 25600. There is a distinct colour shift to magenta as the ISO increases. This can be corrected in post processing of course, but emphasizes what we know about increased ISO. We gain digital noise, we lose colour integrity and we also lose dynamic range. This is particularly evident in the dark colour swatches that start to crush together.
The sample images are downsized to 1440 pixels on the long side, with JPEG quality set at 100%.
Pixel density is 9.06 megapixels per square centimetre. My Canon 1Dx Mark II has a pixel density of 2.34 megapixels per square centimetre. This makes sense as the megapixel count is nearly the same, yet the sensor size is ½ that of the Canon on the Olympus. Given this math, you could say that the pixel density would be similar as on a full frame sensor with a megapixel count of around 40.8. Consequently of this math, my conclusion is that the E-M1 Mark II has very fine resolution and noise control for the size of its sensor.
Conclusions
The premise of this article was whether or not a professional photographer working in the field could make the switch to a mirrorless micro four thirds camera and be successful. My conclusion is yes absolutely. You do give up on some high ISO capabilities and your native print size is going to be smaller than with a full frame camera, but I see these things as being addressable with planning and decent post processing skills. Could I shoot a wedding with this camera? Absolutely, and if I were doing combinations of stills and 4K video, this would be a great body to work with. I don't shoot weddings any more but a pair of these would have been a charm back when I was still doing that kind of work. I would want a couple of fast primes for wedding work however, to get that really shallow depth of field.
There's no question that mirrorless is pro ready. There's also no question that micro four thirds mirrorless is also ready.

Have an idea for an article or tutorial? Do you have a question photo or video unrelated to this article? Send me an email directly at ross@thephotovideoguy.ca or post in the comments.
If you're in Canada, please consider shopping with Henry's in your local store or at www.henrys.com If you're in the United States and shop with B&H Photo Video, please consider doing so through the link on thephotovideoguy.ca as this helps support my efforts and has no negative impact whatsoever on your shopping experience.
If you find the podcast or articles of value, consider clicking the Donation tab in the sidebar of the website and buy me a coffee. Your donation goes to help me keep things going. Email your questions on any photo or video topic and I will try to respond within a day.
I'm Ross Chevalier, thanks for reading, and until next time, peace.


