

Is Piccure Your Next Plugin Purchase?
/I was listening to a recent This Week in Photo episode #TWIP and heard about this plugin called Piccure. It was described as a tool to help correct camera shake. There's a 14 day free trial so I thought I would download it and give it a shot. NOTE : Since this initial review, I received some guidance from the manufacturer directly and applied it. I got better results. After reading this post, head on over to http://thephotovideoguy.ca/?p=1487 for the follow-on
Most folks know that Photoshop CC has a camera shake correction and it's quite good. Not everyone has Photoshop CC and sometimes a dedicated plugin can be the answer, particularly for people who do all their work in Lightroom. Piccure comes as a plugin for both Lightroom and Photoshop. At time of writing there was no support for Aperture.
Initially I feared that the tool would simply do some fairly aggressive sharpening, using a high pass filter style algorithm and punch the contrast up to make it look like it was correcting for camera shake. So for my tests, I used images that were already corrected in these ways and where extra sharpening and contrast would really make the shot look crispy.
I've netted this down to a single image for the sample pics in the article to make it clearer what is happening. Please know that I am not making my valuation based solely on a single image test. What is shown here is consistent with what I saw on all tests.
Piccure really does seem to do some significant math to determine where movement has taken place in the frame. The default settings of Medium for shake and middle ground for sharpening produced really horrible results with the test image. They were already pretty sharp. It's definitely doing something. I got a warning that because the image was large, it could take a while. While processing, all eight cores in the Mac Pro were quite busy.
For point of interest, the test shot shown has the following EXIF.
- Canon 1D Mark IV
- Canon 70-200/2.8L IS II
- 175mm, IS mode 2
- 1/400
- f/2.8
- ISO 2500
- EV +1 2/3
- Shot handheld, unsupported
When you launch Piccure from Lightroom, you do so as with most all other plugins. Right click, choose Edit In and select Piccure. The defaults are sRGB and 240 dpi. I reset those to ProPhoto RGB and 300 dpi as those are my common defaults. The Piccure window looks like this;
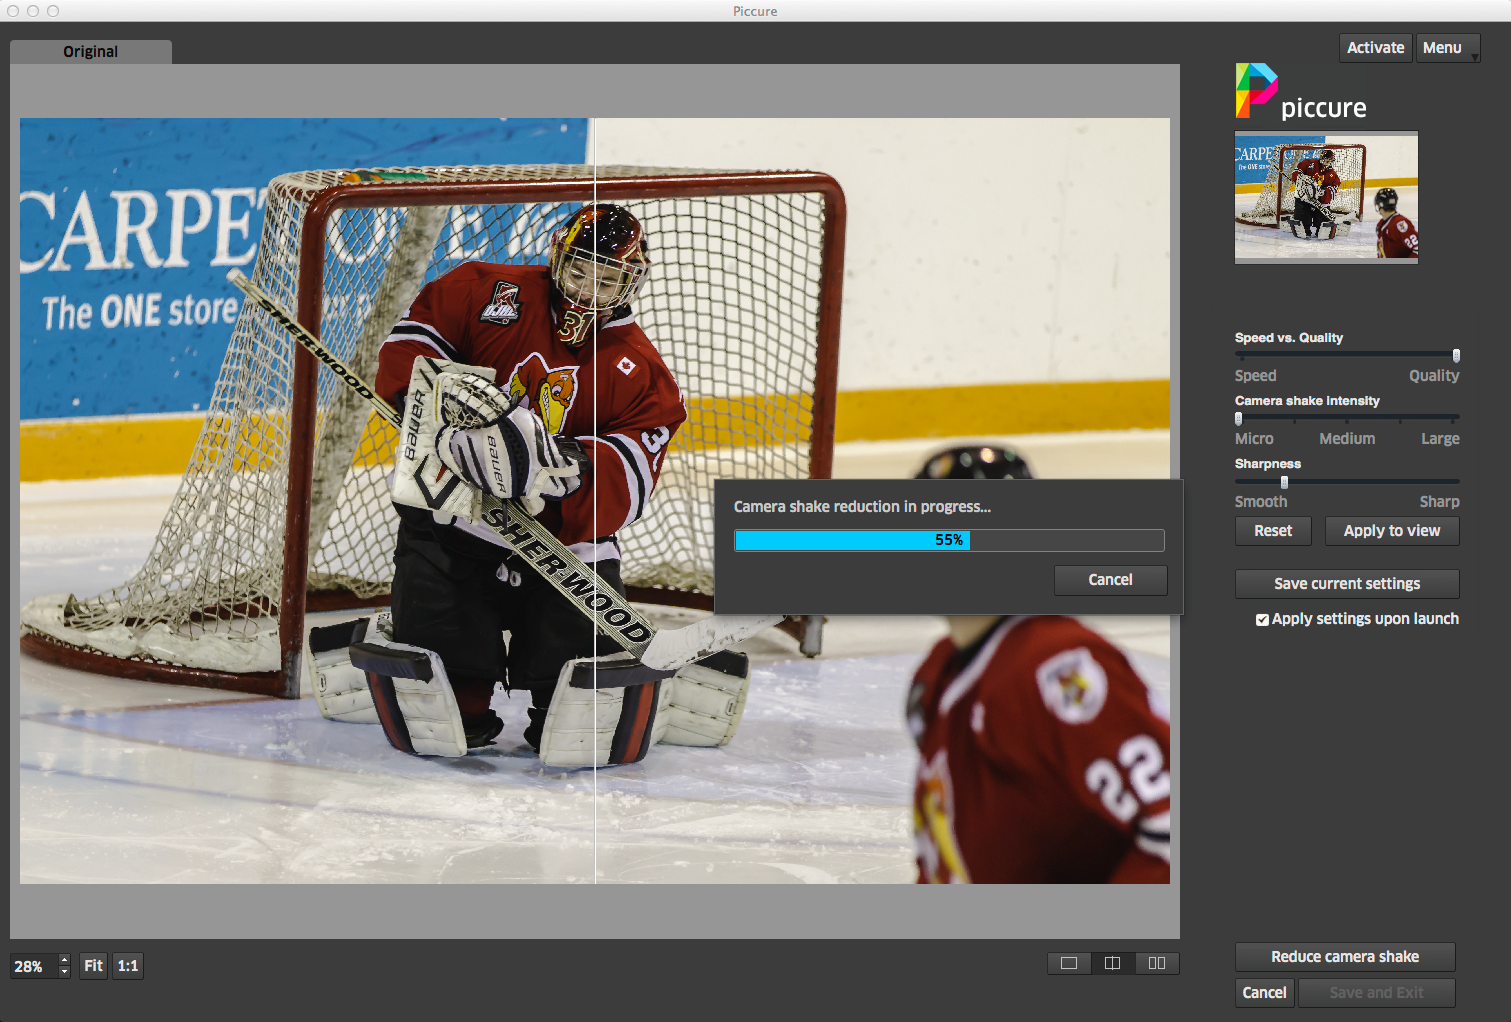
You can see that it gives you a look at what it's going to do, a processing indicator and three sliders. The first controls the balance of speed of work vs quality. Default is full quality. Second defines the amount of camera shake to correct for. Default is medium. Since there was near negligible camera shake, the results were ghastly. I've moved it all the way to micro correction. The third slider is called Sharpness varying between Smooth and Sharp. In every experiment I end up with this all the way over to Smooth to prevent edges you could cut yourself on, along with a lot of duplication.
In the second image, I've zoomed in to 1:1 and you can see the Piccure proposed fixes on the right side. The Canadian flag is nearly unrecognizable the goaltender's face cage is blown out and has black halos.
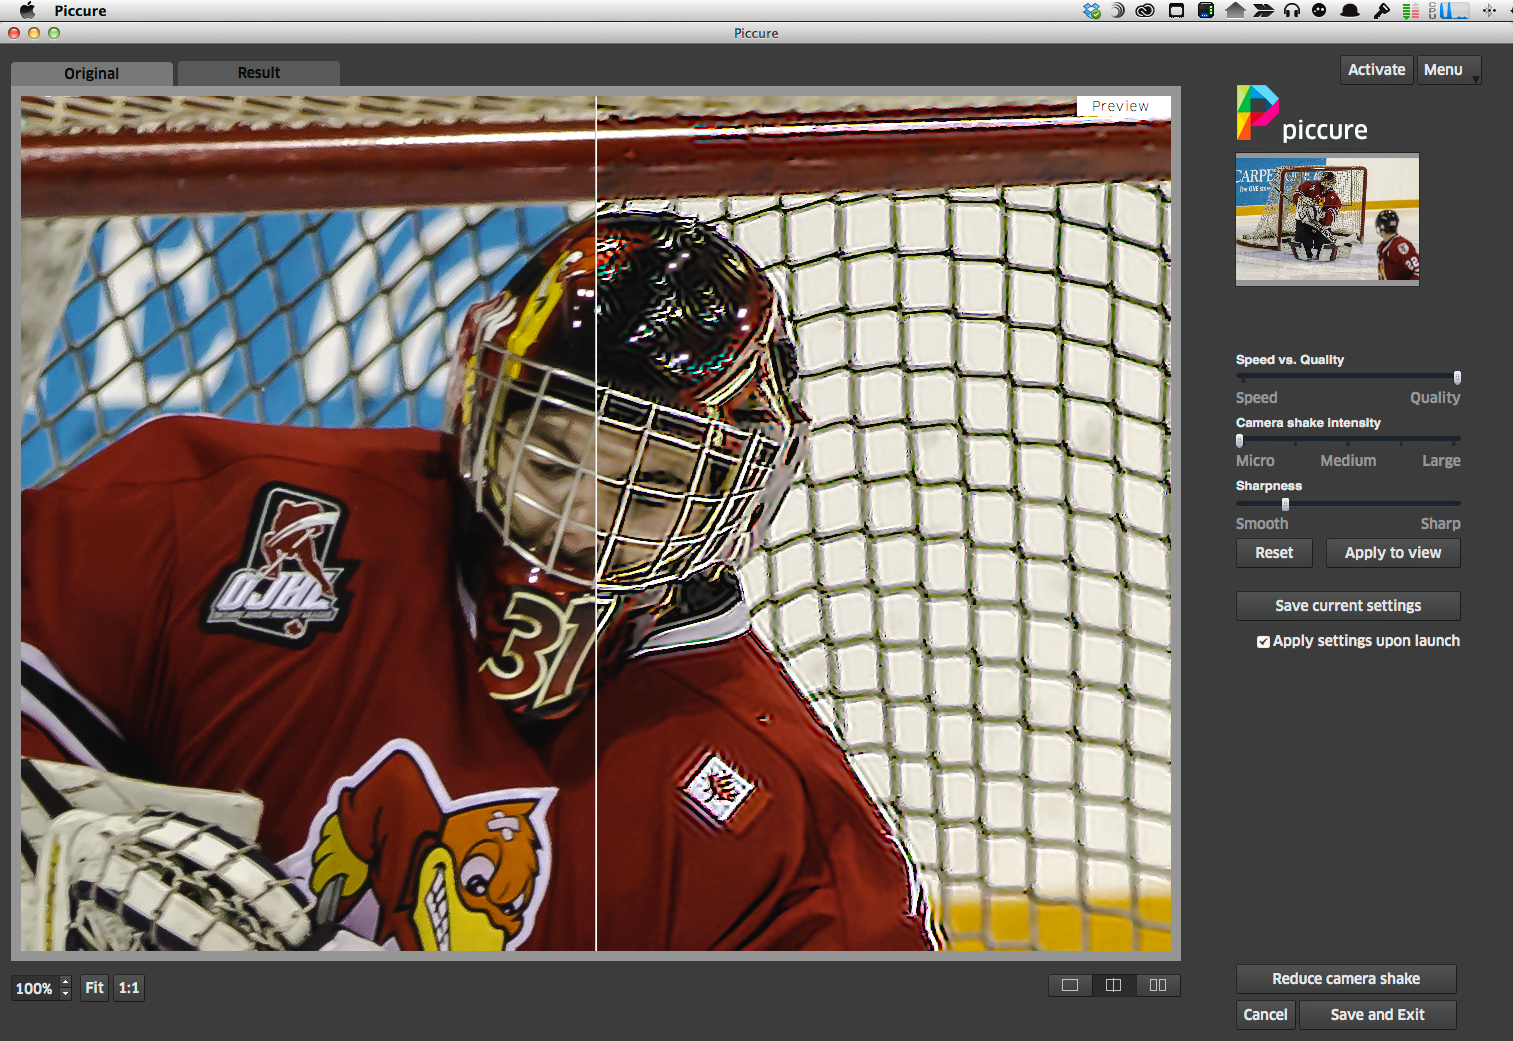
It's pretty brutal so I backed off the Sharpening completely. In the next two images, I've shifted the display to show first the goaltender's face "corrected". Look at how shattered the OJHL logo becomes in the processed side. Then I shifted the image to show the goaltender's face without the processing. The difference, even with the sliders for shake and sharpness backed full off is substantial. I admit I don't like what I am seeing.


I didn't give up at this point, but let Piccure do its thing. To my disappointment, the image is very edgy, the colour saturation is compressed, the contrast is way up and adjustments made in Lightroom have been crushed. You can see this in the next sequence. The first image is the export direct from Lightroom without using the Piccure plugin at all. The second is what came back to Lightroom directly from Piccure and the third is after re-adjusting the Piccure image.


I'm sorry to say that even while the Piccure plugin has done some camera shake adjustment, I feel like I've lost more than I've gained.
By now, you've figured out that I'm not really blown away by the plugin. You're right. For $80, I'd like less crispy and less overall image loss. I need to be fair, there was very minimal camera shake involved in the original image, but these are the ones I would want to tighten up. If the shot is blur city, it goes to the trash.
As a final point of comparison, here's the LR edit passed through Photoshop CC invoking the Camera Shake Reduction filter and returned to Lightroom before export. Consider that Adobe now has Lightroom and Photoshop CC for $10 a month. You can have both programs for half again what the plugin costs on its own. I hope the folks who make Piccure continue to enhance their product. I won't be buying a license at this stage. I can get better results using the tools that I have. Fortunately software is an evolutionary business and they can continue to improve. And perhaps Piccure is exactly the right thing for people who may not care to spend as much time in post-processing as I do, or who have more shake evident in their images.


