Tips to Make Better Photos : Shooting Hockey
/Shooting sports is not my forte. I shot soccer and football a million years ago in High School and have been shooting Polo for a couple of seasons. My friend Susan's son plays in the OJHL for the Aurora Tigers and I went out once last year to provide her some coaching support. This year was busy but I've been pushing to make time to attend local games. We're into the Quarter Finals of the OJHL playoffs and the action is great!

What I love about OJHL hockey is that the young players are really committed to the game and are NEVER going through the motions. I actually prefer this hockey to the NHL, but that's my choice. I can attend a lot of games at a very fair admittance price, get very close to the ice and shoot like a mad fool without being in the way of the other spectators. I have the good fortune of being able to attend local team's games as both the Newmarket Hurricanes' and the Aurora Tigers' home ice is reasonably close.
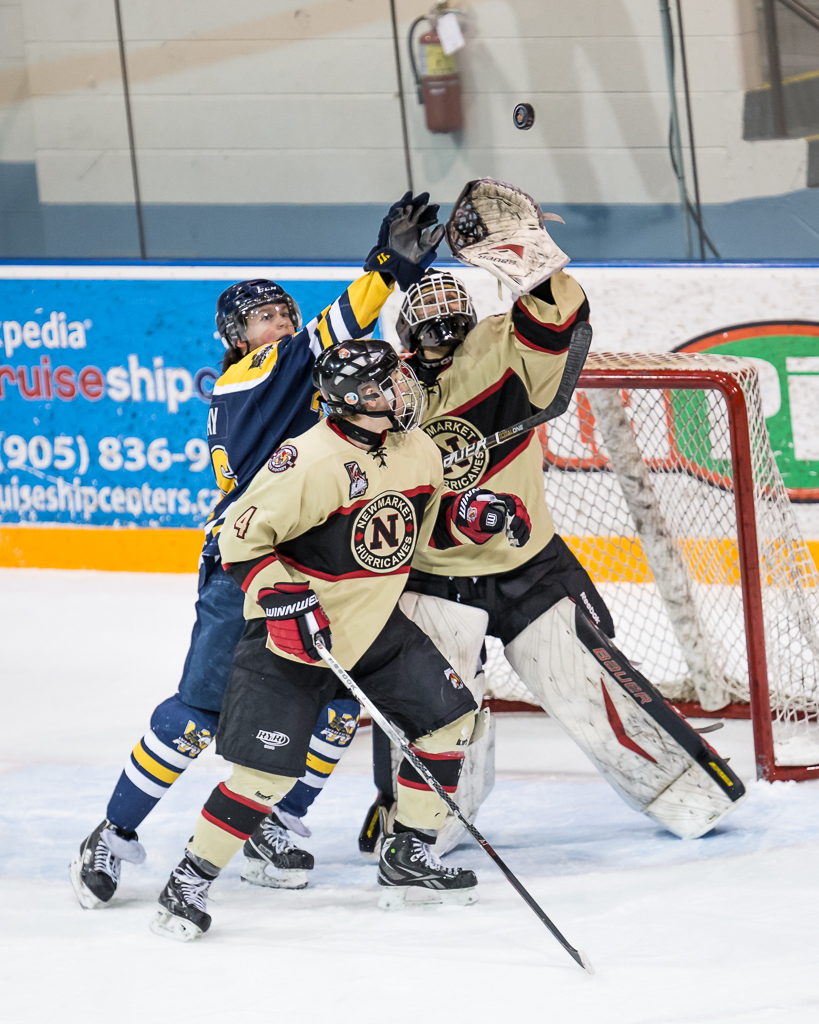
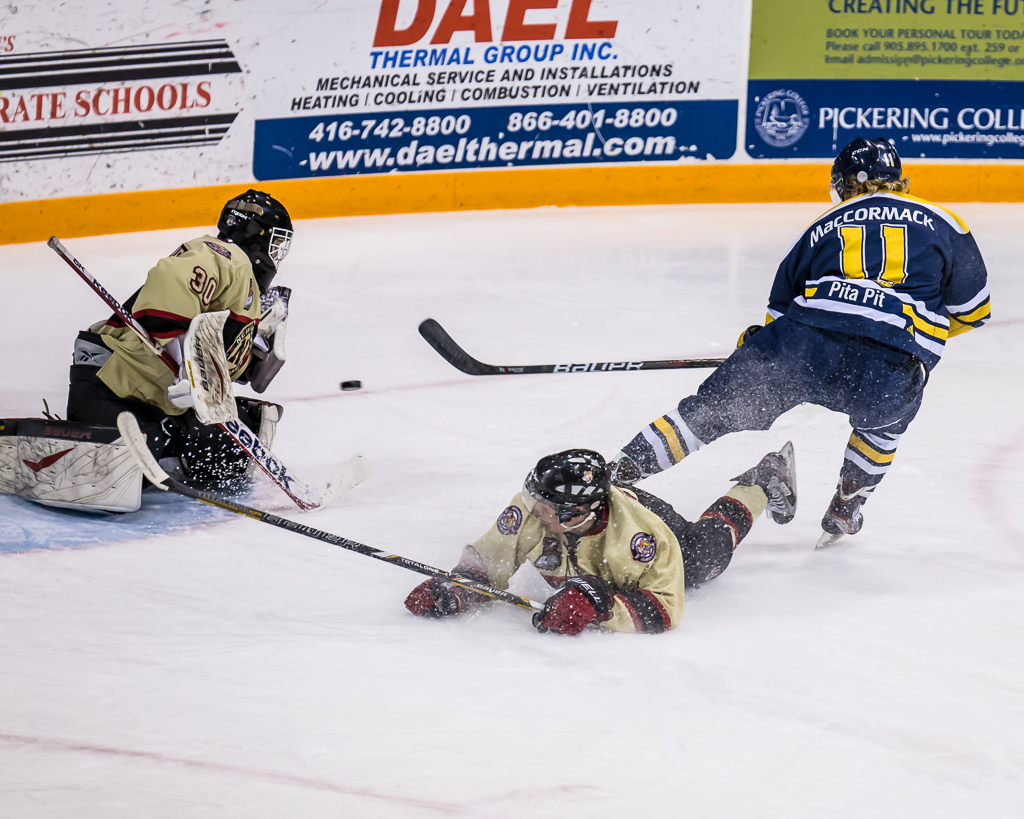
 These shots are from a recent game between the Newmarket Hurricanes and the Whitby Fury. I thought it might be interesting to share some of the things I have learned the hard way about shooting hockey. First, you have to know the game, at least to some extent. I surely don't know the ins and outs of hockey as well as my wife does, but well enough to set up for shots and to be continuously learning to anticipate where the puck will be, to paraphrase the Great One.

So to get started, one of the first things I learned is that the lighting in Junior hockey arenas is pretty horrible. It looks ok (mostly) to the eye but is a mess of colour temperature. In the Ray Twinney Centre in Newmarket, my friend Brian Watts, who shoots hockey professionally, warned me of the "red" corners. The ice looked fine to me live but once I downloaded the photos the span of white balance was all over the place. I have tried arriving early to do a custom white balance but that didn't work out well because of the amount of variance so now I shoot AWB and correct in post. The other thing about the lighting is that it is dimmer than you think it is. I've shot everywhere between ISO 800 and ISO 2500 and now go in with the ISO set to 2500 and live with slighter reduced tonal range and nominal noise. This is one place where the low light capability of the 1Dx blows me away.
 My shooting kit for hockey is as follows;
- Canon 1Dx in Av, ISO2500 EV, +1 2/3, Focus Tracking in Mode 6, AI Servo, Evaluative Metering
- Sigma 120-300/2.8 lens either wide open or f/4 and RRS lens plate
- Gitzo 3551 Carbon Fibre Monopod with RRS MH-02 Head
- Black Rapid HD Sling Strap
That's pretty much it. If I want "environmental" images, I put my Leica M9 with Zeiss 35/2 in my coat pocket. As much as I love the Leica, rangefinders aren't optimal for sports and the high ISO performance need in hockey rinks isn't wonderful.
 The 1Dx has Canon's new case based focus tracking module and I've tried all the different cases to shoot hockey. The 5D Mark III has a similar system and I find that Case 6 for subjects that are fast moving and change direction erratically works well for shooting with the long glass. I get a lot fewer missed shots because the AF is not transitioning in accordance with the game. In this mode the AF works with me, not against me. I can now say I understand why pro sports shooters love this camera. In fairness most all semi-pro and pro level gear has focus tracking of some type built in, but I find the Canon system so fast and so easy to use, I love it. I set a single focus point and follow the action, using the back focus button (AF-On) to enable the AF in advance so it's locked when I press the shutter. Obviously I have the AF set to AI Servo mode. I've tried spot, center weight and evaluative metering patterns and have gone back to evaluative. It's not perfect but nothing in a hockey rink is neutral grey so my experiment with spot metering linked to the AF point produced a disproportionately high failure rate.
 The Sigma lens is extremely sharp. There are Lightroom profiles for it and I give the Sigma folks credit for their design because the corrections are relatively small, the lens is that good out of the box. The only downside to the Sigma is that it is big. I mean really big. I'm no tiny guy, but if I had to handhold this glass for a full period, I'd need a chiropractor, a sports masseuse and bed rest. So I go with the Gitzo monopod and the Really Right Stuff MH-02 Monopod head. This head is AWESOME. It offers a smooth moving tile mechanism so I can loosen it off and have smooth but not sloppy tilting while panning with my body. This is a new monopod head for me and I'm looking forward to the coming
  Polo season as it will help a lot. By mounting a Really Right Stuff plate on the lens foot, I can have the foot in the LR clamp on the monopod and leave the Black Rapid strap with the Really Right Stuff FAB adapter attached at the same time. Very handy and very secure.
From a shooting perspective, I find arriving early at the arena and surveying potential shooting locations is critical. Most town arenas have pretty beaten up glass and shooting through it isn't optimal. You want to be close enough so you aren't cropping out 80% of the shot but also high enough so you aren't shooting partially through the glass. I can shoot manual but find that Aperture preferred works well for me. I set the lens at f/2.8 or f/4, depending on the available light and find in most arenas that with an ISO of 2500, I will get shutter speeds above 1/500 of a second. Yes the lens has optical stabilization and yes I am using a monopod but that doesn't change the fact that hockey moves FAST. In the sample pictures, I am able to mostly freeze the players yet in most cases, the puck is still blurred. I like this as it conveys the sense of action. You'll also note that by default I dial in +1 2/3 stops of exposure compensation to keep the whites from going grey. I tried just dialing in +2 but I kept running into situations at certain points on the rink where the shot just blows right out. I can add the 1/3 stop in post processing but if the important stuff gets blown out completely, there's no bringing it back.
Hockey is a blast to shoot. I'm starting to wonder what sport I will shoot when the season is over other than Polo. Junior hockey is a professional league and the OJHL is very supportive of photographers (no selling of images is the major rule). Many other sports leagues are very protective of photographic rights or are against photography at all where youngsters are playing. If your child is playing, it may be easier for you.
I'm hopeful that both my local teams go all the way. They have a wonderful rivalry and it would mean plenty of games for me to shoot before season's end. Many of the players I have photographed this year are going away to school on hockey scholarships next year, so we'll see a new group of players in the 2013-2014 season. If you want to learn to shoot hockey, your local teams are a great place to go shoot and you'll be supporting your local community.