Think Tank "Perception" Backpacks for Mirrorless Systems

Perception-Mirrorless-backpacks-low-res.jpg

If you've been reading my stuff for a while or have looked at the sidebar, you know that I am a huge fan of Think Tank bags.  Some might say that I am too big a fan because of the number I have bought.  I am also an affiliate so if you buy through my site, you help out The Photo Video Guy.  Which is cool, but let's be clear that I pay for my stuff, just like you do. I was just notified of these new backpacks designed with mirrorless owners in mind.  They look pretty cool and don't scream "expensive camera, please steal" like so many other vendor products.  Let's have a look.

Think Tank Photo just announced that its new Perception backpacks for Mirrorless systems are now available.  The Perception series comes in two colors, black and taupe, and three sizes.  The smallest size, The Perception Tablet™, accommodates a Mirrorless system and an iPad Mini. The largest size, the Perception Pro™, holds a 15" laptop and a 10" tablet, plus one Mirrorless body or small DSLR with a small to medium zoom attached (lens hood reversed).  Plus, the largest size fits four to five more lenses or a large GoPro® kit.

Perception Mirrorless backpacks low res

In addition, Think Tank is offering holiday specials on two of its most innovative products.  You will save 30% on its My 2nd Brain “mobile office” bags for Apple laptops and iPads and 20% on its Suburban Disguise full-featured shoulder bag specifically designed to accommodate standard-size DSLR systems.

Click here to be taken to the Perception Backpacks page

Click here to take advantage of the My 2nd Brain discount

Click here to take advantage of savings on the Suburban Disguise

Remember that when you order using these links, you will receive free gear with these and all orders of $50 or more.  And, as always, you receive free FedEx Ground shipping from Think Tank.

Real World Test : Canon 7D Mark II in crappy arena light

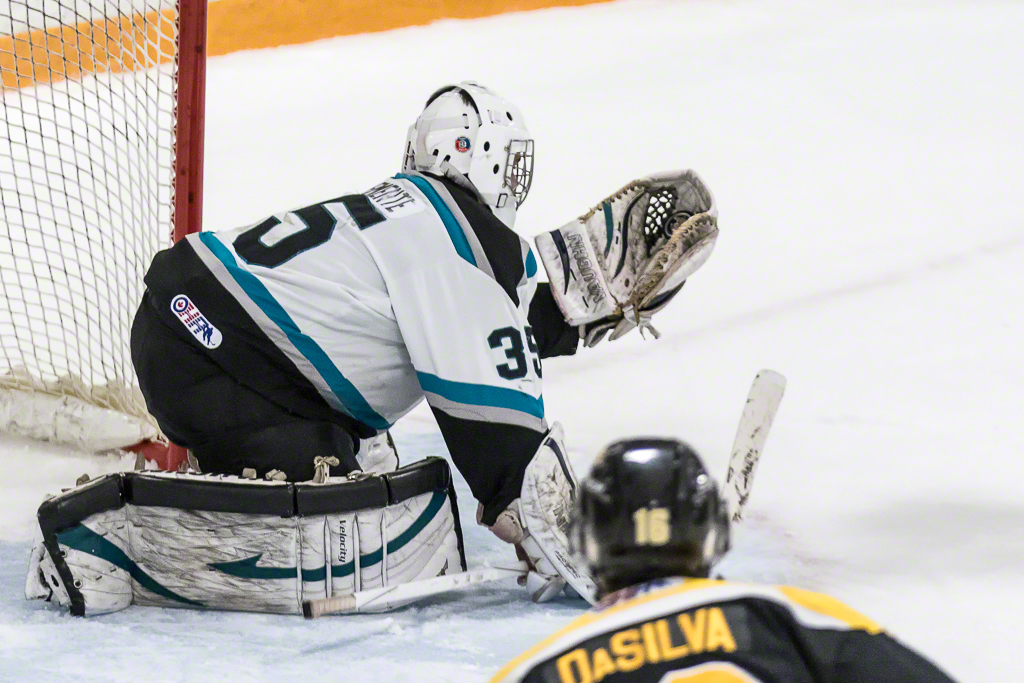
For this story to make sense, I must be clear on something.  I bought the 7D Mark II for two specific use cases, both tending towards longer lenses and both tending towards a preponderance of crappy light.  So you understand, the use cases for the camera are wildlife and sports.  Last night, I along with my good friend Will du Plessis, trundled off to the Aurora Community Centre to photography an OJHL match between the Aurora Tigers and Lindsay Muskies.  We both were shooting the 7D Mark II with the Canon 70-200/2.8L IS II.  To learn how the 7D runs at higher ISOs in horrible lighting, read on...Don't get me wrong.  I love shooting OJHL hockey.  The players really want to be there, work hard and are hoping to get picked for the minors or to head off to University on a hockey scholarship.  The arenas however, leave a lot to be desired from the lighting perspective.  This isn't the Air Canada Centre, the Aurora Community Centre is lit by banks of T8 fluorescent tubes which while white are not particularly bright. I never liked shooting my original 7D beyond 1600 ISO.  After that the noise became annoying and the contrast really started to flatten out.  When I did the test shots with the 7D Mark II, I found that it started to fall off badly after ISO 6400, so I went with the intent to shoot the whole game at ISO 3200.

The camera was set to aperture priority with the lens cranked wide open to f:/2.8.  ISO was set to 3200 and exposure compensation was +1 ⅓ stops.  I hope that this would give me decent enough shutter speeds to freeze action without turning every image into a grainy sack of mush.

Let me say up front that I am not yet acclimated to the 7D Mark II.  Enough has changed to put me behind the curve on it.  Some things are similar to other cameras such as the Case options for AF similar to those in the 1Dx.  When I shoot the 1Dx, I use Case 4 AF and did the same on the 7D Mk II.

My go to kit for hockey up to now has been the 1D Mk IV with a Sigma 120-300/2.8 stabilized lens at ISO 2500.  The Mark IV does a great job and the 1.3 crop gives me up to 390mm effective focal length, that I rarely use.  The 7D Mk II, has a 1.6 crop factor so with the 70-200 that should have ended up about 320mm.  First learning. For a recreational hockey arena where I want tight shots and not to have to crop away dead space more than 30%, 320mm is too short.  So next time out, the Sigma 120-300 is back on point.

The AF in the 7D Mark II is very fast.  It is not fast like the 1Dx but comparable in AF performance to the 1D Mark IV and that's very good indeed.  I was a bit off my game having not shot hockey in a while so I felt out of sync a bit and it showed in the images.  Shots were clean in the viewfinder and accurate on the LCD.

I shot in RAW (as I always do) and using a Sandisk 32GB Extreme card rated at 120 MB/s I never managed to fill the buffer.  I did find that high speed burst at 10fps was overkill and low speed at 3fps was inadequate.  Fortunately the 7D Mark II allows you to set your low speed burst rate.

I tried the anti-flicker setting on the camera.  I honestly cannot tell if it made a difference at all so next time I shoot without it.  I've also programmed the camera for back button focus only because I found that having focus on the shutter button resulted in extra frames because the trigger is a bit light compared to either of the 1D models that I have.

I set the camera to AWB and that worked out pretty darn well and left the Auto Lighting Optimizer turned off.  Never have found a real use for that since I tend to expose to the right most of the time.    Since I shoot RAW I don't worry about the colour space or picture style crap but I do set AdobeRGB and Neutral if only to get the LCD JPEG to look as much like the RAW as possible.

About 700 frames knocked two batteries in the grip down to about 75% so decent enough performance.  Shots on the LCD looked fine but Canon has changed the Info display and it no longer tells me the information I want to see the way I want to see it.  Instead they have replaced it with a scrolled display that shows all the JPEG setting cruft instead of the basic exposure info with a full sized image.  Those Canon folks build a nice camera, but they still do not understand User Interface.

The game was heavily dominated by the Aurora Tigers until the third period so I did not get the variety of images I would have preferred but that happens sometimes.

I pulled the CF card and put it into my card reader to import the images to Lightroom and to my horror, every image looked like it was on an acid trip to LSD World.  Arrrggghhh!  So I tried Photo Mechanic.  Arrrrgggghhh!  Then I decided to stick a fork in my eye and try to get the current Digital Photo Professional from Canon's site since Mac's don't come with DVD drives.  No problem so long as I manually TYPE IN THE THE FRICKING SERIAL NUMBER FOR EVERY DOWNLOAD!  Canon I have two words for you numbnutz and the first word rhymes with truck.  No one would actually steal your crappy software, so pull hard and reverse the cranio-rectal inversion you are suffering from.  Jerks.

Well that didn't work either.  But I knew that the 7D Mark II could save in RAW and to both cards and it worked, so I pulled the card from the Lexar USB 3 Card Reader on Mac Pro the cylinder and went down to the studio to try it in the Lexar Firewire Card Reader on Mac Pro the cheese grater.  Every image is just fine.  Hmmm

Is it the Lexar USB 3 reader?  Is it something in the new Mac Pro?  Is it some ghost in the machine?  I went back upstairs and put the SD card in the reader.  It has some RAW images on it.  They imported fine.  Hmmm I plugged the CF card into the reader again and checked again.  Everything is perfect.  Two hours lost in failed imports and assorted futzing about but it all worked the second time.  I still don't know why but have made a note to myself that unless I am in a rush, to use the cheese grater and push the RAW files right to the NAS and import them from there, rather than off the card reader.  Maybe the card is too fast for the reader on LR import.  Still don't know.

Anyhoo.  Lightroom does actually have a RAW converter for the 7D Mark II.  I am not certain that it is a GOOD RAW converter yet.  As yet, DXO does not have a RAW converter for the 7D, it's due in December.  I have found on other occasions that the DXO RAW converter does a better job than the Adobe one.  I did try Apple's RAW Converter with Aperture and I think it did a better job.  RAW conversion is a big deal to me, and even after post processing, I found the Lightroom files kind of flat, whereas the Aperture versions were better and with a lot less work.

So what about the noise?  Well when I did the studio test using studio heads in big light shapers, the 7D Mark II was excellent to 6400 ISO.  I was less impressed with it in crappy lighting in the arena.  For higher ISOs to look good, you need good light with decent contrast and I just wasn't getting that in the arena.  Noise at 3200 for hockey is about the same as the noise at 6400 with studio lighting.  Still a long way better than the original 7D, but not as good as I hoped it would be.

In fairness, I need to give it another shot.  I may take a trip to the Ray Twinney Centre to shoot a Hurricanes game.  The Hurricanes are my hometown team but the current owners are challenging and I gave up shooting the team about a year ago because for every nag with the Canes, the Tigers arena and people are welcoming.  Sadly the Twinney Centre has better lighting.  I will also turn that flicker thing off and try shooting with the longer glass to eliminate the need for so much dead space cropping.  I was hopeful to avoid the weight of the 120-300/2.8 and it's required monopod but I will give it a shot regardless.

I've attached a few images from the culled stack, none are awesome but they will give you a sense of what you can expect.  All images were processed in Lightroom for a minor exposure bump of +⅓, lifting of the shadows a bit, increased clarity, pushing the black point left and lifting the white point marginally.  Clarity and a bit of vibrance were added.  The image then round-tripped through Nik Sharpener Pro 3 and Nik Dfine 2 noise reduction.

Thanks for reading and until next time, peace.

Ross

TIP : Reduce the size of your Lightroom Catalog

My friend Jennifer is an avid photographer and switched to Lightroom about a year ago.  She came by because she said that things were horribly slow and that she had convinced her husband to get her a new Mac, but what could be done in the interim? I checked all the usual suspects and when launching and exiting Lightroom 5.7 with my usual optimize / backup checked, I had to kill the process after SEVEN minutes.

She had just under 8,000 images in the current catalog and it was over 3.2GB in size.  I went over to my Mac Pro.  My current in use catalog has about 32,000 images in it.  My catalog was under 500mb.  What?

Jen loves to experiment.  She'll try presets, and plugins and sliders to learn what they do and to push her creative bent.   I made a discovery that surprised me.  Lightroom saves your History into the Catalog.  I mean it has to save it somewhere, but I never thought about the "where".

So I did an experiment after checking that there was a solid backup of the catalog and confirming with Jen.  I went to the top of the Lightroom Catalog in the Library module and did an Edit | Select All to pick every image in the catalog.  Then I switched to the Develop module and from the Develop menu chose Clear History.  A dialog box popped up to ask if I wanted to delete the history for the current image or all selected images.  I selected all and then sat back to wait.

=== After I posted this, a comment was made that I missed a step ===

=== Not so ===

Lightroom did the work in the background, and in about five minutes, the Catalog had dropped to 1.8GB in size.    Exiting Lightroom was fast this time, exiting with a full backup and optimization in under two minutes.  The final catalog was even smaller after optimization.

So, if you find Lightroom is dragging, and your catalog file seems disproportionately large, perhaps consider clearing your history.

QUICK LOOK : Aputure Trigmaster Plus II 2.4G Wireless Flash Triggers

trigmaster-plus-II-500x380.jpg

If you are spending money on kit for photography, you know by now that there is a ton of stuff coming out of China to help you do what you want, often at a significantly lower price than you might expect. Sometimes, this stuff is utter junk, but the folks building products under the Aputure brand have been pretty consistent in delivering good value for your money for simple products done well.  That's also true for the Aputure Trigmaster Plus II.Thanks to Chris Atkinson of Henry's Newmarket for making a kit available to test.  The kit has two units, a belt case, batteries (in paired carry sleeves) and sync cables in a single box that sells for $129.99

That's a bit more than the Cactus V5 trigger set that I've written about in the past, but this kit brings so additional value that makes the difference more than worth it.  The cables alone, would cost more than that bought separately, and the packaging even includes the adapters needed to fire off studio heads like a Bowens.  Considering that this kit of two is less than a single Bowens Pulsar receiver, this might be a good deal for some users.

The Plus II name is a nudge to Pocket Wizard because at a glance, the units look like the old Pocket Wizard Plus II triggers.  Like a PW Plus II they stand vertically in your camera's hotshoe and like a PW Plus II these are completely manual triggers, meaning you set your own shutter speed and aperture and control power of your flash head manually.    Unlike the PW Plus II, each unit also has a standard hotshoe to trigger your mounted speedlite.  There is a ¼-20 mount on each unit which also acts as a cold foot.  Each unit requires 2 AA batteries to operate.

Each unit can be set for TX/RX (transmit/receive) or RX (receive only).  The three position power switch offers off, on and Super.  Off and On are obvious, Super is a special mode that is purported to extend the range of the radios to 500m.  I had no ability to test that range but in non-super mode, I can confirm that the units work through multiple walls, multiple floor levels and through metallic lined softboxes without any fail to trigger events.  Super mode supposedly is much harder on batteries.  It may also make your head glow, but as I said, I had no need to try it out at length because normal mode worked great every time.

The units each have a folding antenna and a simple channel selector. They are limited to 7 channels, vs the competitors 16 and 32 but this probably won't be a big deal for most photographers.  Setting the channel is easy.  There is also a Relay mode if you really need to reach far out and need to relay your trigger signal to another receiver.

What is very nice about the system is that like the Cactus V6 transceivers, the Aputure can be set to transmit in up to four separate zones, and you can then configure the receiver to be in the zone you want.  While there is no remote power control as in the Cactus V6, there is value in zone management, and the ability to send signals to only selected zones.  This is very handy when you have multiple flashes and are trying to check the exposure for each zone independently.

Like most of this type of radio flash trigger, the Aputure unit can also be used as a wireless radio trigger for a remote camera, but as usual, you need to order the cable for your camera.

The manual is easy to understand, with plenty of diagrams but if your eyes get challenged by micro-print, a set of magnifier glasses will be handy to have.  That the units are made in China is plain from all the Chinese characters on the box and in the documentation, but in the end the units do what they say that they will do and you can get to work quickly without having to study complex instructions.

I think that the Aputure Trigmaster Plus II kit is a good value for what it does.  Note that there is no TTL support, so flash exposure either becomes a series of experiments or a flash meter will need to enter the picture at some point.  They will get your flash off camera, but all your amazing automation will be gone.  If you're good with going all manual, then this kit is a pretty decent choice.  However, if you want TTL and automatic exposure control and you want radio triggering instead of the somewhat challenging line of sight infrared, get yourself a set of Phottix ODINs, or Hahnel TUFF TTLs or even <chokes> Pocket Wizard TT1/FlexTT5s.

Recommended so long as manual flash management is ok.  Image courtesy of Aputure

QUICK LOOK : Cactus V6 Flash TX/RX - despite all the pins these aren't TTL

cactus-V6-birdview.jpg

I've written before about the very excellent Cactus V5 radio transmitter / receivers for your hotshoe flash.  Great range, simple to use, and pretty much foolproof, so long as you understood power and exposure control were all manual.  Then a seminar attendee was telling me of his challenges with off camera flash and how things would be solved by his new Cactus V6 set because the salesperson told him that they had TTL.  Really?  For about $160 a pair?  I had to check this out.Let's get this cleared up right away.  There is NO TTL in the Cactus V6 units.  What there is, is some tech that profiles TTL flashes so you can control their output power through MANUAL settings from the transmitter.  That is actually quite useful for lighting dorks as as myself, but regular users want wireless flash that works simply and painlessly, and without the line of sight limitations of infrared triggering that is built into most camera / flash systems today. Folks who want this need to move along, because the Cactus V6 systems don't do that.

What they do, is build on the V4 and V5 units to include four zones, with each zone having individual power control from full down to 1/128 power with compatible flash units.  The flash unit list is decent and includes the usual Canon, Nikon, Pentax, Metz, Nissin, Olympus, and Panasonic suspects, along with Cactus brand flash units.  The devices can also "learn" many unprofiled flash systems and operate them as well.

The confusion comes from the hotshoes and the feet of the units.  They have multiple pins, just as you would find on a TTL flash.  In fact the single unit has enough pins that they interface directly with Canon, Nikon and Pentax without having to choose a specific model.

At first glance in fact you would think you could control the flash from the camera menu itself, especially since you are supposed to set the unit configured for Transmit to the TTL setting.  But when you try to access the external flash control menu, it tells you that there is no external flash installed.  Much frustration ensues.

You would also expect that with all those pins, the camera would know that there was some kind of flash signalling device telling the camera about itself and that would give flash ready indicators and maybe even set the proper sync speed.  Yeah you'd expect that, but over 70% of the time, the camera had no idea that the Cactus V6 was in the shoe, in TTL mode, powered up and ready to go.  In fact after futzing around for an hour to try to determine what magic sequence was required for the camera to know that there was a flash trigger present, I just gave up.

When you do get the camera to see the trigger, and understand that you are setting the power output manually across up to four flash zones, the units become reasonably usable.  They have a legible LCD panel, a decent menu system and easy to use zone controls.  I was working in my studio and the zone LEDS were so bright that they looked like red lights.  When I went to a much brighter room, I discovered that the red lights were actually letters, so that is even more useful.

I was very hopeful that the V6 would duplicate the incredible range of the V5 units.  Sadly they resemble the performance of the old V4 units, where while you don't need line of sight, a couple of drywall partitions were enough to stop the radio signal from getting through.  When I put the receiver with flash on it inside a Westcott Apollo Softbox, I had 30% trigger failure, possibly the metallic silvery liner impedes the radio signal.  I've never had that happen with the V5 units, or Canon's radio, or the Profoto radio, or even the ridiculously expensive and requiring of a blood sacrifice cursed Pocket Wizard TT1/FlexTT5 units.

Each unit runs on 2 AA batteries (not included) and comes with a little stand.  The unit can sit in a hotshoe or be mounted to a standard ¼-20 fitting on a light stand or tripod.  There is a very easy to use lever lock to hold the unit in place on the hotshoe, and I credit Cactus.  It's not beautiful but it is so much simpler and more effective than those silly knurled ring systems.  Units are sold individually (about $80) each and come with a quick "lighting options" guide and a tiny manual.  If your eyes are becoming more demanding, you will need magnifiers for the tiny print.

With an accessory cable, you can also use the Cactus V6 units as remote radio triggers for your camera.  So if you happen to need to trigger a remote camera, this could be a useful advantage for you.  My friend Bryan shoots pro wrestling, and it's an advantage to fly a camera above the ring and to be able to fire it from ringside on demand.  You can do this with other trigger systems, including the Cactus V5s just be sure to order the right cable for your camera.

The units have a USB port for firmware updates, but for most every photographer I know this is pointless since it is a Windows only updater.  I do understand that Windows has dominate marketshare overall, but more creatives I know use Macs instead of Windows.  So for me at least, this makes the update functionality completely useless.

Conclusion

While the multiple zones are very handy, and the ability to control output power from the camera across four zones, and potentially multiple TTL flash vendors sounds good, I'm not convinced.  I don't believe that the V6 system solves the flash control problem as well as the more expensive Pocket Wizard system and if you want real flash control from the camera, you are better off with Phottix Odin, Hahnel TUFF TTL or even Yong Nuo radio TTL triggers.  Price point is one thing, usability is another.  Not recommended at this time.

STUDIO TEST : Canon 7D Mark II ISO Performance

Ever since I received my Canon 7D Mark II, I have been itching to see what its real high ISO performance looked like.  I could have tried this with JPEGs but I just couldn't bring myself to do it.  Fortunately, the day I write this, Adobe has released Lightroom 5.7 and the latest Camera RAW that directly supports the new RAW format.  Let's see what I learned.Canon's 7D Mark II produces crop sensor delivered images that are approximately 20 megapixels.  Dimensions are 3648 x 5472 pixels per frame.  This is a standard 2:3 aspect ratio, the same as a full frame sensor.  File sizes at ISO 100 were about 21MB each growing to 35.2MB by the time I got to ISO 51200.  This isn't surprising because the greater amount of noise requires more data points so larger files. The Test Shots

I put the Canon 7D Mark II on a Manfrotto 496 ball head mounted to one of their carbon fibre leg sets.  Usually I use Really Right Stuff but sadly the L-Bracket for the 7D Mark II is backordered so far.  I attached a Canon electronic cable release to minimize camera shake even while on the tripod.  I have found microshake even on this tripod at shutter speeds as fast as 1/13 second, so it's a good idea that you always use a release cable when shooting slow speeds even on a tripod.

I used Canon's 85mm f:/1.2L lens for each image.  While the 85/1.2 produces stunning bokeh, the purpose was to test ISO performance so I set a middle aperture of f:/11 for every shot.  Once I had the depth of field I wanted, I set up the lights.  Because I knew I would be running the gamut from slow to fast shutter speeds, well past the camera's native flash sync, and not wanting to get into High Speed Sync complexity I decided on using continuous light, so I set up the Westcott Spiderlite TD-5 with an 18" x 24" softbox slightly up and 45 degrees left of my usual model Sondra.  Distance from the front diffuser to Sondra was about 2 feet.  On Sondra's left and 1 foot away was a Lastolite Trigrip Reflector clamped with a Manfrotto Spring Clamp mounted on a light stand, using the white/silver striped surface.  I didn't want a really punchy reflector, but more snap than plain white.

Once the light and reflector were placed, and Sondra was in position, I took incident light readings with the dome of the Sekonic 478DR placed at Sondra's chin and pointed at the lens.  I was taught this positioning by Frank Doorhof as this measurement will make the cheekbones just a bit brighter because of the relative distance from the source.  Frank was right, and now it's my standard practice when the light is above the subject.

Once I had my meter reading for ISO 100, I made the first exposure.  For each subsequent exposure, I simply doubled the ISO and halved the shutter speed.  I did check each change with the light meter to verify my math was correct.

The results were very good.  The 7D Mark II delivers a significant improvement in image quality at higher ISOs than the original 7D.  Since the camera will be used most aggressively by wildlife and sports photographers who often have to deal with crappy light, this is a real boon.

To be fair, while it is much better than its predecessor, it's not the high ISO performance you will get out of a Canon 1Dx, Nikon D4s or the respected Prince of Darkness, Nikon's Df, a camera I reviewed and continue to say you can shoot all day long at ISO 25600 and get really good images.

But, the 7D Mark II doesn't go near the price territory of those cameras either, and it's not full frame with larger pixels to deal with the lower light levels.

In the gallery attached you can see images where the only things that change are the ISO and the shutter speed.  Since it is all continuous light, there is no quality shift caused by different shutter speeds so you get a fair representation of the ISO performance.  I started at ISO 100 and by doubling the ISO at each frame got to the camera maximum of 51200 in ten frames.

You can click on any image to make it larger, and as you mouse over, a caption will appear to share the relevant EXIF data.  As I shoot OJHL hockey in arenas where the lighting is often questionable, I used to be concerned about pushing the original 7D past ISO 1600.  Based on this initial test, I am quite comfortable that I will be able to shoot at 6400 and get good images.  By reasonable post-processing, I am confident that I can really make the noise irrelevant.  The images posted here have only had two modifications done in post-processing.  They all have a common white balance set custom using a reading off the grey background, and they all have had the Lightroom lens correction for the 85/1.2 applied, not that it does very much at all.  No other tweaks were applied so this really is the RAW output exported as JPEGs 1024px long side at 72dpi for the web.

Conclusions

This is not meant to be a comprehensive review of the 7D Mark II.  It is a fairly comprehensive single light source test of the ISO performance of this body with a decent lens mounted to it and constraints placed on the camera position and the lens aperture.  Reviews of any kind are always subjective, and in my opinion, the photographer who shoots, Canon, and wants a tough high performance DSLR body with a crop sensor, and who also needs really good low light performance will not go wrong with a 7D Mark II.

Next test will be video, and it will be a bit unfair because the comparison will be with my original 7D hopped up with Magic Lantern video firmware.  I will keep you all posted.


The Size of the Light - Thoughts on the Big Octa

BigOctaC1-005.jpg

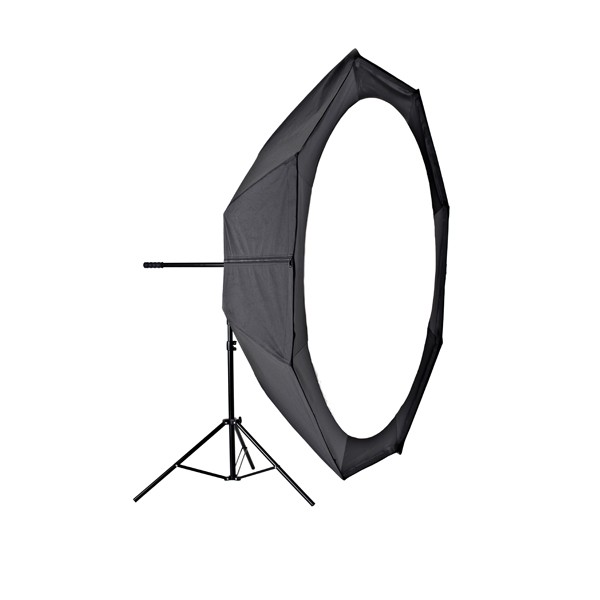
When I first started learning about lighting a long time ago, my master (I was an apprentice and he liked being the master) said it very succinctly, "big light up close is good light".  Of course there are  situations where this could be untrue but since I've been tagged as a  lighting geek, I've found that most of the time he was right.  Later, when taking a class with Joe McNally, I asked the dumb ass question, if you could only have one light with one modifier what would it be, he said "big octa"  Then he showed the class why.  This past Sunday, I did a seminar at Henry's Newmarket on getting started with studio flash and I demonstrated a bunch of modifiers.  But due to time and space, I didn't show my favourite.  One of the attendees had heard me speak about the big octa in the past and asked why it is so good.A big diffused source, in close makes for very soft light, but not necessarily flat light that is boring as all get out.  It has dimension and almost a flavour to it.  So the last couple of evenings, I made some space in the studio and erected the Bowens Big Octa.  It's the first really top end soft box I ever bought and while it is large and cumbersome, the light is just magical. bw1650_octo150_front_three_quarter_shot_3Bowen calls this modifier the Octo 150 because it is 150cm across.  Unlike my Elinchrom Deep Octa (called the Deep Throat in Europe, I guess NA is too PC for that) the Octo 150 is a relatively shallow bowl shape as you see in this image.

So that's a five foot in diameter octa box.  It's large and a bit heavy.  You can see the manipulator arm coming out of the back of the mount as well.  This is important because the studio head is mounted inside the Octo 150 and fires backward into the bottom of the bowl. The area around the mount takes a white reflector panel to prevent hot spotting off the internal silver reflector.  This then bounces the light around and out the single front diffuser.  As you see in the image, the white diffuser is a perfect circle, masked away from the octa frame.

Bowen say you can mount any studio strobe in this Octo 150.  Yes, but you need the proper mount adapter for your strobe.  Mine came with, as expected the Bowens S Type mount for the head.  The sample images herein were all shot with a Bowens 500 Pro head with PW Radio Receiver.  The head power was controlled with Bowens IR remote by peeling back the front to make changes.  I kept the modelling lamp off after positioning to keep the heat down.

So why does a big source matter?  There's this thing I hear that light from a big source "wraps around" a subject.  Light doesn't actually bend unless in the presence of a gravity well much bigger than you will find in your studio, but the giant bowl makes for lots of different angles of incidence exiting the front diffuser to give the appearance of "wrap".  All those different angles of incidence also produce a softness you cannot get from a smaller source.

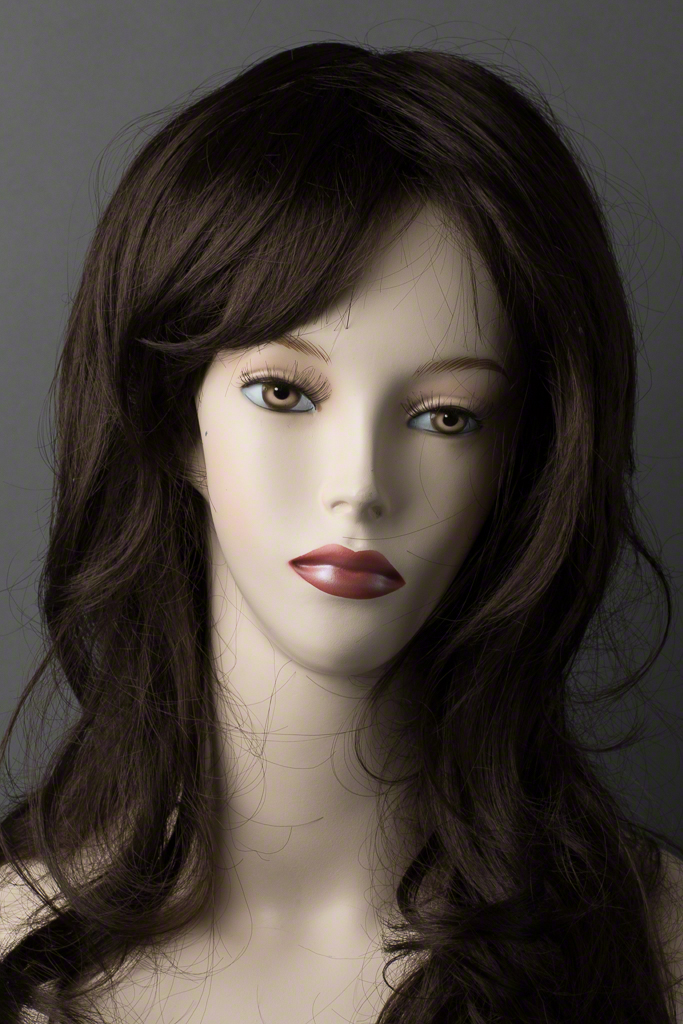
So I asked my regular model Sondra if she would sit for images from the big octa.  As usual, she was completely silent but held the same facial expression for every shot.

1Dx 70-210/2.8, face 3 feet from front of Octo 150

1Dx 70-210/2.8, face 3 feet from front of Octo 150

1Dx 70-210/2.8, face 3 feet from front of Octo 150

1Dx 70-210/2.8, face 3 feet from front of Octo 150


Sondra has very dark brunette hair but one of the real benefits of the big octa is that you get wonderful range of colour tones without having to use masks or over expose the shot.  All these are out of camera as RAW tethered into Capture One and exported as 1024px JPEGs at 72dpi for the web.  No other processing was done.   I moved Sondra only marginally and the Octo 150 not at all, primarily myself and the focal length to obtain different looks.  Even in her painted on eyes you can see the lovely round catchlight from the big octa.

The other benefit is the quality of the shadows.  We want shadows because they give dimension, but the enormous size of the source makes the shadows less harsh and there is a much wider tonal range available across the shadow range.  The big source also has a softening effect overall making it ideal for portraits.

You can certainly do full body shots with a big octa, it has the range to give you reach.  This was powered to factor 4, where the Bowens 500 Pro goes from 1 to 7 so this was three full stops under full power and even then I was getting between f/11 and f/13 depending on the position of Sondra.

The camera was of course in manual mode, which is how I always shoot studio strobes except for the my Profoto B1 Airs that do very good TTL.  I used a Sekonic 478DR flash meter with the PW trigger built in to pop the flash and take meter readings.  I know that you can get to a good exposure with no flash meter in a couple of shots with experience, but I like the convenience and speed of the flash meter.  McNally never uses one, but another teacher of mine, Frank Doorhof swears by them.  For big flash I find them handy.

If you shoot portraits against a neutral backdrop with the intent to put your subject on a different backdrop in post processing the incredible softness of the big octa also makes the placement on a variety of different backgrounds more simple because you are fighting to correct heavy shadows or light that is too harsh.  Back in the day when I apprenticed and backgrounds were stripped out of the transparencies so other backgrounds could be placed, the photographers always went with big soft lights, mostly big white umbrellas in those days, to make the lift more simple.

The Octo 150 is Bowens' version.  Every major studio modifier maker has their own big octa.  Elinchrom does a reverse firing one like the Bowens and Profoto also has a giant octa.  No matter what studio head setup you choose, a big octa is going to produce incredible light quality and you will get great return from the investment.

REVIEW : Canon C300 Dual Pixel Auto Focus (DAF) Upgrade

key_visual_c300.png

I am not a professional videographer.  On my best days, I might be an amateur, but I do try.  Like many folks making videos, I have struggled with the size of my crew, given that it has a count of one, and since I do reviews and training, I am often the camera operator, the director, the producer and the alleged talent.  So when Canon announced the ability to make my loved C300 do useful and speedy autofocus, I gave it serious consideration. Classic camcorders were said to focus really fast.  Not really, they actually used really tiny sensors so any aperture delivered massive depth of field so the focusing effort was minimal.  Not so professional gear that uses DSLR or CINE lenses.  Professional crews have an operator and a focus puller so precise these lenses can be, particularly when they have very wide F or T stops.

But if you are a one person crew, that becomes challenging, particularly if you are also the talent.  The C300, out of the box would actually do autofocus using a select number of Canon's EF-S STM lenses.  STM lenses are silent during focus which is critical for noise control and most of them are of sufficiently good optical quality to produce decent images.  They aren't L glass or Canon or Zeiss CINE glass by a long shot but can help get the job done.

I had been using the STM 18-135 for the one-ups where I was all the parts of the video.  It worked ok, but as I tend to move while presenting there were times it had to work to keep up.  After seeing a C300 with the DAF upgrade and playing with it at a trade event for 10 minutes or so, I decided to bite the bullet and get my own done.

Canon Canada's Service Centre was excellent.  They were friendly, helpful and fast.  I got my camera back in less than seven days.  Once I got it home I put the 18-135 on it and tried a few takes.

The AF is now much faster, more accurate and more usable in real world production.  It looks to the centre of the viewfinder display and shows a rectangle where the focus function is looking.  You can lock focus to hold it during a move, slide or pan if you need to, just like on a DSLR.  I set mine on continuous AF and then sat down at my little set to record a test shoot of a product review.

Despite the head movement and waving of hands, the camera did a much better job at maintaining focus than in the past, so long as I did my job and stayed in the AF area.  In a previous firmware update, Canon had significantly extended the usable range in low light and coupled with this new AF, the camera is even more flexible than it was out of the box.

You can of course turn AF off whenever you wish to, but when it helps, it really helps to have this level of performance.

All new C300s have the modification done at the factory.  The prices have also come down since I got mine.  Ah well.  Some will say that the Canon CINE line is overpriced for what they deliver, but I bought mine with eyes wide open and following adding the DAF upgrade, I think that I will get even more usable life out of the unit.

The DAF upgrade costs $500 and is available for Canon C100 and C300 CINE cameras.  You must return your camera to Canon for the upgrade.

I recommend it to all C100 and C300 owners.

(image courtesy Canon USA)

REVIEW : Nissan MF18 Ring Flash

HenrysMacro-020.jpg

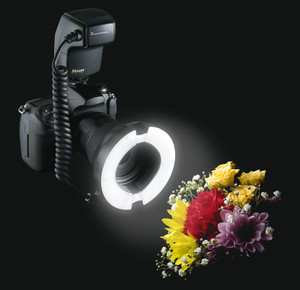
mf18_mdling_2Close up and macro work usually also means some form of supplemental light for adequate depth of field and shutter speeds that don't last until the next ice age.  I was kitting up to do a Macro Photography seminar at Henry's Newmarket and asked Store Manager Chris Atkinson if he could bring in some ring flashes for demonstration and potential sale.  I specifically asked about Canon's MT-24EX because I like the idea of positionable heads.  Then I saw the price tag, and that rings to fit my lenses would be special order because they don't come with the unit and I just gave up.  I already knew the MR-14 EX II and it's ok but overpriced.  I own a Sigma EM-140 that is getting long in the tooth and is not exactly intuitive.  Chris surprised me by getting the Nissan MF18 for both Canon and Nikon.First up, these aren't cheap LED rings, they are serious flashes with TTL support in addition to A mode and Manual.  There is also a fine Macro mode where you can dial the power down to 1/1024 output. mf18_fbUnboxing revealed a solid ring connected by heavy coiled cord to the shoe mount controller packed in a padded case.  Pleasantly, rings for most all lenses are included in the box, including 52mm, 58mm, 62mm, 67mm, 72mm and 77mm.  You can order 49mm, 55mm and 82mm if you need one of them.  Since I use both Canon 100/2.8L and Canon 180/3.5L macro lenses, I was covered without needing to order anything special.

The ring light itself consists of two curved and diffused flash tubes, supplemented by LED modelling lamps.  The ring comes closed as a ring but can be expanded by releasing a switch per side, widening the coverage area.  This could help with vignetting issues but also spreads the light out more.

HenrysMacro-019I was most impressed by the Quick Manual.  It is two pages long and covers everything you need to know in a clearly laid out document.  The Japanese to English translation is good enough.  I was more pleased to find that the unit was actually manufactured in Japan.

The battery door threw me for a second, because it doesn't hinge, it is part of the removable battery tray.  Very elegant design there but watch the icons as the batteries go into the tray all pointing the same way not in the typical four way opposition.  Nissan makes extra trays available which would be very useful for scientific or forensic applications where you may be burning through a full charge in one outing.

The main controller is small and feels robust.  It is plastic but the kind of plastic that feels good, not the kind that feels like it will fall to pieces if you breathe on it wrong.  There is a simple on/off switch, and a four-way rocker switch with a Select button in the middle.  Above this is a bright and easy to read LCD panel.

lcdpanel_nAs good as the quick manual is, you don't need it because the Nissin people have built a stunningly good user interface on this unit.  Canon and Nikon could stand to check these folks out, the UI is that good.

I quickly set the unit to TTL mode and mounted it to my 1Dx with the 100/2.8L lens on it.  Attaching the 67mm ring is fast, although it will not take a lens cap when screwed on.  The flash tube assembly attaches with two spring released clips, similar to the Sigma and Canon alternatives.  Fit is solid but still allows the ring flash  to be easily rotated.

This is very important because once in flash mode, the four way rocker allows you to control flash exposure compensation on one axis and flashtube power ratio (A:B) on the other axis.  Having used other products, I am still amazed at how simple the Nissin folks have made the unit to use.  Being able to ratio the two flash tubes allows for the showing of dimension more than perfectly flat light would.

Power steps in 1/6 EV increments from full to 1/64 power in all modes except Fine Macro which goes all the way down to 1/1024 power.

Exposure compensation is +-3EV in ⅓ EV increments.  As much variability as most anyone will ever need.

HenrysMacro-034You can also set your preferred TTL exposure and keep that if you like something other than 0:0 and for Canon cameras that support it, you can set 2nd curtain sync.  Not even all Canon flashes activate 2nd curtain sync so this is nice to have when you want to blend ambient with flash.  HSS (High Speed Sync) is also supported.

You can even use the MF18 as a Master flash in a Master/Slave relationship and use it to control Slave flashes that support the Canon or Nikon systems using infrared.

I was shooting in landscape mode and flipped the camera up to portrait mode for a shot and when I glanced at the controller LCD panel, the display had detected the change in camera orientation and re-oriented itself, just like your smartphone does.  Hey Canon, your 600EX-RT should do this.  And have as usable a user interface.

The unit is firmware upgradeable and includes a proper X-sync port as well as a connector for an external power source.

How Does It Shoot

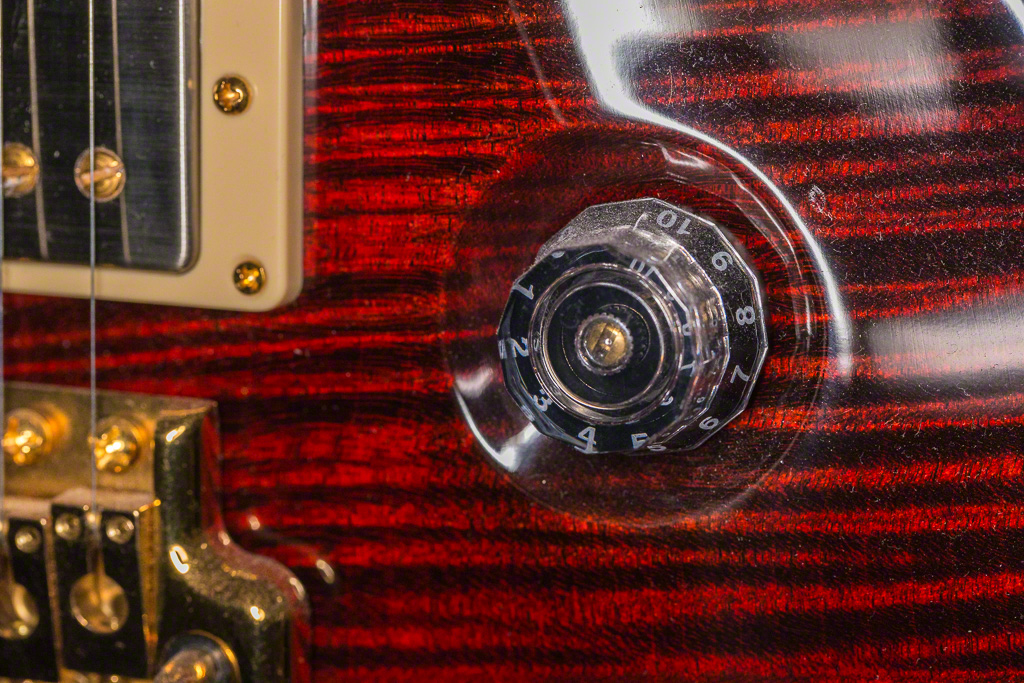
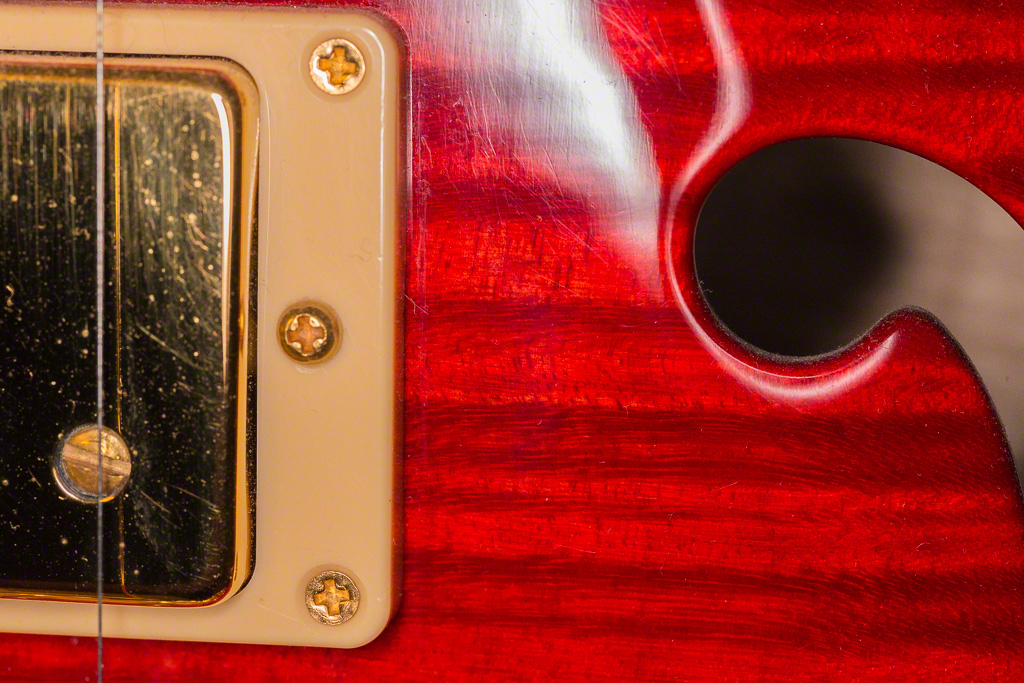
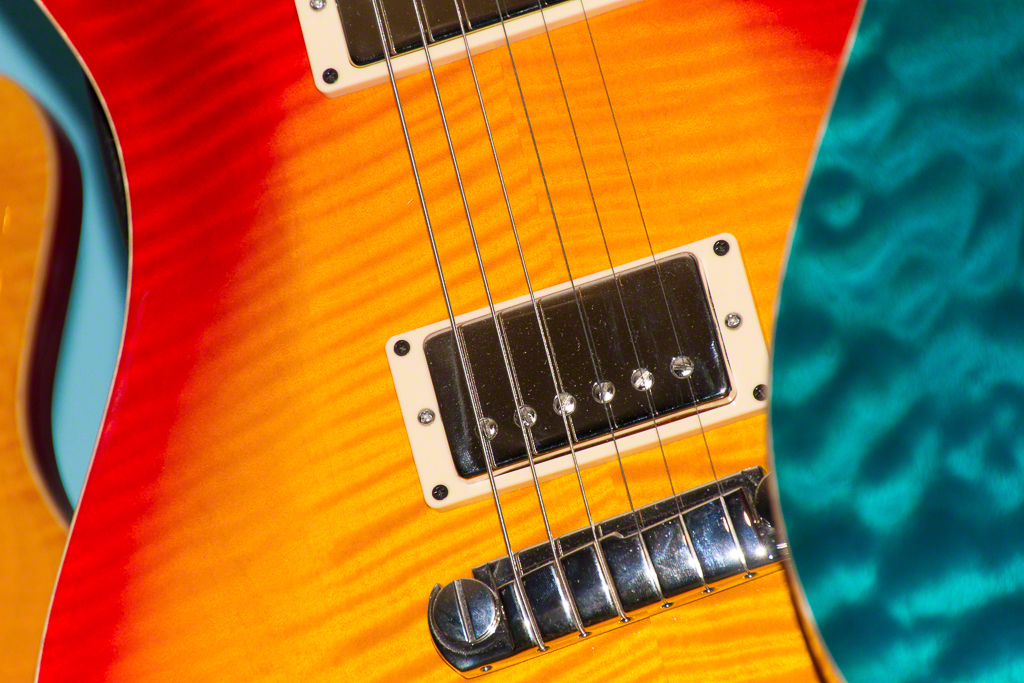
With a Guide Number of 16 at ISO100 you aren't going to be lighting a stadium with this thing.  It is nominally more powerful than the OEM base ring lights and perfectly suited to macro and close up.  I did use it in a poorly lit room at about eight feet to see how it would deal with the flame top on a Paul Reed Smith Artist guitar and it did a beautiful job, albeit with a bit of hot spotting because of the small source.  Colour balance was very clean, coming in at 5500K on the colour checker.  The LED modelling lights are not super powerful but do what they are designed to do, specifically providing you a good idea of how the light will be when the flash goes off.

mf18_image_2_12The modelling lights are useful.  Hold Select for 2 seconds and they come on.  They stay on until you trip the shutter, and come back on when the exposure is done.  Hold Select for 2 seconds to turn them off.

I cannot assess battery life as I had the unit for a limited time, but recycles were fast even when I was making the flash work very hard for each shot.  I used Sanyo Eneloop 2550mA AA rechargeables for my testing.  I stick with either these or PowerEX 2700mA rechargeables and recommend against spending your hard earned money on less powerful rechargeables for your flashes.

Conclusion

HenrysMacro-064I had never tried a Nissin product before.  In fact I knew very little about the company except that it existed and that a friend works for the Canadian distributor.   At a retail price of around $450 Canadian, you cannot beat this unit.  I like it better than my long abused Sigma EM-140 and much more than Canon's pricey MR-14EX II.  That it comes with all the mounting rings most users will ever need in the box, that it does TTL and advanced functions with both Nikon and Canon, that the head pops a bit wider, that the power ratio control band is so huge and that the control user interface is so effective makes it a winner.

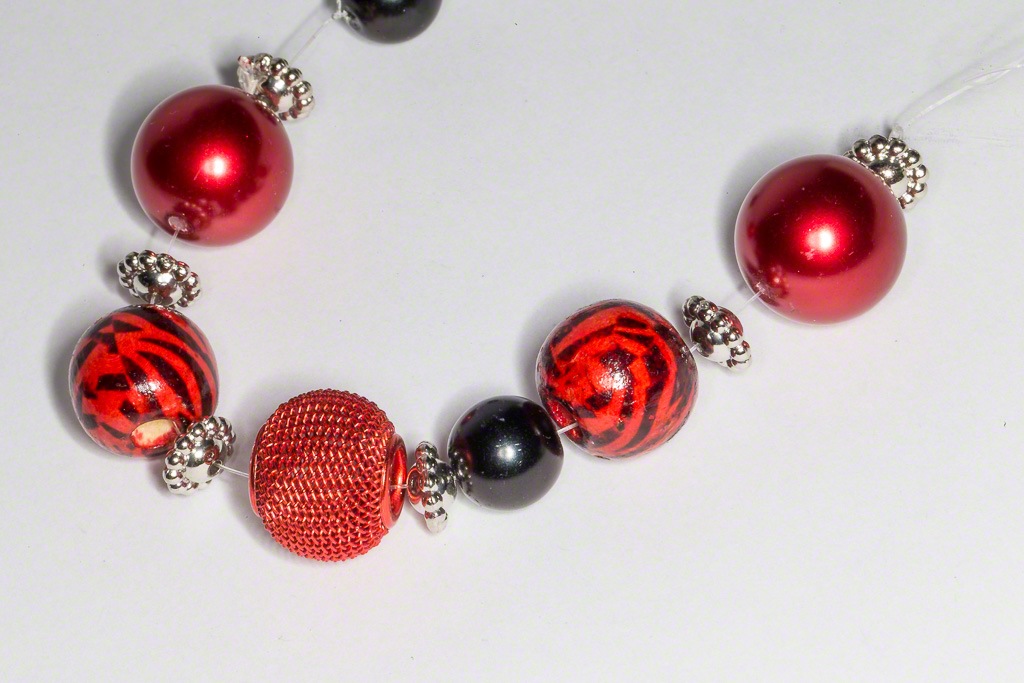
HenrysMacro-015The unit images are courtesy of Nissin Digital, but the rest of the images are fast grabs using the ring light on the 100/2.8L macro.  The light is nice and has great colour fidelity.  In the beads image, you can see how ratioing the two flash tubes contributes to dimensionality.  I spent next to no time setting up these images as I was rushed (as usual) but you can see great exposure control from the TTL mode (no post processing exposure adjustments were made).

As I said, it's a winner and if macro is something you like and you cannot always shoot in studio refined conditions, a ring light is a huge advantage for maximum depth of field with fast (flash sync) shutter speeds to freeze motion.

In Camera Microfocus Adjustments

MFA-300mm.jpg

Some higher end cameras have the ability to store microfocus adjustment profiles for particular lenses.  I have never really found the need until recently, but when needed it really makes a difference.  If you've ever felt a lens you own, or have rented, is a bit soft, have a lookNot every camera has this, so consult your owner's manual before you read this, decide you want to use it and then discover your camera does not have this capability and then get angry with me for bringing it up. I recently completed a deep dive test on full frame 28-300 lenses for my Canon bodies.  Canon's 28-300 was the winner, but not by a huge margin and as I mentioned about their 16-300 crop sensor lens, the one to really look at is Tamron's NEW 28-300/3.5-6.3 DI II VR lens.  You cannot beat it for Image Quality / Investment ratio.  It's also about ¼ the weight of Canon's cannon.

In the focus target tests, the Canon was marginally sharper and had better contrast, at most focal lengths, but got soft at 300mm.  Now when I say soft, I don't mean blurry, I mean not razor sharp.  So I embarked on a time consuming series of tests using my focus target and using the focus adjustment function in the 1Dx.

The net of the long story is that focus adjustment made enough difference to make the lens completely viable for critical work at 300mm, whereas I would have normally said, it's good, not great, but as it is the kind of lens you would only use when you were only willing to carry a single lens, probably good enough.

After applying the focus adjustments and saving them in the camera body, that lens performed even better in subsequent testing,  Could I see the difference in fall foliage?  No.  Could I see the difference in a hawk's eye?  Yes.  It was just that much sharper.  Now I probably could have corrected this using software in post production, in fact I know I could because I did using Piccure+.  But it's really nice to know I don't have to go that route every time now, because I have the lens dialled in for that body.

Micro focus adjustments are rarely needed on primes or even high quality traditional range zooms, but these all in ones, particularly older all in ones like the Canon 28-300 may benefit from this subtle tuning.  If you have a lens you believe to be soft, and your camera offers micro adjustment give it a try.

Opening Up Your Eye

I often hear from photographers, who are typically strong individualists, that they are stuck, or have hit a wall.  Yesterday I led my third #Scott Kelby Worldwide Photowalk in my town.  Based on feedback it was a great success for the mid sized group of folks who came out. One of the most telling things I saw was the breadth and scope of images that were being made by the walkers.  Many commented that they made shots that they would not normally have considered doing, but by simply being out with other photographers, they were encouraged to get out of a comfort zone, to try something new, and to shoot subjects that they would not normally consider.

Yes I did plan the walk and knew where we would go and had some information to share, but I really think that it was the people getting out to shoot together that made the day successful.  Certainly we had great weather, and we had the surprise opportunity to shoot the fire truck helmed by Anne of the McCaffrey Street Fire Station, but everyone who came out really played off each other.

So if you think you are getting stuck, gather a few folks from your local camera club, or photographer friends and just go somewhere to shoot. It may amaze you what you see and discover, and the doors that this kind of thing can open up.

I am very grateful to the hard work done by the folks at KelbyOne to make the worldwide walk happen, and I really feel for them as the registration system let them down in the last few days.  They do great work, but you don't need a global initiative to go do a walk, just go, but go with other photographers to see the possible.

REVIEW : Piccure Plus

You might remember me writing several months ago about a tool to help correct camera micro-shake called Piccure.  I had questions and the manufacturers got in touch right away.  While other options, such as Photoshop, have a camera shake filter, I found that Piccure did a better job.  It was more demanding on the computer CPU because of the complex math, but that complex math ended up doing a more consistent job. What if the folks who do Piccure made it even better?  What if they added robust distortion correction, without having to buy a dedicated, albeit excellent, tool like DxO Optics Pro?  What if they "added" Lens + to Piccure and called it Piccure  Plus?  They did and it is superb.  Want to learn more?  Then read on neighbours...Piccure Plus is found here and it is a giant step forward from the already excellent Piccure.  PIccure+ is a product of a small German company called Intelligent Imaging Solutions.

The engineers have added to the exceptional Motion+ a brand new service called Lens+.

Motion+ is designed to correct camera micro shake.  This can happen when a photographer jabs the shutter release inside of squeezing it.  It can happen when the tripod is overloaded or is not so stable as the salesperson suggested.  It can happen with a long exposure where the shutter is released without a remote or cable.  It can even happen when the ground is moving beneath your stable, cable released camera as was noted in the article on "Flex" found on this site.

Motion+ has a number of simple settings.  Some users are confused by the sliders into believing that the setting options are linear.  They are more stepped than continuous, and while I would prefer that the engineers at Piccure would alter the sliders to include notches where the sliders can be set as is found in other software, once you learn the layout, the problem ceases to be a problem.

You choose the amount of shake reduction you want, the sharpening you want and press Preview to see what it's going to do.  Use only enough adjustment that you need, over adjusting will give you less than stellar outcomes, which is why the software starts you at very small changes.  Note that this is significant math so it will take a bit of time for the preview to build.  Be patient, it's worth it.  Motion+ is very good but can only go so far, so your handheld 2s shot on the pitching deck of a ship isn't going to be fixable, but one of the scenarios mentioned above that we have all encountered will definitely improve.

Lens+ is brand new.  Instead of using a series of downloaded lens "profiles", which we know can work very well when the profile is available for your exact lens and camera combination, Lens+ uses raw pixel math to compute for distortions and more importantly chromatic aberrations and makes corrections therein.  It is stunningly good, but be patient, because again, there is a lot of CPU being consumed in the calculation.  In addition to the optical aberration correction, there are both a sharpening and denoising engine included in the package, so you are getting a lot of value for your investment.

As you would want, Piccure+ works not just as a standalone application, but as a plugin to Photoshop, Lightroom and Photoshop Elements.

Piccure+ wants to see the information in the RAW file, so while you can send it other formats, it will ask for the location of the original RAW file to get the real RAW data stream ahead of the Lightroom or Photoshop RAW decoder if it cannot detect the path to the original.  I only know this because on one RAW file in Lightroom, Piccure+ wanted me to point to the original RAW.  The dialogs confused me until I figured out what it wanted and in fairness, it has never happened again since.

What makes Piccure+ different from other plugins is the value proposition.  Most other plugins modify the image by altering colour, contrast, tone, dynamic range, texture, border, filtration - all things that modify the original image.  Piccure+ is not one of those types of plugins.  We love them, but there is good reason to add Piccure+ to your stable of tools and to alter your workflow to include it.

Piccure+ is an optical correction tool.  That's it, that's all.  It doesn't create apparent sharpness by manipulating contrast, it doesn't try to fix aberration by filtering for certain colours or applying a canned profile.  It does real math with your original images as they come out of camera to make them sharper, cleaner and more distortion free.

Here are a couple of sample screenshots to get a sense of how Piccure+ does what it does.  The Goshawk photo on the right is out of camera, imported as CR2 Canon RAW native into Lightroom.    Camera was a Canon 1D Mk IV with Canon's 70-200/2.8L II IS lens.  Exposure was 1/800 at f:/6.3 and ISO 100.   Nothing was done to the image.  On the left is the same photo after a round trip to Piccure+

goshawk piccureplus

To give a better perspective, I have used Lightroom's screen zoom tool to zoom in on feather detail, and then with the Compare screen up, grabbed this second screenshot.  Again, the only processing is the photo on the left after a roundtrip through Piccure+.  The original image is great, right until you look at how much more Piccure+ gets out of it.

Compare the feather detail, Piccure+ on the left, unmodified on the right

In this next sequence of images, the original shot is made on a 1Dx with Canon's razor sharp 180/3.5L macro lens.  The camera was on my RRS tripod and the lighting was Westcott's Stylus continuous light as part of a macro seminar I was doing for Henry's.  Exposure was 6.0s at f:/32 and ISO 100

Crayons straight out of the camera

Crayons after Piccure+

Now you could rightfully argue that since the originals are RAW that no RAW pre sharpening has been done.  Except that this would not be true because by default Lightroom applies some sharpening automatically to all RAW files.  You can certainly disable that if you wish and use an external RAW pre sharpener like the superb Nik Sharpener Pro with the RAW Pre-Sharpen option.  Even then, you are still going to get a better image after using Piccure+

I particularly like that there is no dynamic range or white balance shift as sometimes occurs with other plugins.

Intelligent Imaging Solutions is a small company, dedicated to producing very practical and useful tools.  Until recently, their website was very basic.  They do next to no marketing.  They just build very good, very effective, imaging software.   At $149 Canadian through the web site, Piccure+ may be the most important plugin you can buy, that no one knows you are using.  It really does help you get more out of the camera and lenses you already own.  Everyone recognizes images that have been run through Photomatix or HDR Efex Pro, or Silver Efex or Perfect Portrait.  They all do a great job but you know by looking (probably) that they were involved.  When you use Piccure+, you aren't adding a vendor "look" to your photos, you are making your own photos better by correcting for the natural flaws that occur in lenses and when we capture images.

There isn't a serious photographer out there, who cannot benefit from Piccure+

Flex : Long Exposures in Wooden Buildings

Last weekend, I ventured to Sainte Marie Among the Hurons with my friend Bryan Weiss and some of his Daytripper Photo customers.  The re-creation of the habitat of the Hurons and Jesuits is very well done, and the facility is perfect for photography, so long as one is prepared with a tripod and willing to go with longer exposures.  But I did discover a problem...Before I get to that, do note that this is a re-creation of the 1650s, so there is wood smoke everywhere.  And it is smoke from sapwoods so be sure to clean the outside of your camera when you are done there and even if you are one of those who eschews the use of UV protective filters, this would be a good place to use one. I shot the entire day using a Canon 1Dx with Tamron's new PZD version of the 28-300/3.5-6.3  This is a very impressive lens, nearly as colour rich as Canon's own, at one third the price and one quarter the weight.  A really superb lens.

Wood frame buildings, particularly those framed with a built with Canadian softwoods have a certain amount of flex natively.  In normal situations, if you are the photographer standing still during your long exposures, things will go very well.  If however, you are where there are other tourists, particularly small children who bore easily, be prepared to over shoot because the clomping of feet on floorboards, stairways, second floors and basically anything attached to where you are photographing is going to cause blur.  I found that most all of my indoor photographs where other people were in the building exhibited some amount of blur.

There are solutions that work some of the time, such as Piccure that I have written about in the past as well as Photoshop's own Camera Shake correction.  I say some of the time because although they work wonderfully in most cases, some of my images are beyond recovery.  As it happens, I was gifted with the private beta to a forthcoming offering this morning and it did a better job on addressing the movement, but I cannot talk about it until it is released.

This is just a sample image that has been corrected for the floor shake.  It is not optimal but gives an indication of the possible with the right tools.  The better way would have been to pay more attention to my environment and wait for quiet.

The Father's Desk - after correcting for shake caused by moving floorboards

Fast redundant storage - the Drobo 4 Bay 3rd Generation

drobo-3rd-gen.jpg

As our photo and video libraries grow we need the ability to grow our storage on the fly while getting improved redundancy.  Sure you can buy standalone drive kits, or build your own, but the folks at Drobo have a better, and now faster and cheaper idea.I have not always loved Drobo.  I had more problems than necessary with quality on my 2nd generation Drobo, and reliable connectivity for the 5 to my old Mac Pro was never really there.  Part of the issue was the lack of a reliable eSATA and USB3 card and driver for the Mac Pro, and part was just crappy support and not so hot firmware for the 5 out of the gate.  By the end of the Mac Pro's life, things were stable on USB3 so when I got the new Mac Pro, the transition was smooth and it works fine today. But I, like all of us, wanted more storage, in this case as a local backup for files already stored on the Drobo 5D (which redeemed Drobo in my mind because it has been flawless).  I am perhaps excessively paranoid about drive failure but since I am, I needed a cheaper alternative to another 5D.  Drobo recently released the 3rd generation 4 bay Drobo.  It is a simple device having only a USB3 connection and a power connection.  It comes empty, so your best bet is to populate it with OEM hard drives.  Based on years of managing failures and for fast local performance I standardized on Western Digital Caviar Black drives in locally connected systems and Western Digital Caviar Red drives in my Network Attached Storage.

The 3rd Gen is easy to setup.  Install at least two and a maximum of four drives.  Load the Drobo Dashboard on your computer, Windows or OS X.  Plug in the drive and power it on.  Launch the Drobo Dashboard application.  It sees the Drobo, let's you name it, and formats the array using their proprietary but proven BeyondRAID technology.

You are up and running.  Now let's suppose you went with 2TB drives and a year from now you are running short on space.  Pull one out and replace it with a larger drive say a 4TB drive.  Do this while the system is running.  Drobo sees the drive go away and continues to work just fine albeit slower because Drobo can survive a full disk crash.  Drobo then sees the new drive and begins to work to expand your available storage all in the background.  In fairness, when I do a disk upgrade I do the upgrade with pairs of drives, but installed one at a time to let Drobo do the storage management properly.

I added the 3rd generation this week and after upgrading to the latest Drobo Dashboard, it saw my drive pack, set it up for the Mac and the Drobo was running away providing storage in less than five minutes.  Unlike standalone disk systems, if a drive ever fails, the Drobo will alert me but it will keep running.  Drobo says the 3rd generation is much faster internally than the 2nd generation.  USB3 is a lot faster than Firewire 800 which is how I ended up connecting my 2nd gen unit so I cannot say how much faster it is, but I will say I do not see any spin up latency on the new unit that I used to see on the 2nd gen unit.

I bought my Drobo3 as I call it at Canada Computers.  The unit was $349.   Western Digital 2TB Caviar Black drives are on sale at $139 each.  If you populate the unit with four drives you end up with about 6TB of storage with full data protection.  Even if you only load two drives, you still get 2TB of fully protected storage.

Sometimes those prebuilt drives you buy at Costco and elsewhere use slower, less reliable drives.  They last in my experience two to two and a half years.  I have never lost a Caviar Black or Caviar Red drive.  The Caviar Green drives are cheaper but I have had 50% failure in two years on those and do not recommend them in a device like a Drobo.  They are also much slower performers lousy for photo and video work.

Is a Drobo right for you?  If you want inexpensive, easy to manage, in box scalable redundant storage, the answer is very likely yes.

FIRST LOOK : Topaz Impression

Yes, yes I know, there are ten zillion tools for post processing and really who needs another one? Maybe I do.  I'm not an artist with a pencil or brush but my buddy from Everyday HDR and the Digital Zone System #Blake Rudis is.  Blake sent an email out today and he is pretty enthused with a new plugin / standalone app from the folks at Topaz Labs called Impression.   I am a Topaz Labs customer and I do like their tools very much.  Will I spend $$ on Impression?   Let's find out...Topaz Impression is a plugin and standalone application that allows you to apply painterly effects to your images.  It also does charcoal, pencil and pastel as well.  I used to draw, some even said quite well.  I could paint in water-colour but oils, acrylics, pastels all were beyond my ability.  But I like the look of artist materials and this plugin lets you apply these finishes to your photographs.

Impression has options for Ancient, Impressionistic, Modern, Painting, Pencil, Charcoal and Pastel.  Each option area has multiple finishes, some inspired by great masters, some by the medium itself.  Not every option fits every photograph but I thought I'd share some test images from the evaluation copy I got today.

Original Edit from Lightroom


Topaz Impression - Van Gogh II


Topaz Impression - Pastel II


Topaz Impression - Charcoal III

These are some very quick samples using the standalone app.  Each process gives you a starting point and a huge amount of flexibility in adjusting the application of the look.  There are not hundreds of options but there is a significant gamut of manipulation available within each option so less really is more.

Topaz Impression is available as an item in the entire Topaz Suite or as a standalone purchase.  I already own the full suite, and I'm not sure that I would want to spend $99 on this plugin alone.  I don't see myself getting sufficient return from the investment.    I may change my mind in the future because I really do like what I see, but for the moment, I cannot make the jump.


REVIEW : Tamron 16mm-300mm f:/3.5-6.3 Di II VC PZD

This is the first of what I hope will be three different reviews of what photography writers like to call "The One Lens".  We're not speaking of something Tolkeinesque or the unicorn of lenses, we're speaking of the one lens that you would carry with you when you only wanted to carry your DSLR and one lens and have that lens be useful for pretty much everything.The lens I will start with is Tamron's new (second version) of their wide to long telephoto zoom.  This lens is designed for crop sensor cameras, having a sensor ratio of 1.5:1 or 1.6:1.  So your Nikon D5XXX, D7XXX and the like bodies and all Canon bodies from the 7D on down in price point. The focal length measurement on the box is as if this was a lens for full frame but it isn't so on a Nikon or Sony this is effectively a 24mm-450mm equivalent.  On a Canon, this is a 25.6mm-480mm equivalent.  And those are the mounts available.

The maximum aperture is a variable, for cost and weight reasons, starting at f:/3.5 at the widest angle, dropping to f:/5.0 when the barrel marker hits about 50mm and f:/6.3 after about 200mm on the barrel.  So in most cases, this is an outdoor lens (but more on challenging that later).  In order to get the shutter speed you want to have for crisp images (1/focal length in use is a good standard), you may find yourself pressing for higher ISO settings so be confident in your camera sensor's low light capability before embarking down this path.  Cameras with CCD sensors that tend to go south much past ISO 800 are not optimal platforms for a lens with this limited light gathering capability.

This lens is a twist zoom and when zoomed out to 16mm it is short and very compact and at f:/3.5 will suit well for travel photography, perhaps even inside museums.  Outdoors it will be terrific.  Zoom all the way in to 300mm and the lens becomes Gepettan, meaning it becomes a stunning twin to Pinochio's nose growing in length to nearly a foot long.  Thank goodness it stays nice and light.  There is a simple lock to lock the lens at 16mm to prevent zoom creep if carried facing down.

This second generation lens has improvements in the lens elements and also improved Vibration Compensation (VC), Tamron's nomenclature for stabilization.  The Sony mount has no in lens VC instead depending upon Sony's in body stabilization.

Construction is complex with 16 elements in 12 groups, expected in a lens of 18.8x zoom range.  This lens also does decent close up work (calling it macro is mcmarketing) at 1:2.9 ratios or about ⅓ life size.   This brings the close focus distance to 15.3 inches.  That's quite impressive in a lens that wound in is only 3.9 inches (99.5mm) long and weighs 19ozs (540g).  It takes 67mm filters and there are 7 aperture blades for those who get excited counting blades to try to guess what the bokeh will look like.  It comes with a flower petal bayonet mount plastic lens hood which is useful at 16mm and for the most part useless at 300mm.  This isn't Tamron's fault, it's the reality of a single lens hood for such a wide zoom range.

To keep things sharp, minimize distortion and manage colour fringing, the lens has both Low Dispersion and Aspheric lens elements.  Considering a Canadian street price of under $700, photographers who have been around for a while will smile wistfully remembering what aspheric element lenses used to cost.

The PZD stands for the new focus drive system powered by Piezo electronics.  This improves focus response over the prior version which while accurate has been characterized as achingly slow.

Testing

For my test, I shot this lens mounted on a Canon 7D.  Thanks to Chris Atkinson at Henry's Newmarket for help arranging the testing.  The whole kit including battery grip is very manageable and I can definitely see going on a vacation with just this lens on the camera.  I tend to overload when I travel and it gets out of hand very quickly so a one lens, one body kit with just a flash in my pocket would be very nice.

Please note that third party lens makers always have to make a helicoid rotation decision.  Tamron lenses rotate like Nikon lenses, so Canon users will have to get used to focusing "the other way" when on manual focus.

My first shots were acclimitization shots, so done with the ISO punched up to 6400 and shooting handheld in what can only be characterized as crappy indoor light.  Either I have gotten a lot steadier, or the VC really makes a difference.  I was handholding at 1/60 with the lens zoomed all the way in to 300mm and getting very sharp images with the aperture all the way open.

In my testing, I found some visible but not horrible barrel distortion at the wide settings, that is pretty much gone by the time you get to 28mm on the zoom range.  This distortion is correctable in Lightroom or Adobe Camera Raw using the Lens Corrections that are built in.  Pushing into the 300mm focal length there is pincushion distortion that is less evident unless you have straight lines at the edges.  It's not awful and is readily corrected in post-processing.   I found the contrast falloff at the wide angle range to be subtle but there, much less evident at 300mm.  Vignetting exists as well at 16mm but is correctable via lens correction in post.

When first unboxed, I found the zoom ring to be unpleasantly stiff.  Certainly no risk of lens creep.  As I have shot the lens for a few days now, it has loosened up to be much more usable and there's no indication of coming sloppiness.

Since the lenses I own are almost entirely Canon's L glass, I am accustomed to the weight and metal construction of the Canon lenses.  The Tamron, being a primarily plastic body is significantly lighter.  The lens elements are all glass though.  I try to be very careful with my lenses, but I would be concerned about the Tamron if it got bounced around.

Is this the magical unicorn of the one lens?  Have a look at the sample images and make up your own mind.  I liked it better than the Sigma 18-250 or Tamron's own 18-270.  Yes it is more money, but I think you are getting a fair bit more for your money here.   I much preferred it to Canon's 18-200 (despite multiple tests, it's just not that good) and it compares very favourably with Nikon's 18-300 DX lens.

Handheld at 300mm 1/15

Handheld 4 stops of vibration reduction

Handheld, High ISO


Here we have a series of sharpness tests and a colour check.  These are JPEGs right from the RAW.

Overall, this is a really great piece of kit.  It has wonderful range at a fair price for the capability that it delivers.  If you are shooting Canon, I cannot think of a better choice.  If you are shooting Nikon, it is a strong alternate to Nikon's own 18-300.

Perspectives on Photoshop World 2014 Las Vegas

pswpp_w699_h367.jpg

So straight up, I am a huge believer in the work that the people at KelbyOne do when it comes to photographic and related software training.  They have been in my personal experience, unfailingly supportive, friendly and consistently deliver great content.  I just returned this morning on the red-eye from Las Vegas and wanted to get my thoughts down before I fell asleep (again). I flew in a bit early because there is a lot of interesting stuff to shoot in the Las Vegas area, especially if you are willing to get off the strip.  In truth, I shot nothing on the Strip at all, it's not really my scene.  I did do a helicopter trip to the Grand Canyon, went to the Valley of Fire for sunrise, went to the Neon Sign Graveyard and also did a Pre-Con workshop with the inestimable #JoeMcNally.  The Pre-Con is an add-on package to Photoshop World and if there is one you want to do are well worth the time and money.  My friends Isabel and Stephanie did a Pre-Con on light painting with Dave Black and said it was really good.

For those who've never been, Photoshop World #PSW14 is the firehose of training.  You choose your tracks, your instructors, your classes.  Show up awake, and prepare to drown in knowledge transfer.

This year, I want to thank Glyn Dewis, Jim DiVitale, Joe Glyda, Raphael "RC" Concepcion, Roberto Valenzuela, David Ziser, Dave Cuerdon, Jason Groupp, Dave Black, Moose Petersen, Julianne Kost, and of course, Sergeant Major Joe McNally (rank earned while he was "encouraging" us during his workshop) for delivering superb content in a friendly and powerful manner.   I'd like to thank Bill Fortney for pointing out again that Moose Petersen suffers because people confuse me for him.  (He's the one with talent!)

Classes start right after the Keynote and run into the early evening.  PSW also has a welcome reception where you can have a beverage with the instructors the first night, a party (if so inclined) the second night, a Midnight Madness bash the third night and a big wrap up with videos and prizes as the closing event.  There is a tradeshow floor with plenty of vendors to talk to as well.

One of my favourite events is The Art of Digital Photography where some of the instructors present their personal best in a slideshow format.   Dave Black always manages to pull tears and did so again with his moving tribute to Michelle Kwan.  McNally is always disarmingly funny.  Di Vitale always kicks off and shows why he is the master of the composite.  Julianne typically does her presentation in parts and is one of the few who really make iphonography truly impressive.  Joe Glyda, always has a personal assignment, this time was a dam assignment from the Hoover Dam that was peppered with Joe's moderately bent sense of humour.  First time presenter Bill Fortney showed his beautiful Americana landscape and macro work.  The session is always closed by Moose whose images remind us why he so loved as a landscape artist.

The Kelby team do a great job at organization managing over 3,000 attendees with people whose full time jobs at Kelby Media have nothing to do with events management.   There are always some hiccups but I find that when you ask politely, most of the time things are sorted immediately.

The Las Vegas event is at the Mandalay Bay so the hotel is connected to the conference which adds convenience.  Las Vegas certainly has the hotel space for a conference this size and is a fairly reasonable plane ride.  Food and activities are very expensive however as the entire goal of the city appears to be to separate you from your money as fast as possible.  I've attended PSW in Washington DC, Orlando and Atlanta and found it more economical but definitely not as convenient.

Up to now, PSW has happened twice per year.  It looks like there will be only one in 2015, August 10-13 in Las Vegas.  Given the amount of work, and the incredible coordination required, I can certainly see the rationale for consolidation.

The big question people ask me is if it's worth it.  I have to say yes.  Consider it a $2000 investment in yourself.  You have airfare, hotel and attendance not including meals and any other entertainment, but I don't see any other option to get this much variety in training, with this pantheon of instructors anywhere else.  Jason Groupp did advise that WPPI is a larger event, focused on Wedding and Portrait photography and that may be an alternative if one of those is your specialty.  I like that at PSW I can learn about pretty much anything in the realm of photography and software editing from a wide variety of instructors and know that their content is backed up by superb video training online.

What would I change if asked?  I would definitely look at making the Pre-Cons a two day event.  While they are an extra cost, I would definitely do two, because of the actual photography involved under the leadership of great instructors.  Consider this.  The Pre Con with Joe McNally cost less than some lesser known offerings of similar duration.  And it was with Joe McNally.  Joe was there early and his entire crew built us 6 different sets, arranged the talented artists to be there and did all the setup, and provided all the lighting.  Big thanks to John and MD, a huge shake for my friend Michael Cali, and also a cheer for Joe's wife Annie.  I have done a number of classes and workshops with Joe and I ALWAYS learn something new.  Here are a few of my own images from that workshop

McNallyWkshop-028 McNallyWkshop-043-Edit McNallyWkshop-046-Edit McNallyWkshop-056-Edit McNallyWkshop-094-Edit

I would also suggest that the classes explicitly advise whether they are tutorials or slideshows.    My personal preference is the tutorial and my hat goes off to my new mate Glyn Dewis who in addition to being a brilliant teacher is one of the nicest fellows I have ever met.  He is incredibly gracious and easy to talk to.

If your eyes are beginning to strain or you like to take notes, the ProPass option (extra $$$) is definitely worth it.  You get early access to front row seating, early entry to the keynote, a ticket to the event party, some swag and a discount coupon for the Kelby bookstore.  Corey Barker's latest book moved from $42 to just over $10 for me as a result.

In the years that I have been going, the tradeshow floor has gotten smaller with fewer vendors showing up.  I doubt that Kelby Media is hosing anybody to be there but it would be nice to see a lot more vendors and more vendors with actual stock to sell.  Ordering over the Internet may be the way that many people shop, but sometimes personal service should turn into an immediate reward.  A big shoutout to my buddy Joe Johnson Jr, and the rest of the great people at Really Right Stuff for the time that they spent with Isabel and Stephanie, talking about the best route for tripods and supports.  I think everyone knows that I believe that the products from RRS are the best on the planet.  Their new video head is really impressive and Joe said he was going to send me one of their new sliders for a heavy duty evaluation.  I was also very impressed by the Phottix line of products.  Jason had never laid hands on the Mitros+ flashes before and was getting great multi flash radio controlled TTL exposures in his class in minutes.  The user interface could not be simpler.  The Mitros+ sells for about $400 and is as powerful as a top line Nikon or Canon TTL flash but also includes a radio transceiver built into each unit.  For those who already own a bunch of TTL flashes but want the efficiency of radio instead of infrared (I still stand by my statement that just because Joe McNally can make infrared work at 100', the rest of us develop apoplexy trying to make it work at distances greater than 10'), the Phottix ODIN system gives group controls, radio transceiver, channel flexibility and much more.  I will be pushing on my Canadian affiliate partner Henry's to start carrying these units in Canada.  Phottix also has this really cool collapsible beauty dish that is very impressive.  RC stopped by and he talked to me about it at some length.  Sadly B&C and Hunt were sold out and B&H was only doing web orders.  Hopefully we will see these locally soon enough.

Some attendees say that the event should be longer.  I think an extra day of pre-conference and one more day of classes would be ideal.  Of course I would then need several days to recover and would definitely look for transport other than the sardine tin crush of Air Canada Rouge.  That is a really horrible travel experience despite the great attitudes displayed by the flight attendants.   It would be easier of course if other travellers did not think that a small automobile qualified as a carry on and learned that one carryon and one personal item are not the same as four pieces of monster hardshell luggage.  And a screaming baby is neither appreciated or wanted by ANY other passenger.

I need to thank Moose for his sense of humour and for having his photo taken with me to help direct people to the real Moose Petersen.

I suppose I should disclose that the old line "what happens in Vegas, stays in Vegas" should be modified to "what happens in Vegas, ends nearly immediately in Vegas" so before either Steph or Isabel post anything (they are on a plane as I write this), I did actually get married in Vegas to a lovely lady named JaneMarie courtesy of the very talented wedding photographer and instructor Jason Groupp.  Fortunately for JaneMarie, the wedding was annulled before class was over.

Photoshop World returns to Las Vegas in August 2015.  You should go.  It's in my plan now.

REVIEW : Wacom Cintiq 13HD Drawing Tablet / Display

800x600_13HD_01.jpg

Some folks really struggle working with a Wacom tablet.  They find it difficult to relate the position of the pen on the tablet to the work that they want to do.  I have students who bought a tablet but gave up on it pretty quickly.  Sad because when you invest time, they can become indispensable.   A quicker route to success might be a tablet that is also a displayI bought the bigger Wacom display / tablet the first year it arrived.  I don't have the touch version and I'm absolutely ok with that.  Being able to tilt the screen at any angle and draw right on it for editing images, or when I think I can actually draw is nothing short of magical. As I am doing more tutoring and mentoring, I was thinking of something that would take up less space and still give me all the power of the big Cintiq.  Chris Atkinson at Henry's of Newmarket agreed to help me out.  He brought in the Cintiq 13HD for me to review and try, on the understanding that it had better not be coming back.  He has no worry on that score.

Findings

If you already use a Wacom tablet, the drivers you have probably work.  If you don't and you use a Mac, download the latest drivers from Wacom's site because the included CDs are basically useless to you.

I am using the Cintiq 13HD with a 15" Macbook Pro Retina so the connections were (mostly) straightforward.  The Cintiq needs a USB port AND an HDMI port.  My Macbook has the HDMI port but if yours doesn't you at least will need a display port or Thunderbolt port and a Thunderbolt to HDMI adapter.  This should be in the box frankly and that it isn't is cheap to the point of dumb.

800x600_13HD_07

You will also need AC power.  Much is made of the portability of the Cintiq 13HD and it's true so long as AC is available.  It is, after all, a display.  The cable is a bit of an octopus having the HDMI and USB at one end, a tap for the power connection and a single connector at the Cintiq end that is reminiscent of Apple's old 30 pin connector.  The cable is about ¼" in diameter so it doesn't bend well and takes up space.

Wacom pen

Wacom includes their excellent pen in a nice presentation case along with an assortment of alternative nibs along with accent rings to personalize the pen.  The finish on this pen is nicer than on the pen for my other Cintiq or for the Intuos 5 tablet that the Cintiq replaces.

800x600_13HD_01.jpg

800x600_13HD_01

The Cintiq has four soft buttons and a "rocker-wheel" with centre button on one side of the unit.  The screen is blessedly matte so not fraught with reflections like so many other displays.  Colour fidelity is very high, matching the colour corrected 23" Cinema Display I have nearly exactly out of the box.  I am having issues with the Color Munki Photo software with multiple displays with Mavericks and so have not yet promoted the Cintiq to primary, and done the reboot dance to see if the software can calibrate the display.  Hopefully some day XRite will manage to get their thumbs out and fix their software.

The buttons and wheels are all programmable through the Wacom preferences tool on the Mac, I can only presume that they have a similar offering for those running Windows.  I find them a bit less usable than on the Intuos or the bigger Cintiq.

Mass Moving

800x600_13HD_02

The Cintiq 13 is designed to be lightweight and it is.  It comes with a cover/stand that has three different lean angles in addition to flat.  It does not slide around but it does tend to wobble a bit and it is more work than it should be to click the Cintiq into a specific lean angle.  I wish that this was more stable.

Usage

My testing involved using the Cintiq as a second display and as a working tablet.  It's a nice display but smaller than a usual desktop.  Screen resolutions are limited to 1080p, 720p and 1600x1200.  Default is 1080p which is nearly illegible for my eyes.  I've set mine to 1600x1200 and it's ok, 720p makes a Photoshop an exercise in moving around so that doesn't work for me.  I would prefer more resolution choices than are offered.

That stand is also quite annoying if you don't get the screen positioned just right, tending to fall over a lot.  The price of portability I guess.

As a tablet the Cintiq works very well.  I found it gritty at first but more use smooths the nib out and it now rides smoothly.  I got used to working on big displays so I have had to relearn zoom and move keystrokes in Photoshop to move around on images.  The big deal for me is the ability to engage the pressure sensitivity as a brush function and this worked flawlessly.  I was able to control filters and masks not just by drawing but also handle flow rate and such using just pen pressure.  Just like you should be able to do.

Summary

wacom-cintiq-13HD-img3-l

Should you buy one?  Your use case will determine.  I did because the device fits my desired use case and because I was able to purchase mine during one of Wacom's irregular dealer rebate sales.  You have to look for those, but when they come you can usually save over $200 on the purchase of a Cintiq.   There are real downsides, including the big cable, the remembering to flip your display settings in your computer if you need the cable exiting the left side of the unit, and a high regular price.  Wacom also does these tablets that are also Android tablet computers, but at their regular selling price, I don't see them flying out of any stores soon.   On sale you can usually find a Cintiq 13HD for under $1000.  That is a lot more than a decent LED powered IPS LCD display and a Wacom Intuos 5 tablet, but there is a convenience and usability factor you just don't get any other way.

Addendum

Writer Steve Walker does and amazing job in his work on tablets of all types. Check out his work at https://tabletfeast.com

FIRST LOOK : Macphun Tonality and Tonality Pro

tonalityproicon.jpg

I try to keep up with what's new in editing and post processing offerings.  When I first saw the offerings from Macphun, I was underwhelmed, but in the last six months we have seen significant enhancements in their offerings including Intensify Pro, Snapheal Pro and Focus Pro.  Unlike other vendors who put software into a suite and offer a bundle, Macphun Software goes the individual product route.  It's good because you only get what you want, but if you find yourself liking what they do, it could end up costing you more than a suite.  Macphun is getting pretty close to that point with the release of Tonality.  In fairness they do have a bundle, but that doesn't help those who've been loyal from the beginning and bought products as released.Tonality (and Tonality Pro) are another in a limited but wonderful specialization in black and white conversion.  I've talked about Silver Efex Pro 2 from Nik and Perfect Black and White from OnOne. The team at Macphun is comprised of many of the original (pre-Google-gobble) Nik Software folks.  Thus, you know that they know their way around photography and their way around a Macintosh.  One of the criticisms levelled at Macphun is that their software is Macintosh only.  Having spent a large part of my life at a software company, I've seen what happens when a small focused team gets stretched too far across more platforms than they can reasonably cover.  It's not good for anyone, and fortunately for me, and people like me, Macphun chooses (for the moment) not to overextend themselves beyond the Macintosh.

TonalityPro1


Tonality Pro (pictured) has the standard look and feel of a Macphun app.  A nice large working window on the left and scrolling menu / function bar on the right.  There are disclosure triangles to collapse sections to increase ease of use ( a la Lightroom) and all the expected functionality in a black and white conversion tool.  Macphun puts heavy emphasis on UI sometimes referred to as User Interface but also known as Usablity Index.  Having done seminars on Intensify Pro and Snapheal Pro, I've seen the ramp time to being comfortable being shorter for new users than some competitive offerings.  What is also good is that as a user develops skill, there is not a beginner wall to run into,  Macphun software has functionality that advanced users want and will use.

Like OnOne, but unlike Nik, Macphun supports Layers natively in their apps.  This makes the non-pro versions pretty useful for people without Photoshop.  The software doesn't have the scope and scale of Photoshop layers, but is quicker to learn and for many, easier to understand.

The Tone controls are similar to those found in Lightroom.  There are master exposure and contrast controls, including what Tonality calls Smart Contrast, then individual controls for Shadows, Midtones, Highlights, Blacks and Whites.   One could look at this as a simplified Zone system offering five zones instead of eleven.

The next section is Clarity and Structure.  Here's where Tonality starts to step out ahead.  In addition to macroscopic Clarity, there are also individual controls for general Structure and Micro Structure.  As details are a big part of the Black and White movement in general, these enhancements are very welcome.

Most all B&W converters bring the ability to apply a digital colour filter as we did when shooting black and white film.  Tonality not only brings the filters, you can control both the Luminance and Saturation of the filter.  I particularly like how intuitive this presentation is.  You can do this in other software, including natively in Lightroom, but I think the Tonality model is much easier to understand for new users.

Next you can choose to Split Tone, with separate density controls for Highlights and Shadows as is expected in a split tone or duotone control.  These features are not widely used in any software but when done well can really add significant interest.

There is a separate control specifically for Glow, a very nice feature as anyone who has come to love Nik's Glamour Glow will tell you.

There is also a blur control, that you can manage radially, similar to what is Lightroom, Photoshop and other software.  Again the UI is kept simple and understandable.

Next up is Texture.  Many photographers love the ability to overlay a texture to drive a mood, and this usually involves sourcing a texture and then a trip to Photoshop to apply a new layer with the texture and then working with the blend mode, and opacity to get the look you want.  Tonality brings it all to you simply in a module.  24 sample textures are included and you can of course load your own.  Blend modes are limited to Normal, Multiple, Soft Light, Overlay and Screen so Photoshop gives you more options, but I've heard from educators as sophisticated as Scott Kelby that these are the ones 99% of folks will ever need.

As one would expect, there is a Vignette and a Grain control.  They have the expected features and are easy to use.

There is also a Photoframe feature similar to the tool in Perfect Photo Suite but with only eleven choices.  Certainly sufficient to get started and the user has control over frame width.

The final individual control is Opacity to control the overall density of the combined settings.

Tonality also provides a substantial set of Presets to start with to use directly or as building blocks to your image.  Because there is the capacity for Layers, you can apply multiple Presets.  One might think that there is only one set of Presets called Basics because of the orientation of the disclosure triangle.  This is not correct as the number of Preset sets includes Basic, Architectural, Film Emulation, Portrait, Dramatic, Outdoor, Street, Vintage, Toning and HDR.  There is also a block for user created presets as well as a Favourites bucket.

Looking along the top bar we see the usual open, save, share, zoom and undo tools.  There is also an eyeball to quickly switch preview modes, a very nice cropping tool and help.  On the upper right there are Histogram, Paint (like painting on an inverse mask) with the expected size, opacity, feather, softness and brush type choices, Erase (paint on the mask), and a Graduated Filter tool.

In my test image (below) I found a limit of eight layers when used as a plugin from Lightroom.  I also discovered that the crop tool is not there when used as a plugin and I think that it should be for the simple reason that if you apply a photo frame and then want to change the crop, well you will lose your photo frame.  It's nitpicking but that's my observation.

Tonality Pro Example


The default return format is TIFF which will compress all the layers created in Tonality Pro when round-tripped from Lightroom.  You can also set the format to PSD, but the default setting in Tonality Pro is to flatten all the layers for the return, so if your expectation is to be able to hop in and out, and tweak layers after the fact, forget that.  It's disappointing that this so.  I could not find a preferences option not to flatten and did not find anything on this in the otherwise excellent online guide and tutorials.  Hopefully the Macphun folks will read this and consider it a feature request, or if it's already there, point out to this user how to do it.

Macphun does produce very good tutorial offerings in the form of videos and online guides.  Not all links resolve everything right now, but this will improve over time based on past experience.

When you mouse over the histogram a hidden feature appears that I really like, this is the Zone System overlay.  It shows hashes in your photo for each zone as you mouse down the scale.  Sadly there is no function I could find to change the colour of the hashmarks as grey on black and white is not particularly user friendly.  Perhaps this could be done in an update.

Should You Buy It?

For many folks, plugins are like candy, there are never enough.  At $60, the Pro version is not stupid money, but considering everything you get for $150 in the Nik suite, some would (ok have) argued against the spend.  I do a lot of work in black and white and while these days, I do most of it using The Digital Zone System from new friend Blake Rudis, the spend was worth it to me for speedy options. I really like that I can work in layers and manage the opacity of each layer, and that I have rich masking tools in the product.  It has a very usable interface and the learning curve is not steep at all.   There are items that are significant "missings" for me, but these may not be the same for everyone.  If you don't own a black and white conversion and editing tool, and don't want to learn to do all this work manually in Lightroom or Photoshop, Tonality Pro is a really good bet.  Now if you don't need this to be a plugin, can live with five instead of eight layers and don't care about blend modes, zone systems and colour bleed capability, you can get regular Tonality through the App Store for $20.   For lots of people, that could be more than enough.

Support The Photo Video Guy by purchasing Tonality Pro through my site

Tonality Pro

Review : The Profoto B1 500 AirTTL System

Profoto-B1.jpg

When I first saw the announcement of this system in late 2013,  I was really excited.  Consider the following;

  • A fully self contained studio grade flash with 500ws output
  • A fully self contained power source in the form of a Lithium Ion battery
  • Complete remote control including power, modelling light and test from the hotshoe of my camera
  • Full e-TTL II integration with my Canon DSLRs
  • Full remote manual control to use with any other camera such as my Hasselblads or Leicas
  • A light weight, highly portable flash head that only needs a stand
  • Ability to use all of Profoto's light shaping modifiers

If all this sounds pretty cool to you too, read on to learn how it all worksI have not been a Profoto customer so far.  I own Bowens lights and Elinchrom lights and think that they are both great.  Bowens are built tough but are heavy and the battery system accessory is not inexpensive.  Elinchroms are lightweight, have a brilliant collapsing soft box system, include a wonderful remote that works without fail but the heads are mostly plastic and don't handle a beating all that well.  My Elinchroms for battery based use are a completely different set of lights, lightweight and convenient but needing adapters to use existing light modifiers.  None of the studio strobes I own or have used up until now have TTL flash support.

The other issue is that Profoto kit is expensive.  Like about double what its competition is except for the reflectors which are ridiculous money.  Profoto has a wonderful reputation for great light and great tools to be sure, but having witnessed Joe McNally make beautiful light with a match and a piece of cardboard I believe that beautiful light is as much talent as tech.

But to have really good TTL in a super powerful head that was portable and could use all kinds of modifiers, would be so nice wouldn't it?

With thanks, as usual, to Chris Atkinson of Henry's Newmarket, I have for a short evaluation period a B1 500 AirTTL light and Air Remote TTL-C controller.

Starting Up

Profoto-B1.jpg
Profoto B1

It seems that some organizations are overdoing the beautiful packaging thing.  I recently went through the unboxing of a Wacom Cintiq 13HD (review coming).  Took forever to get it properly unboxed.  Not so with Profoto.  Simple packaging without pounds of heavy black cardboard.  The light comes with all the necessary cables in what I would call a "gig bag" a soft well padded case with dividers to hold the light.  An immediate message that the thing is designed to be portable.  There's even a slot for the Air controller which is a separate purchase.

Profoto B1 Kit
Profoto B1 Kit

The battery came with a minor charge in it.  The charger is the typical block AC thing with a power connector that plugs directly into the battery.  The battery is charged removed from the body of the unit.  It actually reminded me of the Hasselblad mode of addressing.  Probably a coincidence.  It took about an hour to bring the battery up to power.

I like well written manuals but I also like intuitive UI design so I can get to work without having to crack the manual.  Here's how it went.

  1. Put the battery on charge
  2. Put 2 AAA batteries in the Air Remote TTL-C
  3. Put the B1 on a light stand with a boom
  4. Put the Air Remote TTL-C on the 1Dx
  5. Click the B1 battery into place
  6. Turn the B1 on by holding the on button and waiting for it to cycle up
  7. Turn on the Air Remote TTL-C and the 1Dx
  8. Aim light at model
  9. Shoot
  10. BANG!  Perfect exposure, beautiful, if very direct light (unit comes with an integrated reflector/ diffuser but no light shapers)

Darn, everything should work this easily.

Looking Deeper

Air-Remote-TTL-C-front

The piece that really makes the kit special is the TTL support.  Currently the only option is the Air Remote TTL-C for Canon but I understand that a Nikon version is coming.  Both the flash head and the remote have USB ports so the firmware is updateable over time.  The unit has three groups via buttons on the front but I've heard rumours that future firmware will support more groups.

The energy buttons allow you to control Flash Exposure Compensation in TTL mode, and basic output power control when not in TTL mode.  Power control can be managed independently across Groups A, B and C.  There are multiple channels available for radio communication with a range of over 100m in TTL mode.  There is no documented limit to the number of heads per group.  Canon's unit says a maximum of 15 600 EX-RTs can be controlled from their offering.

This is sort of amusing since you would need nearly ten 600 EX-RT units to match the max output of a single B1 Air.

The Model button turns the LED modelling lamp on and off and the Head button allows you to control which head you are working with if needs be.

The remote feels comprehensive not like it will fly apart in a strong wind.  There's a sense of "pro" gear therein.  The display is nice and bright and easy to read.  I was also very pleased to discover that you can also make all your TTL group and FE comp settings from within the camera and they pass properly to the Remote Air TTL-C and then onto the head.  Yes, I know this shouldn't be a surprise, but let's say other TTL radio options (like oh say PocketWizard) have been far below expectation.  Some folks believe that the Remote Air TTL-C is overpriced.  It certainly carries the Profoto premium ticket price, but take a look at the cost of Canon's own ST-E3-RT, a good device but more of a pain than the Profoto and like the Profoto it is a proprietary and closed system.

I also very much appreciated that I could set the flash(es) to either 2nd curtain sync or High-speed sync right from the Air TTL-C.  Older reviews griped about the lack of HSS but I suppose the one I got had the newer firmware that added HSS support.  So in that vane, the unit is fully firmware upgradeable via USB.

Moving on to the B1 head itself, again you feel the quality when you pick it up.  Mounts are solid and lock up properly.  The battery clips in properly and securely.  The handgrip makes handling the head very easy.   The head comes with a protective cap that when removed reveals the diffuser cover over the flash tube.  This is the first strobe head I have every used with a basic integrated reflector and diffuser.  It feels more robust to me than an exposed tube and modelling lamp.

Profoto uses a rubber ring with a clamp lock for their light shaping tools.  Profoto tools are a lot more expensive than competitors.  One thing that makes them different is that the external reflectors come in what Profoto calls zoom capable.  This simply means that you slide the reflector mount to the degree coverage marker you desire on the barrel of the head.  This could mean you need to purchase fewer reflectors in the long run.  Profoto also uses their own mount on a speedring for soft boxes.  It looks (on the web) like everyone else's speedring, with the exception that you have more control over how deeply into the soft box the nose of the head goes.

Many photographers don't start with Profoto gear and so may have an investment in other vendors light modifiers.  I was not able to find an adapter to mount Bowens reflectors or speed rings on the Profoto.  Elinchrom makes a Profoto mount for their collapsible soft boxes, and also make a mount converter to accept Elinchrom reflectors etc on the front while mounting to the Profoto head.  I bought two of the Elinchrom to Profoto converters and they work just fine.  I already have a mount converter from Bowens to Elinchrom so I will try that on top of Elinchrom's converter.  It's not quite so elegant as a Profoto Beauty Disk or Magnum reflector but it costs considerably less than having to buy new Profoto light shapers.  It works.  It's not elegant and does change the angle of coverage slightly but it will do until I can justify Profoto branded light shapers

There are also numerous off shore light modifiers available with mounts to fit Profoto.  In checking a variety of sources, reviews are uniformly poor citing low quality, poor fit, no fit, unreliable locking and other problems.  The photographer who elects to go Profoto is best advised to sell off older kit if possible and replace it with the best he or she can afford.  I did purchase the Fotodiox Profoto adapter for Bowens speedrings.  It looks and is sized identically to the Bowens brand, and works just fine.  I was also pleased to discover that the same adapter can be used with my Lastolite Hot style softboxes for shoe mount flash.  Lastolite makes their own adapter but delivery was going to be a while and the price is ridiculously high.

Conclusion

The real question is "is this thing worth the price premium?"

When I first bought my Bowens, I did so because their light shapers were myriad, reasonably priced and their heads well built.  I quickly became frustrated by their poor remote control option which is infrared line of sight requiring a blood sacrifice with every use and that I had to pay a lot more to get radio remote.  Now of course, the PW cards are gone and Bowens offers their own proprietary radio control in most kits.  Still no remote power setting or similar useful features.  Because of this, and the absolute pain in the arse that setting up Bowens softboxes turned out to be, I went with Elinchrom BRX heads.  Very light and a wonderful radio control system.  But they don't handle abuse well and I am not nuts about the mounting system.  Still they became my go to heads.  And then I needed battery power.  So I bought a set of Elinchrom Ranger Quadras, partly because my flash mentor, the inestimable Joe McNally recommended them as lightweight, reliable and lots of pop for the dollar.  They work great, but you need to run cables from the power pack to the heads, and you need adapters to use regular Elinchrom light shapers.  Still, a great system, except for that wire issue.

None of these solutions brought TTL.  I still use a light meter.  Many folks don't because in truth you can get to decent in exposure in three or four test shots, but I like the idea of the light meter, except when the subject is moving in relation to the lights.  TTL, for me at least, has always been a good place to start, usually requiring a bit of flash exposure compensation but never really far off.  Hence the simple love affair with the Canon 600 EX-RT setup.  Light, transportable, TTL, lots of groups and independent control from the top of the camera.

Take the power of the Bowens heads, add the TTL capability of the Canon flash system, add the flexibility to use my existing Elinchrom and Bowens light shapers.  Eliminate cables completely.  Give me serious range.  Add second curtain sync and HSS to studio power strobes.   And control the whole thing from a robust legible controller on the top of the camera.  That's the Profoto B1 Air system.

Profoto B1 Location Kit

So the answer is yes.  The Profoto B1 Air system is absolutely worth the investment.  So much so that despite having many lights, I have purchased the Location kit that has two heads and the car charger in addition to the regular charger.  I've already put my first pair of Bowens 500 Pro heads with PW receivers up for sale.